baking, cooking, dessert, Food, recipe, recipes, Uncategorized

milk bar’s chocolate-chocolate cookies

We’ve had the Momofuku Milk Bar cookbook by Christina Tosi for a couple years now but we only actually got to try something from one of their bakeries last week!  We went on a last minute trip to go surprise Rock’s mom in Las Vegas and we ourselves were pleasantly surprised to find that a Milk Bar (and a Momofuku!) had opened up right next to our hotel.  We got one of their bagel bombs and a half dozen assorted cookies and now I want to bake everything from the book.  This is only the second recipe I’ve tried from the book (the first was 2 years ago – I made the birthday cake for Aymeric’s first birthday and it took me an entire day) and the recipes can be a bit complicated, as well as very specific, but you just need follow the directions in the recipes exactly.  (I learned this the hard way with that birthday cake.  When it says mix for 6 minutes, you mix for the damn 6 minutes!)

Anyway, these chocolate cookies are AMAZING.  INDESCRIBABLE.  Rock just said these are the best cookies we’ve ever made.  You have to try them.

Makes 10 – 15 cookies.

There’s 2 parts to the recipe: the chocolate crumb that gets mixed into the cookie and the cookie dough itself.

Chocolate crumb:  1/3 cup all-purpose flour  /  1/2 tsp cornstarch  /  1/4 cup sugar  /  1/3 cup cocoa powder  /  1/2 tsp kosher salt  /  3 tbsp unsalted butter, melted

Dough: 225 grams (16 tbsp) unsalted butter, room temperature  /  1 and 1/2 cups sugar  /  2 tbsp corn syrup  /  1 egg  /  1/4 tsp vanilla extract  /  2 ounces semi-sweet chocolate  /  1 and 1/4 cups all-purpose flour  /  3/4 cup cocoa powder  /  3/4 tsp baking powder  /  1/4 tsp baking soda  /  1 and 3/4 tsp kosher salt (I went out and bought kosher salt just for this and I’m gonna have to say it was worth it.)

IMG_3890

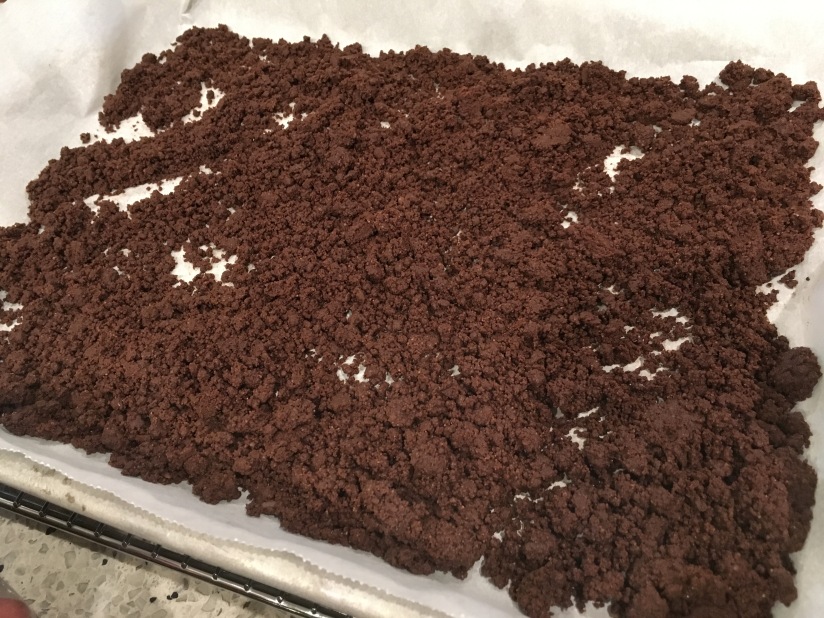
Start with the chocolate crumb by heating the oven to 300F.  Using a stand mixer with the paddle attachment on low speed, mix together all the ingredients except for the butter.  Add the butter and mix on low speed until the mixture starts forming small clusters.  Spread the clusters on a parchment-lined baking sheet and bake for 20 minutes, breaking them up every now and again.  Let the crumbs cool.

IMG_3893

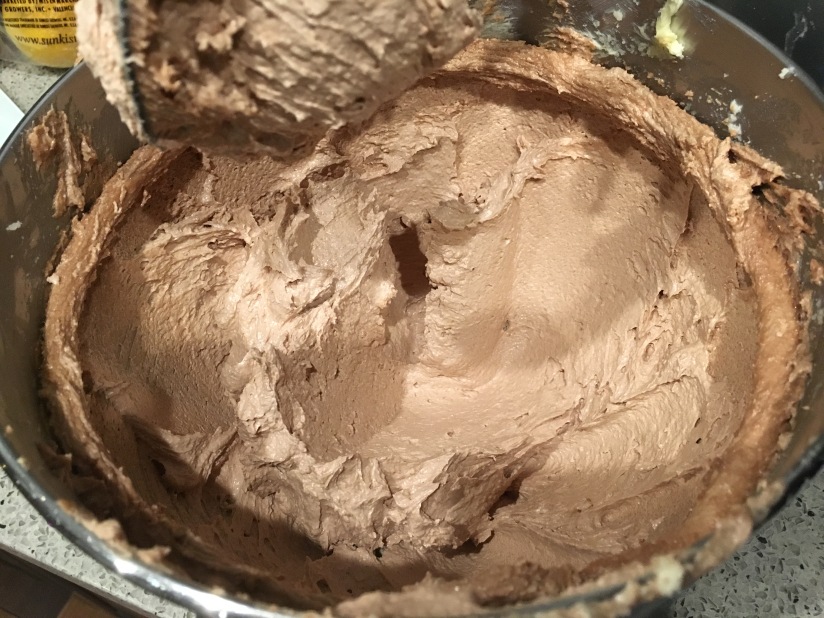
Using a stand mixer with the paddle attachment, cream together the butter, sugar and corn syrup on medium-high speed for 2 to 3 minutes.

IMG_3892

Scrape down the sides of the bowl and then add in the egg, vanilla and melted chocolate. Beat for 7 to 8 minutes.

IMG_3894

Turn the mixer speed down to low and add the flour, cocoa powder, baking powder, baking soda and salt.  Mix just until the dough comes together, no longer than 1 minute.  (The recipe specifies: “Do not walk away from the machine during this step, or you will risk overmixing the dough” !!!)

IMG_3895

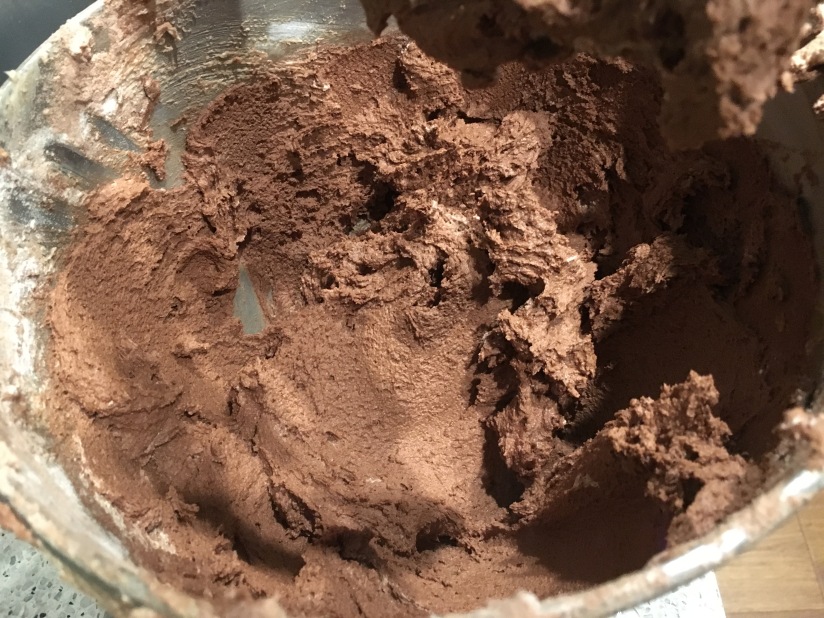
Scrape down the sides of the bowl again and then add in the chocolate crumbs.  Mix on low speed just until incorporated, about 30 seconds.

Using a 1/3 measuring cup, portion out the dough onto a baking sheet lined with parchment paper.  Pat down the tops of the dough so they are a bit flat and then wrap the entire sheet pan in plastic wrap and refrigerate for at least 1 hour.  (Here the recipe says: “Do not bake your cookies from room temperature – they will not bake properly.”)

IMG_3896

Heat the oven to 375F and arrange the chilled cookies at least 4 inches apart on a parchment-lined baking sheet.  (I had to do 2 batches.)  Bake for 18 minutes.  Let the cookies cool completely on the sheet pans.

IMG_3906

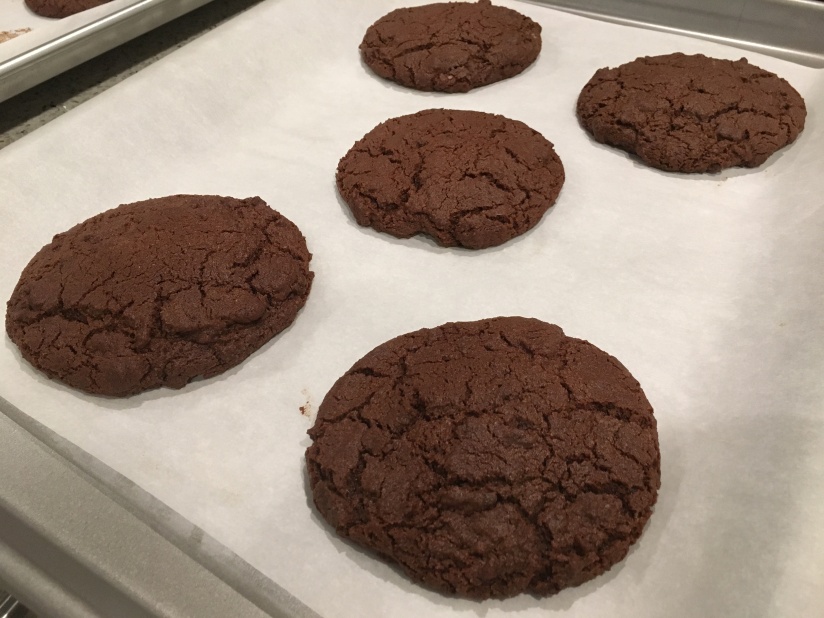
I’m so stoked, these turned out PERFECT.  Possibly even better than the one we bought in Vegas ‘cus they’re fresh out of our oven. It says the cookies can keep fresh in an airtight container for 5 days or you can freeze them for up to 1 month.  Let’s be real though, these cookies aren’t going to last the 5 days.

IMG_3909

Danish raspberry slices (hindbærsnitter)
baking, cooking, dessert, Food, recipe, recipes, Uncategorized

danish raspberry slices (hindbærsnitter)

These traditional Danish pastries look like pop tarts but they are definitely not pop tarts!  These slices are homemade raspberry jam sandwiched between tender shortbread-like biscuits (some recipes call it cakes) topped with icing and sprinkles.  I got one for Aymeric when we were in Denmark last year ‘cus it looked like a fun treat for a kid but it was so good that Rock and I ended up eating most of it.  Anyway, we’d been meaning to try making them and we finally got around to it this past weekend when we had friends visiting.  I used a recipe from a book that Rock got me a while ago by Trine Hahnemann called Scandinavian Baking: Sweet and savoury cakes and bakes, for bright days and cozy nights. How hygge is that!?

Makes 8.  I wish we had made double the recipe.

300 grams frozen raspberries  /  1/2 cup superfine sugar  /  1 and 2/3 cups all-purpose flour, plus a bit more for dusting  /  150 grams icing sugar (if you don’t wanna weigh it, 1- gram = 1 tbsp)  /  100 grams (7 tbsp) chilled butter, chopped  /  1/2 egg, lightly beaten  /  sprinkles (the recipe calls for pretty light pink sprinkles but I just used what I had on hand)

IMG_3571

Put the frozen raspberries in a small saucepan and bring to a boil, stirring constantly.  Add the superfine sugar and turn the heat down to let the jam simmer for 20 minutes.  It didn’t say if you should keep stirring so I just did anyway every now and again to be sure.  Take off the stove and set aside to cool.  It should be quite thick.

FullSizeRender-3

While the jam is cooling, you can make the biscuits.  Sift the flour and 50 grams (5 tbsp) of the icing sugar into a bowl.  Then rub in the butter with your fingers until the mixture has the texture of crumbs.  Add the half an egg and mix the dough until it can come together in a ball.  Wrap dough in plastic wrap and let it rest in the fridge for 30 minutes.

Preheat the oven to 350F and roll the dough out onto a lightly floured work surface until it is 40 x 22 cm (or 16 x 9 inches).  Rock took this very seriously and dug out the measuring tape to make sure he got it perfect.

IMG_3575

Now cut the dough into two 20 x 11 cm (or 8 x 4.5 inches) rectangular pieces.  Prick all over with a fork and bake for 20 minutes.

IMG_3621

Let the biscuits cool on a wire rack.

FullSizeRender-4

In a small bowl, whisk together the remaining 100 grams of icing sugar with 2 tbsp of water until you get a smooth consistency.  Spread the icing on one of the biscuits.  The recipe said to leave the icing set first and then put the sprinkles on but it didn’t really work out for us ‘cus the sprinkles kinda just rolled off and we had to gently tap them into the icing which caused it to crack.  So instead of doing that, I would say sprinkle over the sprinkles before letting the icing set for 30 minutes.

Place the other biscuit on a chopping board and spread with the raspberry jam.  We didn’t end up using all of the jam.

IMG_3579

Place the iced biscuit on top of the biscuit with the jam on it.

IMG_3580

Cut into triangles and dig in!  You can keep these in an airtight container for 4 or 5 days but I doubt they’ll last more than a day before you eat them all.

IMG_3581

They didn’t turn out perfect looking but not bad for our first batch!  And they tasted amazing. Already thinking about when I can make these again.

Danish raspberry slices (hindbærsnitter)IMG_3587


baking, cooking, dessert, Food, recipe, recipes, Uncategorized

classic banana bundt cake

This recipe is from Dorie Greenspan’s Baking: From my home to yours.  We’ve made this twice in the last two weeks (once was for friends! once was just us…) and it’s just a really good and easy cake to make.  No more difficult than a banana bread and gives me an excuse to use my beloved bundt cake pan.

3 cups all-purpose flour  /  2 tsp baking soda  /  1/2 tsp salt  /  1 cup unsalted butter, room temperature  /  2 cups sugar  /  2 tsp pure vanilla extract  /  2 large eggs, ideally also at room temperature  /  4 very ripe bananas, mashed (about 1 and 1/2 cups)  /  1 cup plain yogurt (or sour cream)

IMG_3266

Preheat your oven to 350F and generously butter a bundt pan.  The recipe calls for a 12 cup pan but I’m pretty sure mine is a 10 cup and it works just fine.  Whisk together the flour, baking soda and the salt.

Then, using a stand mixer with the paddle attachment or a hand mixer, beat the butter until it’s creamy.  Add the sugar and then beat at medium speed until pale and fluffy.

IMG_3267

Add the vanilla and then the eggs, one at a time, beating for 1 minute after adding each egg.  Turn the mixer down to low and then add the mashed up bananas.  Next, mix in half of the dry ingredients, then the yogurt, and then the rest of the dry ingredients.  Transfer the batter to your pan and tap the pan a bit on your kitchen counter to get any bubbles out and smooth out the top.

IMG_3269

Slide the cake into the oven, placing the pan straight onto the oven rack.  Bake for about 65 to 75 minutes or until a dry spaghetti noodle comes out of the centre clean.  If the cake is browning too quickly – give it a check after about 30 minutes – tent a piece of aluminum foil and loosely cover the cake.  When the cake is done, let it cool in the pan for about 10 minutes on a cooling rack before unmolding it onto the rack to finish cooling.

IMG_3274

The recipe’s side bar serving suggestion is to serve with coffee, tea or a slurpable mocha milkshake.  I love how specific that is!  Wrapped airtight, the cake will keep at room temperature for up to 5 days but our cakes never lasted that long before being finished off.

classic banana bundt cake


thai chicken biryani (khao mok gai)
cooking, Food, recipe, recipes, Thai food, Uncategorized

thai chicken biryani (khao mok gai)

I found this recipe in Lonely Planet’s Thailand: From the Source cookbook (yes, LP has a few cookbooks!) and we are now all obsessed with this dish.  It’s a southern Thai meets Indian dish where the chicken is braised in rice with turmeric and spices and this specific recipe calls for a generous scattering of deep fried shallots over top.  SO GOOD!!!  Even my increasingly picky toddler was going to town on this. (Although, he wouldn’t eat the shallots ‘cus he said they were ‘octopus’ – you can’t win em all!)

A few things I did different: There’s a recipe for a chilli dipping sauce included but I skipped it and just used store-bought Thai sweet chilli sauce.  I also used coconut milk instead of unsweetened evaporated milk and used de-boned chicken thighs instead of entire chicken legs.  Just though it would make my life a bit easier but if you want, the original recipe calls for 3 chicken legs with the skin removed and cut into big chunks (whatever ‘big’ means, I dunno!)

Serves 4

~700 grams skinless boneless chicken thighs, cut into roughly 1 inch pieces  /  2 tsp curry powder (I used Indian curry)  /  1 tsp ground turmeric  /  1 tsp ground coriander  /  1/2 tsp ground cumin  /  1 tsp ground cinnamon  /  1 tsp salt  /  1 tbsp sugar  /  2 bay leaves  /  200 ml coconut milk  /  1 and 1/2 tbsp butter  /  2 cups jasmine rice, rinsed and drained  /  2 cups water  /  canola oil for frying  /  300 grams shallots, very finely sliced (this seems like a lot but it’s really not after frying)  /  pinch of salt

IMG_3425

Mix the spices, salt, sugar, bay leaves and coconut milk in a large bowl.  Mix the chicken in and let it marinate for at least 15 minutes.

IMG_3426

In a frying pan or a wok, melt the butter over medium-high heat and then add the chicken, including the marinade.  Fry for about 10 minutes or until the chicken is juuuust cooked.  Transfer to a bowl.

IMG_3428

I replaced my rice cooker with an Instant Pot so I used that but you can of course use a rice cooker or cook on the stove top.  Add the washed and drained rice to the Instant Pot and then put the chicken and sauce on top.  Then add the water and using the manual setting, set it to high pressure for 3 minutes.  When the 3 minutes are up, let the steam naturally release for 10 min.   If you’re cooking on the stove top, bring to a boil and then cover with the lid and turn the heat to low.  Cook for 20-25 minutes until the rice is cooked.

IMG_3433

While the rice is cooking, fry the shallots.  In a frying pan or a wok over medium heat, add just enough oil so that you can deep-fry.  Toss the shallots with the salt in a bowl and then squeeze out as much liquid as you can.  When the oil is hot, fry the shallots in batches for about 1 to 2 minutes until crispy.  When each batch is done, transfer to a plate lined with paper towel to drain any excess oil.

IMG_3427IMG_3430

Plate up the rice and chicken, scatter the fried shallots over top and serve with a small bowl of sweet chilli sauce on the side.  Again, SO GOOD!

thai chicken biryani (khao mok gai)