No-bake cheesecake
cooking, dessert, Food, recipe, recipes, Uncategorized

no-bake cheesecake

I don’t know why I haven’t been making more no-bake cheesecakes in my life! I have made more cheesecakes than I can count and I know basically every trick in the book for getting cheesecakes to bake up just right.  But this was just so damn easy!!!  And while not like a baked cheesecake, I think it’s just as delicious – just different.  The filling is much lighter and mousse-like and just lightly sweetened. Nothing wrong with that.

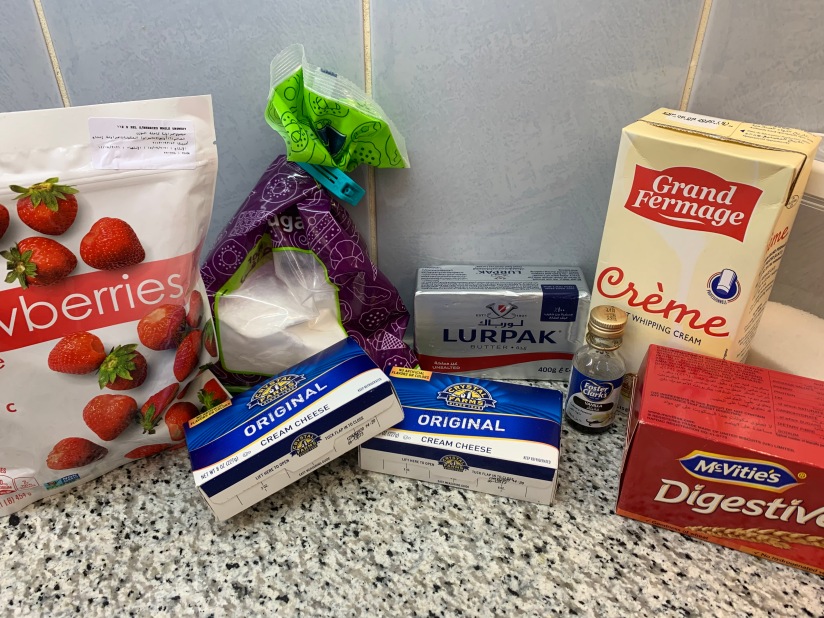
I decided to make this today because for the first time since we moved to Saudi, I found bricks of real cream cheese!  (All that’s ever been available is the spreadable form of cream cheese in tubs.)  This is adapted from Nigella Lawson’s Cherry Cheesecake recipe and it is just so easy and soooo delicious.  Just note that while I’ve already made a more substantial crust, this recipe doesn’t yield the tallest cheesecake.  Which we’re totally happy with but if you want a tall/deep cheesecake like say New York-style, then I would suggest you double the ingredients for the filling.

Crust: 250 grams digestive biscuits or graham crackers / 150 grams (6 tbsp) unsalted butter, melted

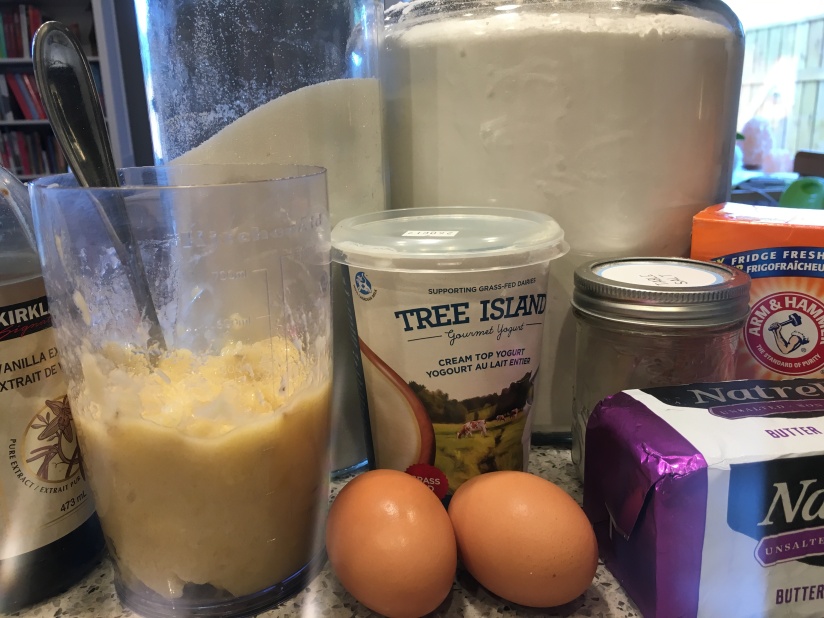
Filling: 300 grams (10 oz) cream cheese, room temperature (the kind in brick form, not in a tub) / 60 grams (1/2 cup) icing sugar / 1 tsp vanilla extract / 1/2 tsp fresh lemon juice (which I forgot – oops!) / 1 cup heavy or whipping cream

Optional topping: 3 cups of strawberries, hulled / 2 tbsp granulated sugar

IMG_1549

Blitz the digestive crackers or graham crackers until they’re crumbs in either a blender or food processor.  Add in the melted butter and pulse to combine.

IMG_1572

Press the crust mixture into the bottom of an 8 inch springform pan.

IMG_1574

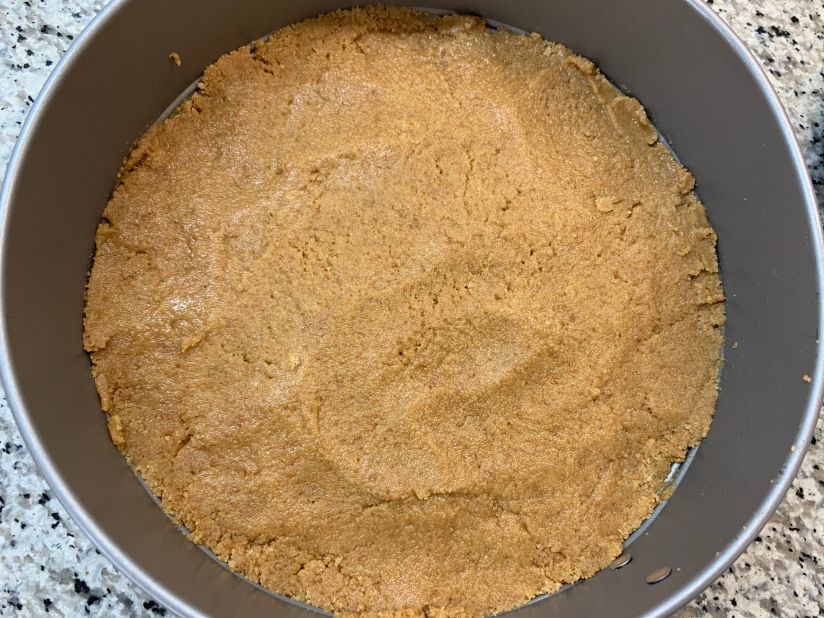
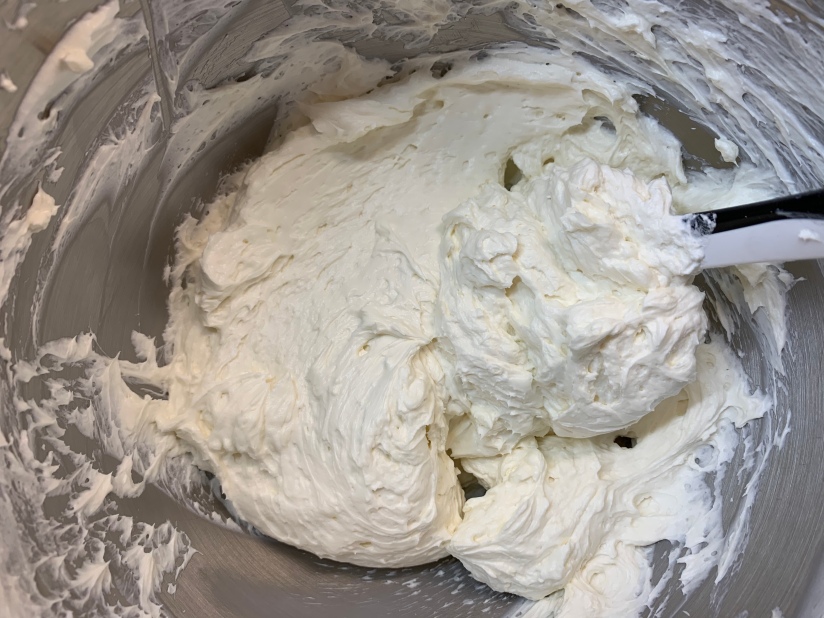
Pop into the fridge just to chill and let it set up a bit while you move onto the filling.  Beat together the cream cheese, icing sugar, vanilla and lemon juice until smooth.  I used the paddle attachment on my stand mixer because I’m lazy but you could always just do it by hand.

IMG_1575

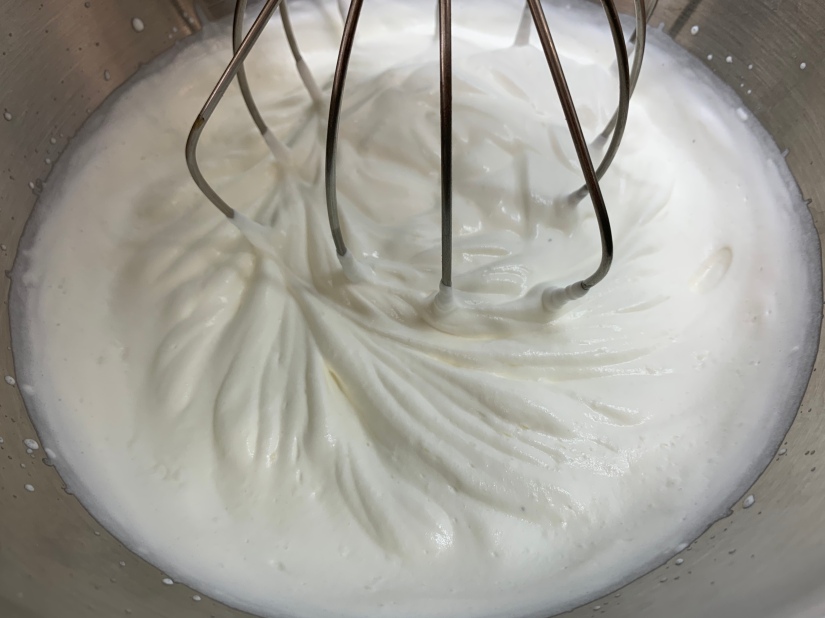
In a separate bowl, whip the cream until you get medium peaks. (Nigella’s recipe said to just “lightly whip” but I figured medium peaks was a good middle ground.)  Again I used my stand mixer with the whisk attachment but you could just whisk it by hand.

IMG_1576

Using a spatula, gently fold the whipping cream by hand into the cream cheese mixture until everything is combined and smooth.

IMG_1577

Gently spoon the filling onto the crust and spread evenly.

IMG_1578

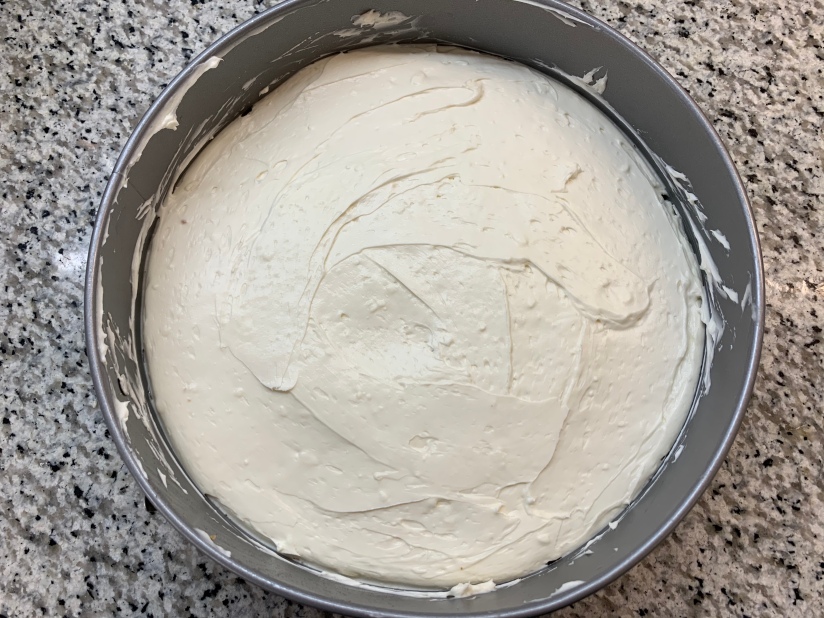
Cover with clingfilm and chill and set in the fridge for minimum 3 hours or overnight. (I obviously went with the bare minimum.)

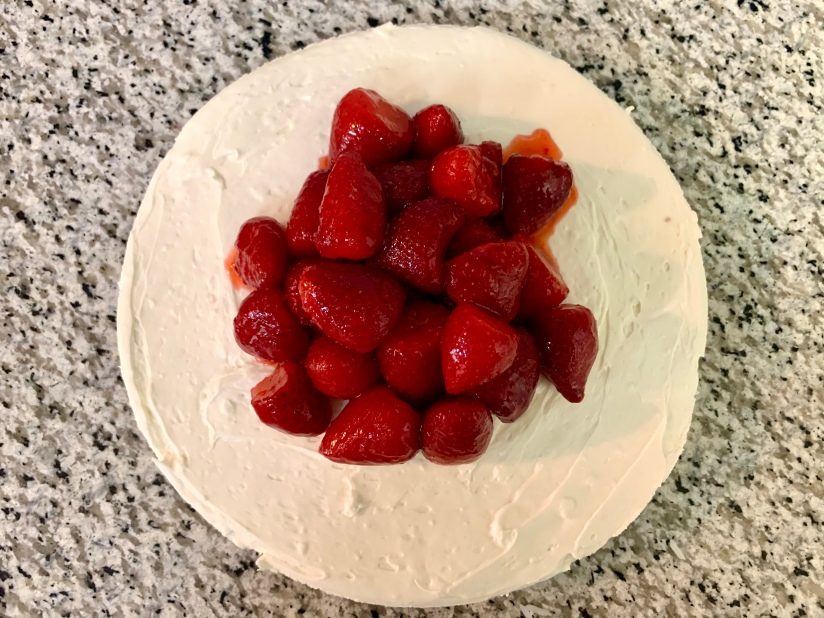
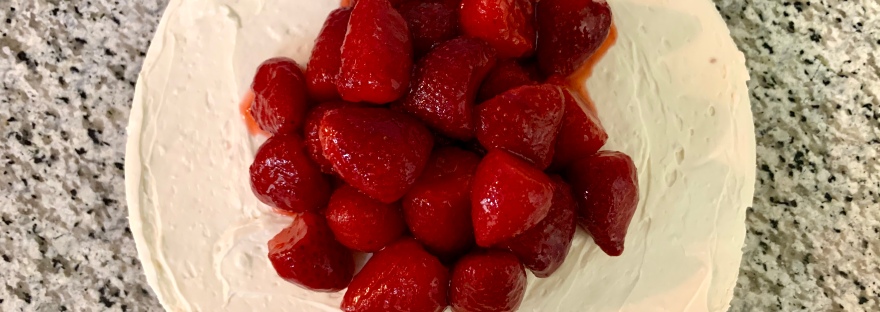
If you want you can have the cheesecake on it’s own. Or you can top it with some macerated strawberries.  The shop was completely out of fresh strawberries so I used some defrosted frozen ones – not ideal but still did the trick. Simply mix the strawberries with the sugar and let it sit at room temperature for about 30 minutes.  I piled up most of the strawberries on top of the cheesecake with some extra on the side but you can do whatever you’d like obviously.  Slice up and enjoy!

No-bake cheesecake


blueberry, almond and lemon cake
dessert, Food, recipe, Uncategorized

blueberry, almond and lemon cake

I don’t even remember how I came upon this cake (probably Instagram) but I’m glad I did! This recipe is from the cookbook Simple by Yotam Ottolenghi and it is SO good!  I don’t think I’ve ever baked with almond flour before but the result is so lovely – the cake is fragrant and super moist.  Plus anything with blueberries or lemons is a winner for me.

150 grams unsalted butter, room temperature / 190 grams granulated sugar / 2 tsp fresh lemon zest / 2 tbsp fresh lemon juice / 1 tsp vanilla / 3 large eggs / 90 grams self-raising flour / 1/8 tsp sea salt / 110 grams almond flour (ground almonds) / 200 grams fresh blueberries / 70 grams icing sugar

IMG_1135

Preheat the oven to 356 F and line a loaf tin (11 x 21 cm or 8 to 9 inches) with parchment paper, leaving some overhang so you can easily take out the cake later.  Using the paddle attachment on your stand mixer beat together the butter, granulated sugar, lemon zest, 1 tablespoon of the lemon juice, and vanilla.  Beat on high speed for 3 to 4 minutes – the mixture will be nice and light.

IMG_1137

Next, add the eggs in one at a time, mixing on medium speed to incorporate between each addition.  Now add in the salt and mix until incorporated.  Then add in the almond flour and mix until incorporated and then finally the flour, mixing again just until incorporated.

IMG_1138

Add in 150 grams of the blueberries and gently fold into the cake batter.  Spread evenly into the loaf pan and bake for 15 minutes.

IMG_1139

Take the cake out and sprinkle the remaining 50 grams of blueberries over the top of the cake.

IMG_1141

Put back into the oven and bake for another 15 minutes.  Take the cake out and loosely cover with aluminum foil before baking for a further 25 to 30 minutes.  The cake is ready when a toothpick or dry spaghetti noodle comes out of the centre clean.

IMG_1144

Let the cake cool in the loaf tin placed on a cooling rack for about 10 minutes.  Then using the edges of the parchment paper, simply lift the cake out and let it continue cooling.  After the cake has completely cooled (or at least almost completely! I’m so impatient), simply mix together the remaining 1 tbsp of lemon juice with the icing sugar to make a simple glaze.  Spoon the glaze over top of the cake and you are done.

blueberry, almond and lemon cakeIMG_1168

German apple cake
baking, cooking, dessert, Food, German food, recipes, Uncategorized

german apple cake

I have been thinking about making a German apple cake, or Versunkener Apfelkuchen, for awhile and I happen to have a lot of apples at the moment so I figured today would be a good day!  I decided to use this recipe that I found off a blog that has quite a lot of German recipes called Plated Cravings.  I did add cinnamon to the recipe though because I just love apples with cinnamon together.

4 small apples (I used Granny Smith) / 1/2 cup (115 grams) unsalted butter, room temperature / 1/2 cup granulated sugar / 2 tsp vanilla extract / 2 tsp fresh lemon juice / 3 large eggs / 1 and 1/2 cups cake flour / 2 tsp baking powder / 1 tsp ground cinnamon / 1/4 tsp sea salt / 2 tbsp whole milk / icing sugar (optional)

IMG_0884

Preheat the oven to 350 F and either grease or line with parchment paper a 9″ or 10″ springform pan.  Start with the apples by peeling and quartering them.  Then, using a small sharp knife, cut thin slices into the apple quarters lengthwise about 3/4 of the way through the apple so that you’re not cutting all the way through.

IMG_0885

Using the paddle attachment on your stand mixer, beat the butter on medium speed until creamy and then add in the sugar.  Beat together until light and fluffy.

IMG_0886

Add in the eggs one at a time.  Mix in between each addition just until the egg is incorporated into the butter/sugar mixture.  Then mix in the vanilla and lemon juice.

IMG_0887

In a medium bowl, whisk together the flour, baking powder, cinnamon and salt.

IMG_0888

Add half of the dry ingredients mixture into the stand mixer bowl and stir just until incorporated.  Add in 1 tbsp of the milk and again, stir just until incorporated as you don’t want to over-mix at this stage.  Add in the rest of the dry ingredients, stir in, and then the other 1 tbsp of milk and again, stir in.

IMG_0889

You’ll end up with quite a thick cake batter.  Evenly spread the batter into your springform pan and then place the apple quarters with the sliced sides up on top.  You don’t need to press the apples into the batter as the cake will rise up around the apples as it bakes.

IMG_0890

Bake for about 45 minutes or until a toothpick or dry spaghetti noodle comes out of the centre clean.  You can take the springform ring off the pan and let the cake cool on a cooling rack.

IMG_0891

Once the cake has cooled, if you want, you can use a sieve or sifter to dust some icing sugar over top.  This cake turned out so great – it’s quite light and not too sweet.  We just had the cake on its own but apparently it would go great with some whipped cream or some vanilla ice cream as well.  Enjoy!

German apple cake

masala chai pound cake
baking, breakfast, cooking, dessert, Food, recipe, Uncategorized

masala chai pound cake

After making my espresso coffee cake, I started thinking about making a cake using tea.  I decided to try making a chai cake and I found a recipe for a chai-spiced pound cake on the King Arthur Flour website that looked good but I wanted it to actually have tea in it as well and not just the spices.  So I spent a silly amount of time reading up on adding tea into baked goods – the easiest way would be to steep tea in milk or another liquid used in your recipe but this pound cake recipe didn’t have any liquid in it.  So I decided to infuse the butter with tea!

A couple of things – you do need to melt the butter, infuse it, and then let it cool back to room temperature which takes some time so just keep that in mind.  And also, you’ll need to start off with more butter than is needed in the recipe because after you add the tea, the tea will absorb some of the butter and you’ll lose some as you strain it.  The end result is fab though – the cake actually tastes like a warming cup of masala chai.

300 grams of unsalted butter (the cake will actually only require 16 tbsp or 227 grams of infused butter) / 4 black tea bags / 1 cup light brown sugar / 1/4 cup honey / 2 large eggs, room temperature / 1 tsp baking powder / 1/4 tsp baking soda / 1 tsp sea salt / 1 tbsp ground cinnamon / 2 tsp ground ginger / 2 tsp ground cardamom / 1 and 1/2 tsp ground allspice or ground cloves / 1 tsp black pepper powder / 2 cups all-purpose flour 1 cup full fat Greek yogurt, room temperature / 2 tsp vanilla extract

IMG_0488 2

In a small saucepan over medium heat, add the butter and melt.  Tear open the tea bags and add the tea leaves to the melted butter.  Open at least one of the tea bags carefully so that you can use it to line a small strainer. Turn the heat down to low and let the tea steep in the butter for 5 minutes.

IMG_0496

Take the saucepan off the heat and let it steep for a further 5 minutes.  Using one of the opened tea bags, line a small strainer and then pour the butter through to strain out the tea. If a bit of the tea does end up in the butter, no big deal.

IMG_0494 2

OK and now for what I found to be the toughest part – waiting for the butter to cool and solidify as the recipe requires room temperature, not melted, butter!  I’m pretty impatient so I stuck the bowl in the fridge for about 40 minutes, giving it a stir a couple times.

IMG_0497 2

Hard part is done.  Preheat the oven to 350F.  Add 227 grams or 16 tbsp of the tea-infused butter, the brown sugar and the honey to the bowl of a stand mixer.  Using a paddle attachment, beat at medium speed for two minutes.

IMG_0498 2

Add the eggs one at a time.  Beat on medium speed for two minutes in between each addition.  Then stir in the baking powder, baking soda, salt, cinnamon, ginger, cardamom, allspice or cloves and black pepper.

IMG_0499 2

Stir in half of the flour just until incorporated and then add in the yogurt and vanilla.  Again, stir just until incorporated.  Scrape down the sides of the bowl as needed. Add in the last half of the flour and stir just until incorporated.

IMG_0501 2

Lightly grease with butter and lightly flour a 9 or 10-cup bundt pan.  Spread the cake pan evenly into the pan.

IMG_0502 2

Bake for about 50 minutes or until a toothpick / dry spaghetti noodle comes out of the centre clean.  Let the cake cool in the pan for about 15 minutes before removing from the pan.

IMG_0503 2

Let the cake cool completely on a cooling rack before slicing.  Enjoy!

masala chai pound cakeIMG_0512 2


baking, cooking, dessert, Food, recipe, recipes, Uncategorized

blueberry buckle

The other night as I was mindlessly scrolling through Facebook, an article popped up titled, “The best Alton Brown recipe *isn’t* the one you’re thinking of,” by someone who used to work for him.  I used to love Alton Brown’s show, Good Eats, back in the day so I clicked on the article and found a glowing review for his blueberry buckle.  I had never even heard of a blueberry buckle but I mean, if it’s Alton Brown’s best recipe then I had to try it. And now I know what a buckle is – a type of coffee cake topped with streusel which kind of ‘buckles’ while it’s baking.

I did have to make couple of adjustments to the recipe – he emphasizes using a square glass baking dish sprayed with non-stick cooking spray (both of which I don’t have) so I used a 9″ square metal baking dish that I buttered and that worked perfectly fine.  Also the recipe uses freshly ground nutmeg but nutmeg is technically an illegal substance (!!) here in Saudi so I substituted with cinnamon.  Oh and he’s also all about the precise measurements with the scale but I’ll give (slightly less precise but good enough) cup measurements as well.

Cake: 9 oz (2 cups) cake flour / 1 tsp baking powder / 1/2 tsp sea salt / 1/2 tsp ground ginger / 4 tbsp unsalted butter, room temperature / 5 and 1/4 oz (3/4 cup) granulated sugar / 1 large egg / 1/2 cup whole milk / 15 oz (3 cups) fresh blueberries

Streusel topping: 1 and 1/2 oz (1/3 cup) cake flour / 3 and 1/2 oz (1/2 cup) granulated sugar / 1/2 tsp ground cinnamon or ground nutmeg / 4 tbsp unsalted butter (cold and cubed)

IMG_9972

Preheat the oven to 375F and lightly grease a 9″ x 9″ square baking pan with either non-stick spray or some butter.  Now start on the cake.  Whisk together the cake flour, salt, baking powder and ground ginger in a medium-sized bowl and set aside.

Using the paddle attachment on your stand mixer, beat the sugar and butter on medium speed for about one minute or until the mixture is light and fluffy.

IMG_9973

Add the egg and beat just until it’s fully incorporated.  Turn the mixer down to low speed and add in 1/3 of the dry ingredients mixture and mix just until incorporated.  Then add in 1/3 of the milk and again, mix just until incorporated.  Repeat, alternating the dry ingredients and the milk until it’s all combined.  Add in the blueberries and using a spoon, just gently stir them in.

IMG_9974

Spread the cake batter evenly into the prepared baking pan.  Now onto the streusel topping!  Combine all the ingredients for the streusel in a bowl and either using a fork, pastry cutter or your fingers, combine everything until the mixture resembles crumbs.

IMG_9976

Evenly sprinkle the streusel topping all over the cake without pressing them down.  Bake for 35 to 45 minutes or until the cake has gone golden in colour and a dry spaghetti noodle or toothpick comes out of the centre clean.  Let cool for at least 10 minutes on a cooling rack before cutting.

IMG_9981IMG_9986

I LOVED how this turned out! Tons of blueberries and the streusel topping really makes it.  Perfect with a cup of coffee or tea. This recipe is definitely going to go into heavy rotation for us!

baking, cooking, dessert, Food, recipe, recipes, Uncategorized

mini vanilla cupcakes

The recipe for mini vanilla cupcakes from the Ricardo Cuisine website (Ricardo is like the Quebec version of Jamie Oliver) has become my go-to whenever I need to make some mini cupcakes for a birthday.  It’s straightforward and always turns out well.  And for my kids’ favourite part, I like to swirl some of my own easy 3 ingredient vanilla buttercream frosting on top.

Makes 48 mini cupcakes.

cupcakes: 1 and 1/2 cups all-purpose flour / 1 and 1/2 tsp baking powder / 1/4 tsp sea salt /  2 large eggs / 1 cup granulated sugar / 1 and 1/2 tsp vanilla extract / 6 tbsp vegetable oil / 2/3 cup whole milk

buttercream frosting: 2 and 2/3 cup icing sugar / 1 cup (225 grams) unsalted butter, room temperature / 1 tsp vanilla extract

IMG_9837

Preheat the oven to 350 F and line a mini cupcake tin with paper liners.  In a medium bowl, combine the flour, baking powder and salt.

In a large mixing bowl, add the eggs, sugar and vanilla extract.  Using a paddle attachment, beat the mixture on medium-high speed for about 10 minutes or until the volume has roughly tripled.

IMG_9839IMG_9844

Switching the mixer onto a lower speed, gradually drizzle in the vegetable oil and mix until incorporated.  Next, tip in about half of the dry ingredients mixture and mix on low speed.  Then add in half the milk and mix and then again, the dry ingredients and then the milk.  Mix just until everything is combined into a smooth batter.

IMG_9846

Spoon the batter into the cupcake liners, filling each cup about 3/4 full.  Bake for about 15 to 19 minutes or until a toothpick or dry spaghetti noodle comes out clean from the centre.  Take the cupcakes out of the tin and let them cool completely on a cooling rack.

IMG_9847IMG_9852

In the meantime, make the buttercream frosting.  Simply add the icing sugar, butter and vanilla into a large mixing bowl and beat with a paddle attachment, starting on low speed and then increasing to medium high.  Beat the frosting until it’s gone creamy and smooth.  You can just spread some icing on top of the cooled cupcakes but to make them look pretty I like to pipe a swirl on top using the Wilton 1M tip.  Enjoy!

IMG_9856IMG_9855


baking, cooking, dessert, Food, recipe, recipes, Uncategorized

lemon bars

A friend recently introduced me to lemon bars and ever since, I am obsessed!  She made some for a dinner at ours and I quickly demolished all the leftovers.  Then I tried her recipe which has you make a lemon curd over a double boiler set up and then just pour it on top of the shortbread.  It’s REALLY tasty but the lemon curd doesn’t set very firmly and then in my lemon bar research (yes, that’s right) I noticed that in most recipes you just bake the lemon filling.  So then I tried the one from the blog Sally’s Baking Addiction, with some changes, and now I’ve settled onto my own adapted version.  It’s super lemon-y with all the fresh lemon juice and lemon zest and it’s dead easy to make – minimal exertion and no need for a mixer.

Makes about 30 bars.

shortbread: 1 cup (230 grams) unsalted butter, melted / 1/2 cup granulated sugar / 1/2 tsp sea salt / 2 cups PLUS 2 tbsp all-purpose flour

lemon filling: 2 cups granulated sugar / 6 tbsp all-purpose flour / 6 large eggs / 1 cup freshly squeezed lemon juice (this could be anywhere between 4 to 9 lemons depending on size!) / 1 tsp fresh lemon zest

IMG_8985

Preheat the oven to 325. Line a 9″ x 9″ baking pan with parchment paper, leaving enough paper hanging over to let you lift the bars out after.

** The recipe I adapted this from uses a 13″ x 9″ baking pan, which… I don’t have here. Wasn’t sure if it would work with the smaller pan but I actually really like how they turn out, so up to you! If you want thinner bars or don’t have the 9″ x 9″, go with the larger pan and simply adjust the baking times to be a few minutes shorter.

First, the shortbread.  In a medium bowl, using a wooden spoon, mix together the melted butter, sugar and sea salt until combined.  Then mix in the flour until you get a smooth dough.

IMG_8986 2

Using your fingers, press the dough evenly into the baking pan and pop into the oven for about 20 minutes or until the edges are ever so slightly turning golden brown.

IMG_8987 2

IMG_8991 2

While the shortbread is baking, move onto the lemon filling.  Into a large bowl, sift the flour and sugar together.  I didn’t sift the two together one of the times I made this and I feel like the filling didn’t set as well.  Can’t say it’s for sure that but when in doubt, sift!  Then add the eggs, lemon juice and lemon zest and whisk until smooth.

IMG_8990 2

When the shortbread is ready, remove from the oven and pour the lemon filling over top.

IMG_8992

Pop back into the oven for about 25 to 28 minutes or until the centre looks pretty set and is no longer jiggly.  Let the whole pan cool on a cooling rack for about 1 hour and then put it into the fridge and let it chill completely; about 1 to 2 hours.

IMG_8993 2

Once it’s chilled, carefully lift the bars out of the pan using the parchment paper.  Place onto a cutting board and cut into squares.  Wipe down your knife in between slicing so you can get cleaner cuts.  If you want, you can dust some icing sugar on top which seems to be a popular thing to do with lemon bars to make them look prettier but I haven’t been bothered to.  I’m too busy eating them.  Keep chilled in the fridge until they’re all gone!

IMG_8997


baking, cooking, dessert, Food, recipe, recipes, Uncategorized

oatmeal raisin cookies

A friend briefly mentioned oatmeal raisin cookies the other day and then I just had to make some.  Could not stop thinking about oatmeal raisin cookies.  I can’t even remember the last time I made them but I did remember that I used to always use the recipe that was just printed on the Quakers Oats packaging.  I looked through some recipes from baking blogs but I decided to just go with my O.G. tried and true and it did not disappoint.  These turn out so delicious and soft and chewy; no crispy oatmeal cookies for me thanks.  Gonna just add this to my blog now for safekeeping.

Makes 24

1/2 cup PLUS 6 tbsp unsalted butter, room temperature / 3/4 cup firmly packed brown sugar / 1/2 cup granulated sugar / 2 large eggs / 1 tsp vanilla / 1 and 1/2 cups all-purpose flour / 1 tsp baking soda / 1 tsp ground cinnamon / 1/2 tsp salt / 3 cups uncooked oats (old fashioned or quick) / 1 cup raisins

IMG_8859

Preheat the oven to 350.  Using a paddle attachment on medium speed, cream together the butter, granulated sugar and brown sugar.

IMG_8860

Then beat in the eggs and vanilla.  In a separate bowl, combine the flour, salt, baking soda, and cinnamon and then add the dry ingredients to the wet and mix until combined.  Next, mix in the oats and the raisins.

IMG_8863

My cookies were bigger than what the original recipe calls for, but I like my cookies substantial.  So I portioned them by measuring out a heaped tablespoon per cookie.  Roll the portioned dough with your hands into a ball and then place on parchment-lined cookie sheets.  (I flattened the dough balls slightly but I would probably just leave them as balls next time so there’s less spread and I get a bit of a fatter cookie.)  Make sure to space out the cookies because they will spread out as they bake.

IMG_8864

Bake for 9 to 12 minutes or until the edges are juuuuust turning ever so slightly golden brown.  They will still be quite soft but you don’t want to over bake because then you’ll get crispy oatmeal cookies and that would suck.

After removing from the oven, leave the cookies on the cookie sheet for a few minutes because they are still pretty soft and you don’t want them to break apart.  Then transfer to a cooling rack to let them cool.  Or just eat them warm.  Live your life to the fullest!

IMG_8870IMG_8873

matcha mochi
appetizers, baking, dessert, Food, japanese food, recipe, recipes, Uncategorized

matcha mochi

We love mochi (Japanese rice cake)!  So soft, chewy and yummy.  But we never thought to make homemade mochi until we were visiting friends and they had made some.  Of course Rock immediately wanted the recipe.  Turns out homemade mochi is actually really easy to make.

1 and 1/2 cups glutinous rice flour  /  3/4 cup sugar  /  1/2 tsp baking powder  /  2 tbsp matcha powder  /  3/4 cup coconut milk  /  1 cup water  /  1/2 tsp vanilla extract  /  cornstarch for dusting

IMG_4007

Preheat the oven to 275F and line a 9 x 13 inch baking dish with parchment paper.  In a mixing bowl, whisk together the dry ingredients and in another bowl, mix together the wet ingredients.

IMG_4008

Add the wet ingredients to the dry and whisk together until there are no more clumps.  Pour into the lined baking dish.

IMG_4010

Cover with aluminum foil and bake for an hour.  After the hour, take off the foil and bake for another 10 minutes.

FullSizeRender

The recipe says to cool overnight but let’s be real; I’m way too impatient for that.  So I let it cool for about 15 minutes on the counter and then I covered it and stuck it in the fridge for a few hours.  I’m happy to say it did no harm and just let me eat my mochi sooner.  I wouldn’t leave it in the fridge for any longer than that though ‘cus I read that refrigerating mochi makes it hard and lose it’s chewy texture.

In order to cut it, I lightly dusted a chopping board with cornstarch and then flipped the mochi out of the dish upside down onto it.  Carefully peel the parchment off as the mochi is quite sticky.

FullSizeRender-2

Dust with some more cornstarch and cut into pieces with a sharp knife.  I just cut squares but you can cut it up however you’d like.  I’ve already eaten two squares but I just read that mochi doesn’t stay fresh for more than a day or two so I better eat more!

IMG_4026matcha mochi


baking, cooking, dessert, Food, recipe, recipes, Uncategorized

classic banana bundt cake

This recipe is from Dorie Greenspan’s Baking: From my home to yours.  We’ve made this twice in the last two weeks (once was for friends! once was just us…) and it’s just a really good and easy cake to make.  No more difficult than a banana bread and gives me an excuse to use my beloved bundt cake pan.

3 cups all-purpose flour  /  2 tsp baking soda  /  1/2 tsp salt  /  1 cup unsalted butter, room temperature  /  2 cups sugar  /  2 tsp pure vanilla extract  /  2 large eggs, ideally also at room temperature  /  4 very ripe bananas, mashed (about 1 and 1/2 cups)  /  1 cup plain yogurt (or sour cream)

IMG_3266

Preheat your oven to 350F and generously butter a bundt pan.  The recipe calls for a 12 cup pan but I’m pretty sure mine is a 10 cup and it works just fine.  Whisk together the flour, baking soda and the salt.

Then, using a stand mixer with the paddle attachment or a hand mixer, beat the butter until it’s creamy.  Add the sugar and then beat at medium speed until pale and fluffy.

IMG_3267

Add the vanilla and then the eggs, one at a time, beating for 1 minute after adding each egg.  Turn the mixer down to low and then add the mashed up bananas.  Next, mix in half of the dry ingredients, then the yogurt, and then the rest of the dry ingredients.  Transfer the batter to your pan and tap the pan a bit on your kitchen counter to get any bubbles out and smooth out the top.

IMG_3269

Slide the cake into the oven, placing the pan straight onto the oven rack.  Bake for about 65 to 75 minutes or until a dry spaghetti noodle comes out of the centre clean.  If the cake is browning too quickly – give it a check after about 30 minutes – tent a piece of aluminum foil and loosely cover the cake.  When the cake is done, let it cool in the pan for about 10 minutes on a cooling rack before unmolding it onto the rack to finish cooling.

IMG_3274

The recipe’s side bar serving suggestion is to serve with coffee, tea or a slurpable mocha milkshake.  I love how specific that is!  Wrapped airtight, the cake will keep at room temperature for up to 5 days but our cakes never lasted that long before being finished off.

classic banana bundt cake