sourdough rye bread
baking, breakfast, cooking, Food, recipe, Uncategorized

sourdough rye bread

Rock has decided to blog for the first time in possibly a couple of years! He always wants me to edit his English but… I’m not going to. Here he is!

Bread is one of the principal forms of food for man from the dawn of time.  Archeologist found proof of stone-crushing barley and wheat use to make floor thought to be 7500 years old.  In the British Museums’ Egyptian galleries, you can see loaves which were made and baked over 5000 years old.  

My rye bread is actually quite easy to bake.  The difficult part is to get the sourdough starter strong enough to make a delicious loaf.  This part can take weeks or you can ask a friend to share some of them with you.  Linzi was kind enough to share hers with us.   The starter is actually natural yeast. The recipe is simple; 100 gr of floor, 100 ml of water and a tablespoon of yesterday mix all together.  You repeat this until the mixture double his size in 6 hours. Every day you need to feed it.   If you don’t bake, the major part of the mixture will be discarded.   This ratio is sufficient to bake a bread and have enough left for a feeding.

When the sourdough starter doubles his size in 6 hours and the smell is very sour, you can put together the ingredients to bake your bread.

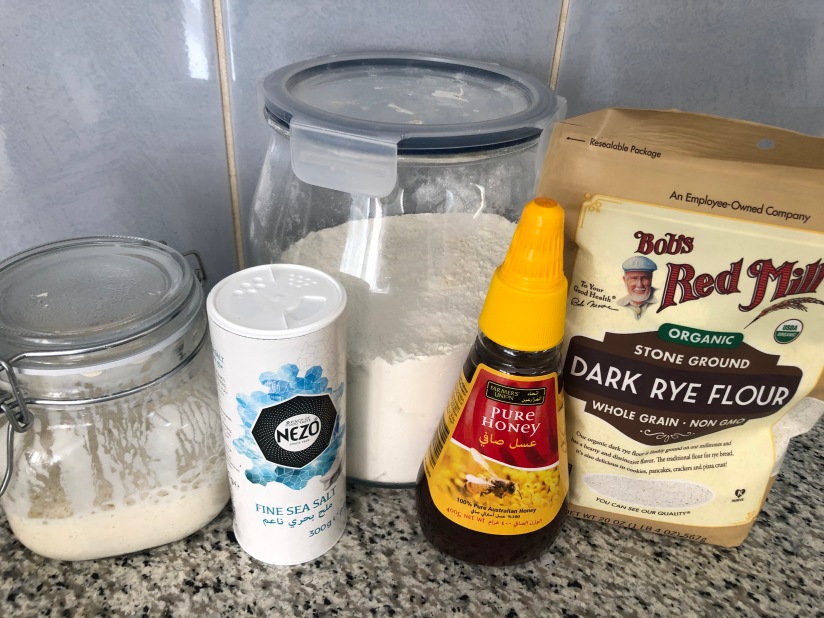
2 cups of all-purpose flour / 1 cup of rye flour / ¾ cup sourdough starter / 1 ¼ cups of warm water / 1 tablespoon of honey (optional) / 1 and ½ teaspoon of salt
IMG_7172

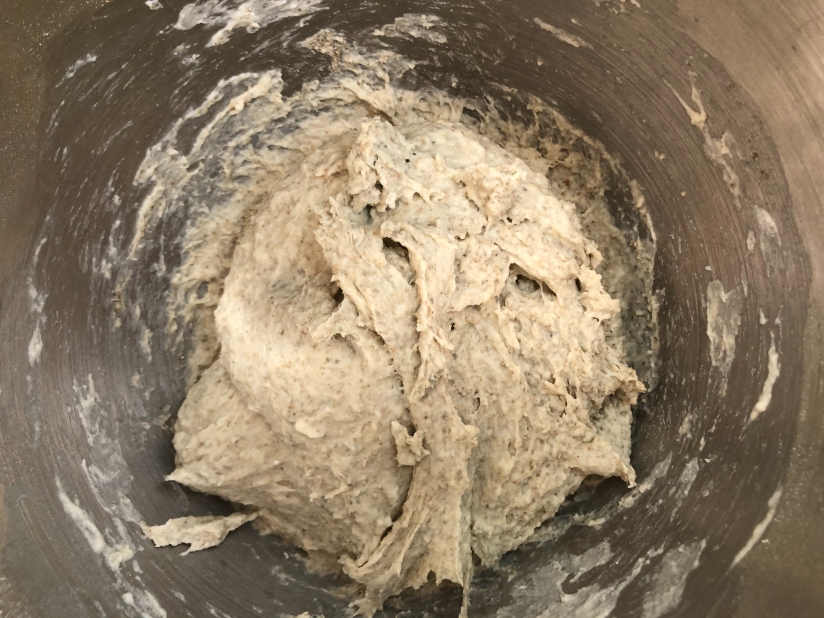
I mix the dry ingredients, flour and salt, first in the mixer bowl.  Then, I mix the water, the sourdough starter and the honey in a different bowl. The honey is optional but it will give you a nice brown color and a boost for the yeast.  Add the wet ingredient into the dry ingredients and mix until combined; cover with a dishtowel and let sit for 15 minutes.
IMG_7174

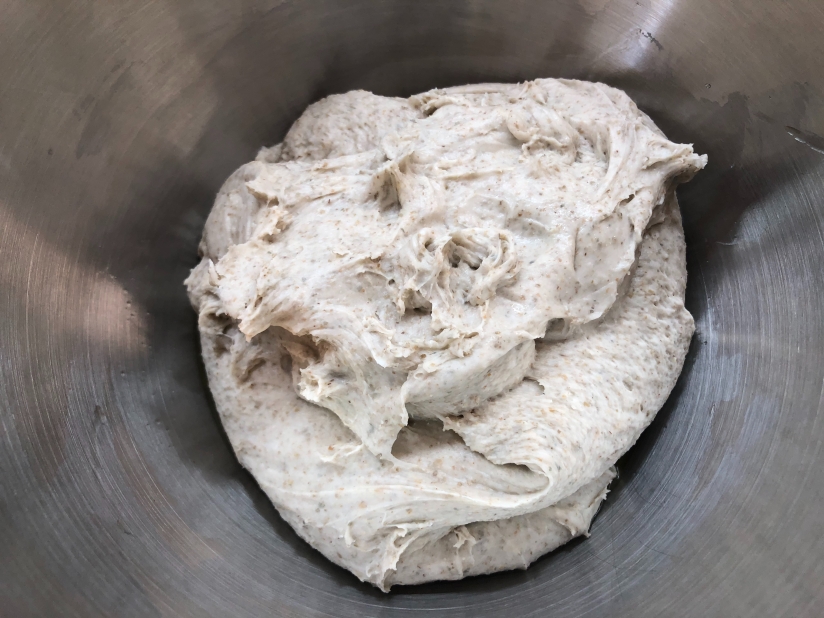
Using the dough hook, knead the dough for 5 minutes at medium speed.  Most likely you will need to add flour.  The goal here is to have a dough that is still clinging to the bottom of the bowl but clearing the upper part of the bowl.  The dough will be wet and sticky so don’t use too much flour.
IMG_7178

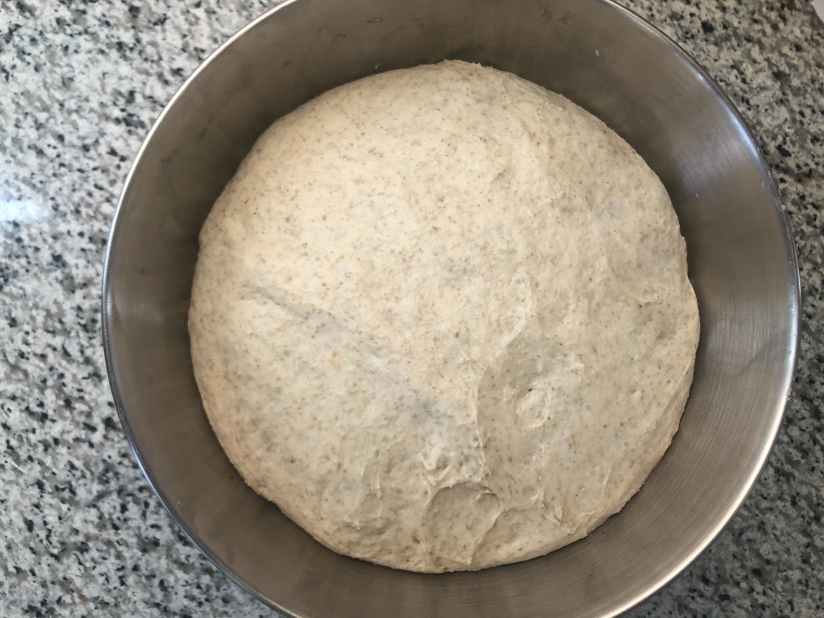
Transfer the dough into a medium size bowl coated with a little of oil; I use olive oil.  Cover with a plastic sheet and let rise for 3 hours.  I turn and fold the dough once or twice during the first rise.  The texture of the dough will change rapidly from a stick ball to a firm, none sticky, very elastic dough.  The smell will get stronger too.

After 3 hours, I turn and fold it again.  I form a nice ball and transfer it on a parchment paper.  I use an upside-down bowl to cover the dough for the second rise, about 2.5 hours.
IMG_7179

20 minutes before the end of the second rise, I put a pizza stone in the oven and turn it to 450 F.  This will permit the stone to warm up nicely.  

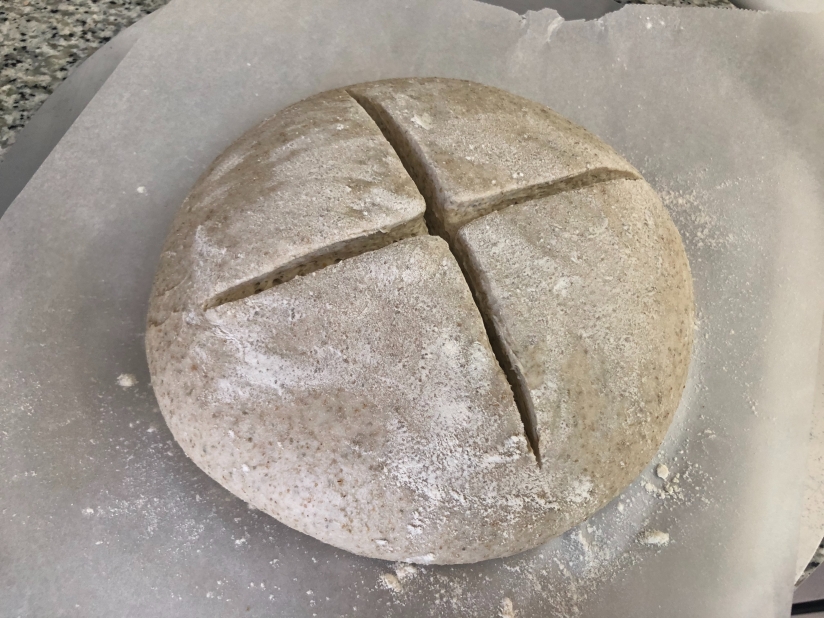
When ready, I dust up the dough with some flour and make some cut in the middle, about 1 cm deep.  Set the dough in the middle of the pizza stone and bake for 30 min.
IMG_7199

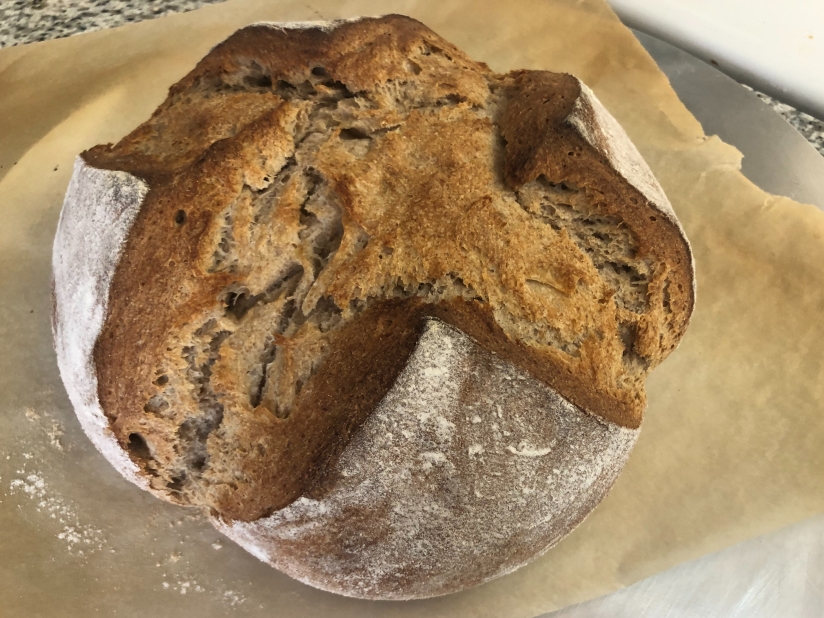
Then remove the bread from the pizza stone and transfer it on a cooling rack.

Et voila!
IMG_7200

I really like this bread.  We tried different kind of flour.  If you use 3 cup of all-purpose flour you will get a better rise and the final product is less dense.  The next experiment will be with spelt flour. 
chewy two-bite brownies
baking, cooking, dessert, Food, recipe, Uncategorized

chewy two-bite brownies

I haven’t had them in a couple years but I found myself craving those addictive store-bought two-bite brownies the other day.  They don’t have them here in Saudi so I figured I’d make them! Problem is – I suck at brownies.  I think it’s one of those things that are supposed to be super easy but it can be hard to get them just right.  Anyway, I was determined to finally be able to make brownies!!

Personally, I like a chewy almost fudgy brownie – no cakey brownies for me thanks.  I read a ton of articles online about brownies, scoured lots of recipes, had one pretty epic fail, but then… I made these and they turned out fab!  They are a little crispy around the edges and then dense and chewy in the middle with a great chocolate flavour.  I used Martha Stewart’s recipe for Chewy Brownies (with just a couple of minor tweaks) and adapted it to be two-bite brownies.

Makes 30 two-bite brownies.

7 tbsp (99 grams) unsalted butter /  7 oz (200 grams) unsweetened baking chocolate / 3 tbsp canola oil / 3/4 cup and 2 tbsp all-purpose flour / 1/4 tsp baking powder / 1/2 tsp sea salt / 1 cup granulated sugar / 1 cup light brown sugar, lightly packed / 3 large eggs, room temperature / Pam non-stick baking spray (the type with flour in it)

IMG_0709

Preheat the oven to 350 F.  In a small to medium saucepan, bring some water to a boil and then lower to a simmer.  You don’t want too much water – just enough to simmer without touching the bottom of a large bowl that you set on top – like a double boiler.  Add the chocolate, butter and oil to the bowl and let it melt altogether, stirring occasionally.

IMG_0710

Take the bowl off the saucepan and mix in the granulated and brown sugars.

IMG_0711

Next, add in there eggs and mix until all combined.  The original recipe says to whisk for about 45 seconds or until smooth and glossy which will give your brownies that shiny crackly top but I don’t really care for that.  However, if you want that – go for it!

IMG_0712

In a medium bowl, whisk together the flour, baking powder and salt.  Then add these dry ingredients into the chocolate mixture and stir just until incorporated.

IMG_0713

Now, spray the crap out of your mini muffin tin with the non-stick baking spray.  This part is key! In my epic fail batch, which to be fair was also a totally different recipe, I just buttered the tin and all the brownies completely stuck to it.  So just to be sure, make sure the tin is really well coated with the baking spray.  If you don’t have the spray, I would make sure the tin is really well greased with butter and then also lightly floured.  Alternatively, you could also line the tin with mini muffin paper liners.

Measure out 1 tablespoon of batter for each brownie.  You don’t want to overfill them as you don’t want these to overflow or have a muffin top like a cupcake would.

IMG_0714IMG_0716

Bake for about 20 to 25 minutes.  You’ll know they are done when a toothpick or dry spaghetti noodle comes out of the centre with moist crumbs on it.  If it comes out with wet batter on it, they’re not done yet.  But also if it comes out clean then they’re overcooked. I know – stressful!  So just check around the 20 minute mark as you don’t want to end up with dry overdone brownies.

IMG_0717

Let the brownies cool in the tin on a cooling rack for about 20 minutes.  And then they should be easily popped out of the tin and you can let them continue cooling on the rack. Enjoy!

chewy two-bite brownies

espresso coffee cake
baking, cooking, dessert, Food, recipe, Uncategorized

espresso coffee cake

I don’t know what made me think of it but in the last week I kept thinking about this coffee cake they used to have at Starbucks like 20 years ago.  I can’t remember it exactly but I remember loving it and my mom always picking me up a piece when she went for coffee.  I couldn’t find any mention of it online let alone a copycat recipe so I decided to come up with one.

Also, I just recently found out that a coffee cake… doesn’t generally have coffee in it (!!!) Did everyone else know this? It’s just a cake topped with streusel that is served with coffee.  Well I wanted a coffee cake that actually tastes like coffee so here we are.  I ended up adapting a Coffee Coffee Cake recipe by Trisha Yearwood and combined that with an adapted streusel recipe from Alton Brown and finally settled on this.  My first attempt had barely any coffee flavour so make sure your espresso is hella strong.

cake: 1 and 3/4 cup all-purpose flour / 3/4 tsp baking powder / 3/4 tsp baking soda / 3/4 tsp ground cinnamon / 1/2 tsp sea salt / 1/2 tsp ground cardamom / 1/2 cup super strong espresso (use 3 to 4 tbsp espresso powder) / 1/3 cup full-fat Greek yogurt / 1 cup (225 grams) unsalted butter, room temperature / 1 cup granulated sugar / 2 large eggs / 1 tsp vanilla

streusel topping: 1/2 cup all-purpose flour / 1/3 cup granulated sugar / 1/3 cup plus 1 tbsp brown sugar, lightly packed / 3/4 tsp ground cinnamon / 6 tbsp (85 grams) unsalted butter, cold and cut into cubes

IMG_0346

Preheat the oven to 350F and line a 9″ x 9″ square baking pan with parchment paper.  Now, start on the cake. Mix the espresso powder with boiling hot water until you have 1/2 a cup.  Add the yogurt and mix until there are no more lumps.

IMG_0347

In a medium bowl, mix to combine the flour, baking powder, baking soda, cinnamon, salt and cardamom.

IMG_0348

Using the paddle attachment on your stand mixer, beat the butter and sugar together on medium-high speed until light and fluffy.

IMG_0349

Scrape down the sides of the bowl and add the eggs, one at a time, mixing until completely combined in between.  Add the vanilla and beat on medium-high speed again until fluffy.

IMG_0350

Add in 1/3 of the dry ingredients mix and stir on low speed just until everything is combined.  Then add in 1/2 of the coffee mixture, and mix again on low just until combined.  Repeat with 1/3 of dry, then the other 1/2 of the coffee, and then finally the last 1/3 of the dry ingredients.  Scrape down the sides of the bowl as needed.

IMG_0351

Now, onto the streusel.  Put all of the streusel ingredients into a medium bowl.  Using a fork or your fingers, combine everything until the mixture resembles crumbs.

IMG_0352

Spread the cake batter evenly into the pan.

IMG_0354

Then evenly sprinkle the streusel over top.  Don’t press the streusel into the batter.

IMG_0356

Bake for 45 minutes or until a toothpick or dry spaghetti noodle comes out of the centre clean.  Let the cake cool in the pan on a cooling rack and then dig in!

espresso coffee cakeespresso coffee cake

matcha and white chocolate chunk cookies
baking, cooking, Food, recipe, recipes, Uncategorized

matcha and white chocolate chunk cookies

I cannot get over how good these are! If you’re a matcha fan then you will love these soft and chewy matcha cookies filled with chunks of white chocolate.  My sister made some matcha cookies the other day which got me thinking, Why have I never made matcha cookies?!  She sent me the recipe she used but she said the cookies didn’t have much of a matcha taste and were a bit crispy on the outside.  So I did some cookie research and found a recipe on a blog called Salu Salo Recipes.  It looked pretty legit but I did make some changes – namely more matcha (‘cus I want these to actually taste like matcha!) and with less sugar and chocolate.

Makes 18 cookies.

2 cups all-purpose flour / 1 and 1/2 tbsp matcha / 1/2 tsp baking soda / 1/2 tsp sea salt / 1/2 cup brown sugar / 1/2 cup granulated sugar / 3/4 cup (170 grams) unsalted butter, melted / 1 large egg / 1 large egg yolk / 1 tsp vanilla extract / 150 grams white chocolate

IMG_0184

Preheat the oven to 325F.  In a medium bowl, mix together the flour, baking soda, salt and matcha powder.

IMG_0164

Next, in your stand mixer, beat together the melted butter, granulated sugar and brown sugar with the paddle attachment until combined.  Then add in the vanilla, egg and egg yolk.  Beat on medium speed until the mixture is quite light and creamy.

IMG_0166

Now add in the dry ingredients mix to the stand mixer bowl and mix on low to medium speed just until everything is combined.

IMG_0172

Then, with a sharp knife, chop up your white chocolate into chunks.

IMG_0173

Add the white chocolate chunks into the cookie dough and using a wooden spoon, fold the chocolate into the dough.

IMG_0176

Using a tablespoon, measure out about 1 heaped tablespoon of dough per cookie.  Roll into a ball and place on a parchment lined baking sheet.  Space out the dough balls as the cookies will spread as they bake.

IMG_0178

Bake for about 10 minutes or until the cookies have lost that raw dough sheen.  The recipe I adapted this from said to bake until the edges go lightly brown but I think that would be hard to tell since the cookies already have colour to them and I wouldn’t want to risk over baking these seeing as I want soft and chewy cookies!

IMG_0179

After removing from the oven, let the cookies cool on the baking sheet for a few minutes as they will still be very soft.  Then transfer them to a cooling rack to finish cooling.  They’ll be quite fat and puffy still when you first pull them out of the oven but they will flatten a bit as they cool.

matcha and white chocolate chunk cookies

Enjoy!  Honestly, I think these are amazing.  Enough matcha flavour but balanced out with the sweetness from the white chocolate.  And so soft and almost fudgy! Love it.

matcha and white chocolate chunk cookies

baking, cooking, dessert, Food, recipe, recipes, Uncategorized

blueberry buckle

The other night as I was mindlessly scrolling through Facebook, an article popped up titled, “The best Alton Brown recipe *isn’t* the one you’re thinking of,” by someone who used to work for him.  I used to love Alton Brown’s show, Good Eats, back in the day so I clicked on the article and found a glowing review for his blueberry buckle.  I had never even heard of a blueberry buckle but I mean, if it’s Alton Brown’s best recipe then I had to try it. And now I know what a buckle is – a type of coffee cake topped with streusel which kind of ‘buckles’ while it’s baking.

I did have to make couple of adjustments to the recipe – he emphasizes using a square glass baking dish sprayed with non-stick cooking spray (both of which I don’t have) so I used a 9″ square metal baking dish that I buttered and that worked perfectly fine.  Also the recipe uses freshly ground nutmeg but nutmeg is technically an illegal substance (!!) here in Saudi so I substituted with cinnamon.  Oh and he’s also all about the precise measurements with the scale but I’ll give (slightly less precise but good enough) cup measurements as well.

Cake: 9 oz (2 cups) cake flour / 1 tsp baking powder / 1/2 tsp sea salt / 1/2 tsp ground ginger / 4 tbsp unsalted butter, room temperature / 5 and 1/4 oz (3/4 cup) granulated sugar / 1 large egg / 1/2 cup whole milk / 15 oz (3 cups) fresh blueberries

Streusel topping: 1 and 1/2 oz (1/3 cup) cake flour / 3 and 1/2 oz (1/2 cup) granulated sugar / 1/2 tsp ground cinnamon or ground nutmeg / 4 tbsp unsalted butter (cold and cubed)

IMG_9972

Preheat the oven to 375F and lightly grease a 9″ x 9″ square baking pan with either non-stick spray or some butter.  Now start on the cake.  Whisk together the cake flour, salt, baking powder and ground ginger in a medium-sized bowl and set aside.

Using the paddle attachment on your stand mixer, beat the sugar and butter on medium speed for about one minute or until the mixture is light and fluffy.

IMG_9973

Add the egg and beat just until it’s fully incorporated.  Turn the mixer down to low speed and add in 1/3 of the dry ingredients mixture and mix just until incorporated.  Then add in 1/3 of the milk and again, mix just until incorporated.  Repeat, alternating the dry ingredients and the milk until it’s all combined.  Add in the blueberries and using a spoon, just gently stir them in.

IMG_9974

Spread the cake batter evenly into the prepared baking pan.  Now onto the streusel topping!  Combine all the ingredients for the streusel in a bowl and either using a fork, pastry cutter or your fingers, combine everything until the mixture resembles crumbs.

IMG_9976

Evenly sprinkle the streusel topping all over the cake without pressing them down.  Bake for 35 to 45 minutes or until the cake has gone golden in colour and a dry spaghetti noodle or toothpick comes out of the centre clean.  Let cool for at least 10 minutes on a cooling rack before cutting.

IMG_9981IMG_9986

I LOVED how this turned out! Tons of blueberries and the streusel topping really makes it.  Perfect with a cup of coffee or tea. This recipe is definitely going to go into heavy rotation for us!

baking, cooking, dessert, Food, recipe, recipes, Uncategorized

mini vanilla cupcakes

The recipe for mini vanilla cupcakes from the Ricardo Cuisine website (Ricardo is like the Quebec version of Jamie Oliver) has become my go-to whenever I need to make some mini cupcakes for a birthday.  It’s straightforward and always turns out well.  And for my kids’ favourite part, I like to swirl some of my own easy 3 ingredient vanilla buttercream frosting on top.

Makes 48 mini cupcakes.

cupcakes: 1 and 1/2 cups all-purpose flour / 1 and 1/2 tsp baking powder / 1/4 tsp sea salt /  2 large eggs / 1 cup granulated sugar / 1 and 1/2 tsp vanilla extract / 6 tbsp vegetable oil / 2/3 cup whole milk

buttercream frosting: 2 and 2/3 cup icing sugar / 1 cup (225 grams) unsalted butter, room temperature / 1 tsp vanilla extract

IMG_9837

Preheat the oven to 350 F and line a mini cupcake tin with paper liners.  In a medium bowl, combine the flour, baking powder and salt.

In a large mixing bowl, add the eggs, sugar and vanilla extract.  Using a paddle attachment, beat the mixture on medium-high speed for about 10 minutes or until the volume has roughly tripled.

IMG_9839IMG_9844

Switching the mixer onto a lower speed, gradually drizzle in the vegetable oil and mix until incorporated.  Next, tip in about half of the dry ingredients mixture and mix on low speed.  Then add in half the milk and mix and then again, the dry ingredients and then the milk.  Mix just until everything is combined into a smooth batter.

IMG_9846

Spoon the batter into the cupcake liners, filling each cup about 3/4 full.  Bake for about 15 to 19 minutes or until a toothpick or dry spaghetti noodle comes out clean from the centre.  Take the cupcakes out of the tin and let them cool completely on a cooling rack.

IMG_9847IMG_9852

In the meantime, make the buttercream frosting.  Simply add the icing sugar, butter and vanilla into a large mixing bowl and beat with a paddle attachment, starting on low speed and then increasing to medium high.  Beat the frosting until it’s gone creamy and smooth.  You can just spread some icing on top of the cooled cupcakes but to make them look pretty I like to pipe a swirl on top using the Wilton 1M tip.  Enjoy!

IMG_9856IMG_9855


baking, dessert, Food, recipe, recipes, Uncategorized

lemon drizzle cake

A Scottish friend introduced me to the lemon drizzle cake awhile back and I’ve been in love ever since!  I had never even heard of this cake until I tried hers but apparently it’s quite popular in the UK.  For those not in the know like I was, it’s a lemon loaf cake that is topped with – you guessed it – a sugary lemon drizzle.  I adapted Tana Ramsay’s recipe for this –  it’s super easy to make with just 5 ingredients needed.

cake:  225 grams unsalted butter, room temperature / 225 grams granulated sugar / 4 large eggs / zest of 3 lemons / 225 grams self-raising flour

drizzle: 85 grams granulated sugar / juice of 2 lemons

*If you don’t have self raising flour, you can make your own: 4 cups all-purpose flour / 2 tbsp baking powder / 1 tsp salt – mix all ingredients together and that’s it!

IMG_9801

Preheat the oven to 355 F.  Using a paddle attachment, beat the butter and sugar together on medium speed until it’s gone pale and creamy.

IMG_9802

Then add the eggs, one at at time, mixing on medium-low in between each egg until incorporated.

IMG_9803

Add in the self-raising flour and the lemon zest and mix on low speed at first (to keep from dousing yourself in flour!) and then on medium speed, just until everything is incorporated.

IMG_9804

Line a loaf pan with parchment paper, leaving some overhang to lift the cake out later.  Ideally use a pan that’s 8 cm x 21 cm but I sold mine since we were supposed to be moving and had to borrow a friend’s.  Hers is 8 x 28 cm but it made no difference really.  Spoon the batter into the pan and spread evenly.

IMG_9805

Bake for about 50 to 55 minutes or until a toothpick or dry spaghetti noodle comes out of the centre clean.  Give the cake a check around 40 minutes or so and if it is getting a bit too brown on top, tent some foil over top.

IMG_9812

After taking the cake out, mix together the sugar and lemon juice for the drizzle.

IMG_9809

Using a fork or a bamboo skewer, poke holes all over the top of the cake.  Then spoon the drizzle over top as evenly as possible.  Using the parchment, gently lift the cake out and let it cool on a cooling rack.

IMG_9813

Using a bread knife or other sharp knife, cut into slices and serve!

IMG_9817

lavender shortbread
baking, cooking, dessert, recipe, recipes, Uncategorized

lavender shortbread cookies

When I was pregnant with my first kid, I was absolutely addicted to the lavender shortbread cookies from a little coffee shop in Moose Jaw.  When we left Moose Jaw, our final stop before hitting the road was to pick up half a dozen of those cookies.  I guess it’s been about 6 years since I had one but I always thought about trying to replicate them and then I finally did it today.  I actually picked up some culinary lavender from a market in Vienna when we were there last but it’s been sitting unopened in my cupboard ever since and now that I’ve made these, I can’t believe I haven’t been making them this entire time.  I tweaked my regular shortbread recipe and these turned out soooo good with a nice, not overpowering, lavender flavour, in a tender, melt-in-your-mouth shortbread.

Makes about 40 to 50 small cookies.

1 cup salted butter, room temperature / 1/2 cup icing sugar / 1/4 cup cornstarch / 1 and 3/4 cups all-purpose flour / 2 tsp dried culinary lavender

IMG_9321

Preheat the oven to 350F and just kinda smush up the lavender with your fingers.

IMG_9322

Using a paddle attachment on your mixer, mix on medium speed until the butter until light and fluffy.

IMG_9323

In a separate bowl, combine the icing sugar, cornstarch, flour and the lavender.  Then gradually add the dry ingredients to the butter while mixing on low speed until the mixture comes together into a dough.

IMG_9324

Roll the dough out on a lightly floured surface with a lightly floured rolling pin.  The dough is quite delicate so roll it out pretty gently until the dough is about 1/4 inch thick.

IMG_9325

Using a small round cookie cutter, cut out your cookies.  I don’t have one so I actually used one of my kids’ IKEA toy cups (hence the edges aren’t particularly clean but you gotta do what you gotta do).  Of course you could make the cookies bigger or use different shape cookie cutters as well.  Space the cookies out on a parchment-lined baking sheet (they won’t really spread much) and pop into the oven for 10 minutes.

IMG_9327

Ideally, the cookies don’t get any colour to them at all so do keep an eye on them if your oven runs hot.  Once they’re out of the oven, leave them to cool on the baking sheet for about 5 minutes before transferring to a cooling rack.

IMG_9328

Seriously, so good.  I will definitely be making these again. Maybe tomorrow.

lavender shortbread

baking, cooking, dessert, Food, recipe, recipes, Uncategorized

oatmeal raisin cookies

A friend briefly mentioned oatmeal raisin cookies the other day and then I just had to make some.  Could not stop thinking about oatmeal raisin cookies.  I can’t even remember the last time I made them but I did remember that I used to always use the recipe that was just printed on the Quakers Oats packaging.  I looked through some recipes from baking blogs but I decided to just go with my O.G. tried and true and it did not disappoint.  These turn out so delicious and soft and chewy; no crispy oatmeal cookies for me thanks.  Gonna just add this to my blog now for safekeeping.

Makes 24

1/2 cup PLUS 6 tbsp unsalted butter, room temperature / 3/4 cup firmly packed brown sugar / 1/2 cup granulated sugar / 2 large eggs / 1 tsp vanilla / 1 and 1/2 cups all-purpose flour / 1 tsp baking soda / 1 tsp ground cinnamon / 1/2 tsp salt / 3 cups uncooked oats (old fashioned or quick) / 1 cup raisins

IMG_8859

Preheat the oven to 350.  Using a paddle attachment on medium speed, cream together the butter, granulated sugar and brown sugar.

IMG_8860

Then beat in the eggs and vanilla.  In a separate bowl, combine the flour, salt, baking soda, and cinnamon and then add the dry ingredients to the wet and mix until combined.  Next, mix in the oats and the raisins.

IMG_8863

My cookies were bigger than what the original recipe calls for, but I like my cookies substantial.  So I portioned them by measuring out a heaped tablespoon per cookie.  Roll the portioned dough with your hands into a ball and then place on parchment-lined cookie sheets.  (I flattened the dough balls slightly but I would probably just leave them as balls next time so there’s less spread and I get a bit of a fatter cookie.)  Make sure to space out the cookies because they will spread out as they bake.

IMG_8864

Bake for 9 to 12 minutes or until the edges are juuuuust turning ever so slightly golden brown.  They will still be quite soft but you don’t want to over bake because then you’ll get crispy oatmeal cookies and that would suck.

After removing from the oven, leave the cookies on the cookie sheet for a few minutes because they are still pretty soft and you don’t want them to break apart.  Then transfer to a cooling rack to let them cool.  Or just eat them warm.  Live your life to the fullest!

IMG_8870IMG_8873

baking, breakfast, brunch, cooking, dessert, Food, recipe, recipes, Uncategorized

mini banana muffins

Bananas here in Saudi seem to over-ripen super quick so I have made this recipe more times than I can count.  I adapted this recipe from one I found on allrecipes.com and it is super quick and easy.  And most importantly, kids absolutely LOVE them!

Makes 48 mini muffins

1 and 1/2 cups all-purpose flour / 1 tsp baking powder / 1 tsp baking soda / 4 ripe bananas, mashed  / 1/2 cup granulated sugar / 1/3 cup melted butter / 1 large egg

IMG_2800

Preheat your oven to 375F.  In a large bowl, mix together the flour, baking soda and baking powder.  In a separate bowl, mix together the melted butter, the mashed bananas, sugar, and the egg.

IMG_2801

Add the wet ingredients into the dry ingredients and mix until just combined.

IMG_2802

Spoon the batter evenly into the muffin tin cups.  I like to use paper liners but I’ve also baked these without liners when I don’t have any (like this time!) Just grease with some butter or spray with a baking spray and they’ll be fine.

IMG_2803

Bake for about 15 minutes or until a toothpick (or my preferred tool – a dry spaghetti noodle) comes out clean.

IMG_2805