cornflake chicken strips
cooking, Food, recipe, Uncategorized

cornflake chicken strips

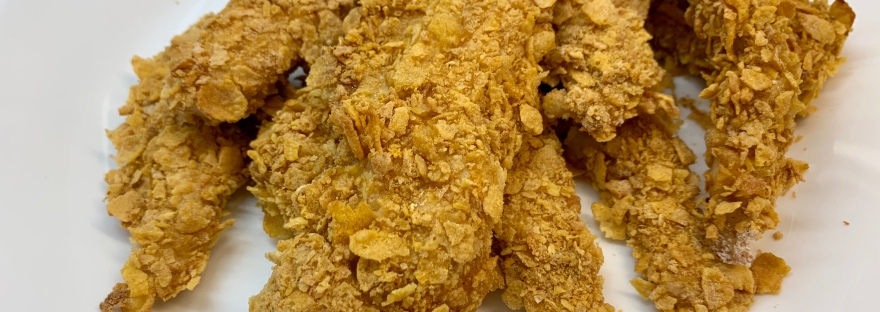
A friend sent me a recipe for cornflake chicken awhile back saying it was one of her kids’ favourite meals.  I think I misread the directions in the recipe, but they turned out to be chicken strips – and my kids LOVED them!  This isn’t that exact recipe but it doesn’t matter because my kids still love these and actually beg me to make them.  Definitely healthier than frozen chicken strips as they’re coated with cornflakes instead of breading and they are baked.  But still satisfyingly crunchy and yummy!

450 grams skinless, boneless chicken breasts / 2 eggs / 3/4 cup all-purpose flour / 1 tsp garlic powder / 1 and 1/2 tsp seasoned salt / 1 tsp paprika / 1/4 tsp cayenne pepper / 2 cups cornflakes

IMG_3043

First, preheat the oven to 400 F and then move onto all the prep. In a dish or a shallow bowl, lightly scramble the eggs and set aside.  On a large plate, combine the flour, garlic powder, seasoned salt, paprika and cayenne.  On another large plate, crush up the cornflakes just with your hands.  Then for the chicken breasts, cut lengthwise into strips.

IMG_3046

Now, to coat the chicken.  For each strip, first dredge the chicken the flour mixture to coat evenly.  Then, dip into the egg until also coated and then press into the crushed cornflakes on both sides.  After coating each strip, place on a parchment paper-lined baking sheet and continue with all the chicken until done.

IMG_3048

Pop into the oven for 20 minutes – the chicken should be completely cooked through by then but you should check just to be sure.

IMG_3049

And you’re done!  We had these with the classic kiddie favourite dips – ketchup and mayonnaise.

cornflake chicken strips

cooking, Food, recipe, Uncategorized

roasted miso chicken

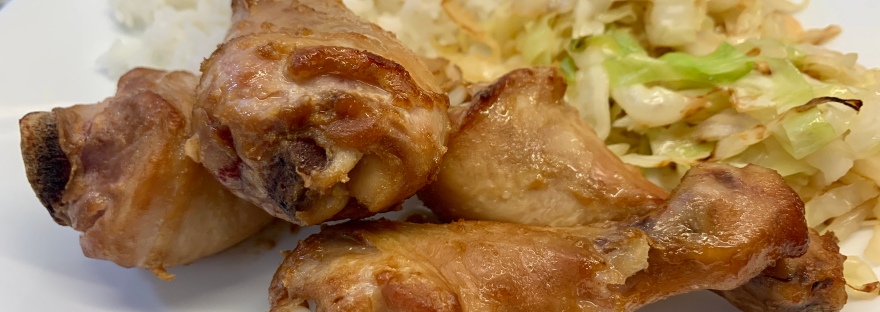
I had never thought about cooking chicken with miso before but then I found this Nigella Lawson recipe in one of her books for a butterflied chicken with miso and sesame seeds.  This recipe is based off of that and with the flavours really dialled up.  This will give you really tasty chicken with solid miso flavour and also some sesame and garlic.  I used drumsticks this time because that’s what they had in the shop plus sometimes I’m too impatient to roast a whole chicken but you could do this with a whole chicken or chicken thighs too.

about 900 grams bone-in, skin-on chicken / 3 tbsp white miso paste / 1 tbsp soy sauce / 2 tsp sesame oil / 2 tsp fish sauce / 2 cloves garlic, minced

IMG_2810

Mix together the miso paste, soy sauce, sesame oil, fish sauce and garlic to make the marinade.  I did this in a glass baking dish but you could also use a large bowl or a large ziplock bag.

IMG_2811

Add in the chicken and make sure the chicken is all coated with the marinade.  Cover with clingfilm (or if using a ziplock, just zip it up) and put in the fridge to marinate overnight.

IMG_2813

When it’s time to cook, heat the oven to 425 F.  Place the chicken onto a roasting rack in a roasting tray.  Pro tip! Line the roasting tray with parchment first to make washing up a breeze.  I don’t always do this and then Rock nags me because I make him do the dishes.

IMG_2832

Pop into the oven for about 40 minutes, flipping the chicken over halfway through to make sure both sides of the chicken are nice and browned.  The chicken is definitely done when you check with a meat thermometer and get an internal temperature of 165 F.

IMG_2836

And then you’re done!  Plate up.  We had this with some calrose or sushi rice and a bit of sautéed shredded cabbage.

roasted miso chickenIMG_2840

sourdough rye bread
baking, breakfast, cooking, Food, recipe, Uncategorized

sourdough rye bread

Rock has decided to blog for the first time in possibly a couple of years! He always wants me to edit his English but… I’m not going to. Here he is!

Bread is one of the principal forms of food for man from the dawn of time.  Archeologist found proof of stone-crushing barley and wheat use to make floor thought to be 7500 years old.  In the British Museums’ Egyptian galleries, you can see loaves which were made and baked over 5000 years old.  

My rye bread is actually quite easy to bake.  The difficult part is to get the sourdough starter strong enough to make a delicious loaf.  This part can take weeks or you can ask a friend to share some of them with you.  Linzi was kind enough to share hers with us.   The starter is actually natural yeast. The recipe is simple; 100 gr of floor, 100 ml of water and a tablespoon of yesterday mix all together.  You repeat this until the mixture double his size in 6 hours. Every day you need to feed it.   If you don’t bake, the major part of the mixture will be discarded.   This ratio is sufficient to bake a bread and have enough left for a feeding.

When the sourdough starter doubles his size in 6 hours and the smell is very sour, you can put together the ingredients to bake your bread.

2 cups of all-purpose flour / 1 cup of rye flour / ¾ cup sourdough starter / 1 ¼ cups of warm water / 1 tablespoon of honey (optional) / 1 and ½ teaspoon of salt

IMG_7172

I mix the dry ingredients, flour and salt, first in the mixer bowl.  Then, I mix the water, the sourdough starter and the honey in a different bowl. The honey is optional but it will give you a nice brown color and a boost for the yeast.  Add the wet ingredient into the dry ingredients and mix until combined; cover with a dishtowel and let sit for 15 minutes.

IMG_7174

Using the dough hook, knead the dough for 5 minutes at medium speed.  Most likely you will need to add flour.  The goal here is to have a dough that is still clinging to the bottom of the bowl but clearing the upper part of the bowl.  The dough will be wet and sticky so don’t use too much flour.

IMG_7178

Transfer the dough into a medium size bowl coated with a little of oil; I use olive oil.  Cover with a plastic sheet and let rise for 3 hours.  I turn and fold the dough once or twice during the first rise.  The texture of the dough will change rapidly from a stick ball to a firm, none sticky, very elastic dough.  The smell will get stronger too.

After 3 hours, I turn and fold it again.  I form a nice ball and transfer it on a parchment paper.  I use an upside-down bowl to cover the dough for the second rise, about 2.5 hours.

IMG_7179

20 minutes before the end of the second rise, I put a pizza stone in the oven and turn it to 450 F.  This will permit the stone to warm up nicely.  

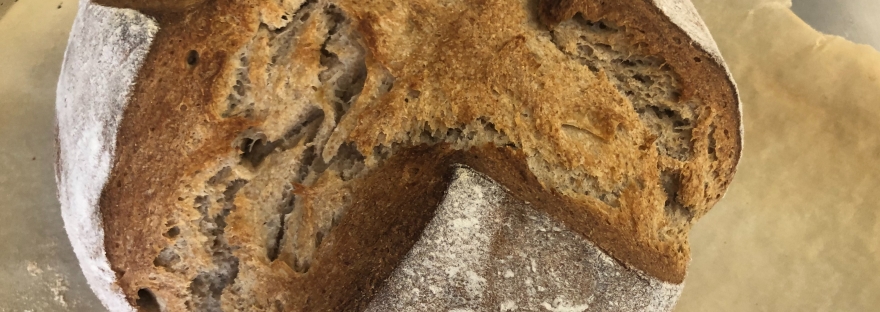
When ready, I dust up the dough with some flour and make some cut in the middle, about 1 cm deep.  Set the dough in the middle of the pizza stone and bake for 30 min.

IMG_7199

Then remove the bread from the pizza stone and transfer it on a cooling rack.

Et voila!

IMG_7200

I really like this bread.  We tried different kind of flour.  If you use 3 cup of all-purpose flour you will get a better rise and the final product is less dense.  The next experiment will be with spelt flour. 

No-bake cheesecake
cooking, dessert, Food, recipe, recipes, Uncategorized

no-bake cheesecake

I don’t know why I haven’t been making more no-bake cheesecakes in my life! I have made more cheesecakes than I can count and I know basically every trick in the book for getting cheesecakes to bake up just right.  But this was just so damn easy!!!  And while not like a baked cheesecake, I think it’s just as delicious – just different.  The filling is much lighter and mousse-like and just lightly sweetened. Nothing wrong with that.

I decided to make this today because for the first time since we moved to Saudi, I found bricks of real cream cheese!  (All that’s ever been available is the spreadable form of cream cheese in tubs.)  This is adapted from Nigella Lawson’s Cherry Cheesecake recipe and it is just so easy and soooo delicious.  Just note that while I’ve already made a more substantial crust, this recipe doesn’t yield the tallest cheesecake.  Which we’re totally happy with but if you want a tall/deep cheesecake like say New York-style, then I would suggest you double the ingredients for the filling.

Crust: 250 grams digestive biscuits or graham crackers / 150 grams (6 tbsp) unsalted butter, melted

Filling: 300 grams (10 oz) cream cheese, room temperature (the kind in brick form, not in a tub) / 60 grams (1/2 cup) icing sugar / 1 tsp vanilla extract / 1/2 tsp fresh lemon juice (which I forgot – oops!) / 1 cup heavy or whipping cream

Optional topping: 3 cups of strawberries, hulled / 2 tbsp granulated sugar

IMG_1549

Blitz the digestive crackers or graham crackers until they’re crumbs in either a blender or food processor.  Add in the melted butter and pulse to combine.

IMG_1572

Press the crust mixture into the bottom of an 8 inch springform pan.

IMG_1574

Pop into the fridge just to chill and let it set up a bit while you move onto the filling.  Beat together the cream cheese, icing sugar, vanilla and lemon juice until smooth.  I used the paddle attachment on my stand mixer because I’m lazy but you could always just do it by hand.

IMG_1575

In a separate bowl, whip the cream until you get medium peaks. (Nigella’s recipe said to just “lightly whip” but I figured medium peaks was a good middle ground.)  Again I used my stand mixer with the whisk attachment but you could just whisk it by hand.

IMG_1576

Using a spatula, gently fold the whipping cream by hand into the cream cheese mixture until everything is combined and smooth.

IMG_1577

Gently spoon the filling onto the crust and spread evenly.

IMG_1578

Cover with clingfilm and chill and set in the fridge for minimum 3 hours or overnight. (I obviously went with the bare minimum.)

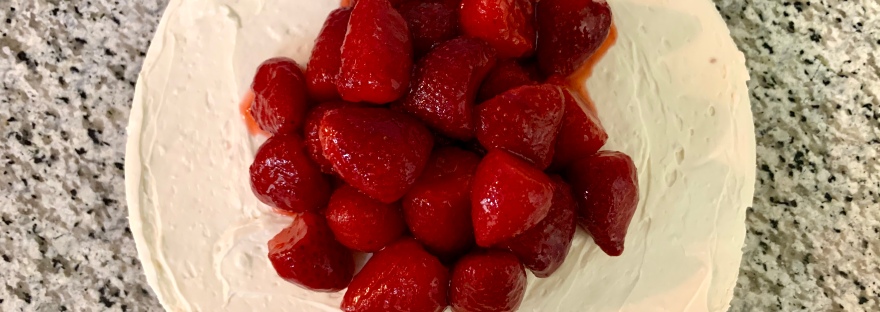
If you want you can have the cheesecake on it’s own. Or you can top it with some macerated strawberries.  The shop was completely out of fresh strawberries so I used some defrosted frozen ones – not ideal but still did the trick. Simply mix the strawberries with the sugar and let it sit at room temperature for about 30 minutes.  I piled up most of the strawberries on top of the cheesecake with some extra on the side but you can do whatever you’d like obviously.  Slice up and enjoy!

No-bake cheesecake


grilled three-cheese sandwich
cooking, Food, recipe, recipes, Uncategorized

grilled three-cheese sandwich

Disney has been posting a bunch of recipes from the Disney Parks which we’ve really enjoyed as we’re big Disney fans!  A while ago we made a couple of our Disneyland faves – their churros and dole whip with the kids which was a total hit.  So I decided to try their grilled three-cheese sandwich from Woody’s Lunch Box in Disney’s Hollywood Studios which we haven’t actually had there but it was, no surprise, amazing!  I tweaked the recipe a bit and Rock baked a fresh loaf of sourdough and we were on our way.

This does make 4 LARGE sandwiches.  If you were to use say sandwich bread, you could easily cut all the ingredients (minus the number of bread slices) in half.  Or just have it be super cheesy, which wouldn’t be bad either!

Makes 4 sandwiches.

cream cheese spread: 1/2 cup spreadable cream cheese (the kind in a tub, not a brick) / 1/2 cup finely shredded sharp cheddar or double Gloucester / 1/4 tsp sea salt

garlic spread: 1/2 cup mayonnaise / 1/ and 1/2 tsp minced garlic / 1/2 tsp sea salt

8 slices of artisan bread (we used homemade sourdough) / 8 slices of cheddar / 8 slices of provolone

IMG_1356

First make the two spreads.  For the cream cheese spread, simply mix all the ingredients for it together in a small bowl.  And for the garlic spread, you guessed it, mix all the ingredients together in a bowl.

IMG_1357

On 4 slices of bread, place 2 slices of cheddar on each and then place 2 slices of provolone on each of the remaining 4 slices of bread.  Spread a quarter of the cream cheese spread on each of the slices with provolone.

IMG_1359

Sandwich the cheddar and provolone sides together and then spread the garlic spread on  the top side of the sandwiches.

IMG_1360

Heat up a large frying pan over medium heat and then place the sandwiches, garlic spread side down and grill for about 2 minutes or until the cheese is starting to melt and the bread is golden brown.  Spread the garlic spread on the now top side of the sandwich and flip the sandwich over to cook for another 2 minutes or so on the other side.

IMG_1362

Once all the cheese is melted and gooey and the bread is all nicely golden browned all over, they’re done! Slice in half and eat!

grilled three-cheese sandwich

chicken sausage rolls
appetizers, brunch, cooking, Food, recipe, Uncategorized

chicken sausage rolls

Back when I was in Darwin, Australia, I briefly worked at the best little pie shop ever and ate their sausage rolls probably everyday.  I have LOVED sausage rolls ever since! But in Saudi of course we can’t get any pork sausage.  Then awhile back, a friend dropped off some chicken sausage rolls that she made and I realized, I should’ve been making chicken sausage rolls this whole time!

I wasn’t that happy with my first attempt but I’ve been working on a recipe for awhile and THIS I am very happy with.  The chicken sausage is very flavourful and not dry at all.  I minced up chicken thighs with our Kitchenaid meat grinder but of course you can just use store-bought ground chicken.

Makes 15 sausage rolls or 45 bite-sized sausage rolls.

Sausage filling:  450 grams ground chicken (mince) / 1/4 cup bread crumbs / 1 tsp dried rosemary / 1 tsp dried basil / 1 tsp dried oregano / 1 and 1/2 tsp sweet paprika / 1 tsp onion powder / 1 and 1/2 tsp garlic powder / 1 tsp sea salt / 1/4 tsp ground black pepper / 1 tsp Worcestershire sauce / 1 and 1/2 tbsp cold water /

15 squares of frozen puff pastry, defrosted but still cold / 1 egg

IMG_1173

Preheat the oven to 400 F.  And then easy enough, combine all the ingredients for the sausage filling in a large bowl.  You can stir together or just mix with your hands until everything is mixed well together.

IMG_1176

Now start assembling the sausage rolls.  Place about 2 tablespoons of sausage filling just off-centre along each square of puff pastry.  Make sure to spread the sausage evenly from top of the square to the bottom.  In a small bowl, lightly beat the egg to make an egg wash.

IMG_1177

Tightly roll the pasty over starting with the side that’s closer to the filling.  Just before sealing, brush the bottom side of the pastry with the egg wash.  Keep rolling and then with the seam-side down, gently push down to seal the pastry.

IMG_1179

IMG_1180

If you want you can leave the sausage rolls whole but my kids prefer them when they’re more bite-sized.  So if you’d like to make bite-sized rolls, use a sharp knife and cut each roll into thirds.  Then, brush the top of each roll with egg wash.

IMG_1181

Bake for 25 to 30 minutes or until your pastry is nicely golden brown.

chicken sausage rolls

And enjoy!  Eat on their own or as we like to do, dip into some ketchup.

chicken sausage rolls

homemade paneer
cooking, Food, Indian food, recipe, Uncategorized

homemade paneer

There’s a recipe for the Indian fresh cheese paneer in the cookbook Made In India by Meera Sodha that I’ve always eyed over the years but never tried making.  Nowadays though I can’t find any store-bought paneer so I decided to give homemade paneer a shot.  Turns out it’s actually really easy! Plus there’s only 2 ingredients.  The recipe from my book doesn’t give very detailed instructions and my first attempt wasn’t perfect (my milk boiled over everywhere and didn’t properly curdle) but after watching some Youtube videos, I’ve got it down now.

Makes about 200 grams of paneer.

8 cups whole milk / 1/4 cup fresh lemon juice

IMG_0929

In a large saucepan or pot, heat the milk over medium heat until it comes to a boil.  On my first go at the recipe I had the heat set on high which was a big mistake so keep it on medium.  Stir frequently to keep the milk from burning on the bottom – this will take some time so try and be patient.  I didn’t set a timer but I think it took about 20 minutes at least for fridge-cold milk to boil.  As soon as it’s come to a boil, turn the heat down to low.

IMG_0938

Add the lemon juice and stir.  It should start curdling pretty much right away – which is the curds separating from the whey and forming lumps.  I kept it on low and kept stirring for a few minutes just to really get the curds forming.

IMG_0944

Line either a large colander or a strainer set over a large bowl with a few layers of cheesecloth and ladle the curds in.  The whey will drain through and you’ll be left with just the curds.

IMG_0954

Rinse the curds under some cold water (I just ran it under the tap) to wash off the lemon juice.

IMG_0957

Using the corners of the cheesecloth, twist together until it’s tight and squeeze the liquid out of the curds.

IMG_0958

Meera says to leave the paneer in the colander with a weight on top but I found that whatever I put on it kept falling over.  So I ended up putting the paneer – still tightly twisted up in the cheesecloth – on a plate, then putting a frying pan on top of the paneer, and then a bag of rice in the pan and that did the trick.  You just want to weigh the paneer down and press it into a solid cheese.  Leave for 2 to 3 hours or until it feels firm.

homemade paneer

Then put it in the fridge either wrapped in plastic wrap or in a container until you use it. You can keep it in the fridge for about 3 days.  The paneer turned out great and it really is unbelievably easy to make!  Plus it doesn’t have all the extra ingredients and additives that are in store-bought paneer.  Definitely worth giving a shot – if you need inspiration, we made palak paneer with this today!

IMG_0963

German apple cake
baking, cooking, dessert, Food, German food, recipes, Uncategorized

german apple cake

I have been thinking about making a German apple cake, or Versunkener Apfelkuchen, for awhile and I happen to have a lot of apples at the moment so I figured today would be a good day!  I decided to use this recipe that I found off a blog that has quite a lot of German recipes called Plated Cravings.  I did add cinnamon to the recipe though because I just love apples with cinnamon together.

4 small apples (I used Granny Smith) / 1/2 cup (115 grams) unsalted butter, room temperature / 1/2 cup granulated sugar / 2 tsp vanilla extract / 2 tsp fresh lemon juice / 3 large eggs / 1 and 1/2 cups cake flour / 2 tsp baking powder / 1 tsp ground cinnamon / 1/4 tsp sea salt / 2 tbsp whole milk / icing sugar (optional)

IMG_0884

Preheat the oven to 350 F and either grease or line with parchment paper a 9″ or 10″ springform pan.  Start with the apples by peeling and quartering them.  Then, using a small sharp knife, cut thin slices into the apple quarters lengthwise about 3/4 of the way through the apple so that you’re not cutting all the way through.

IMG_0885

Using the paddle attachment on your stand mixer, beat the butter on medium speed until creamy and then add in the sugar.  Beat together until light and fluffy.

IMG_0886

Add in the eggs one at a time.  Mix in between each addition just until the egg is incorporated into the butter/sugar mixture.  Then mix in the vanilla and lemon juice.

IMG_0887

In a medium bowl, whisk together the flour, baking powder, cinnamon and salt.

IMG_0888

Add half of the dry ingredients mixture into the stand mixer bowl and stir just until incorporated.  Add in 1 tbsp of the milk and again, stir just until incorporated as you don’t want to over-mix at this stage.  Add in the rest of the dry ingredients, stir in, and then the other 1 tbsp of milk and again, stir in.

IMG_0889

You’ll end up with quite a thick cake batter.  Evenly spread the batter into your springform pan and then place the apple quarters with the sliced sides up on top.  You don’t need to press the apples into the batter as the cake will rise up around the apples as it bakes.

IMG_0890

Bake for about 45 minutes or until a toothpick or dry spaghetti noodle comes out of the centre clean.  You can take the springform ring off the pan and let the cake cool on a cooling rack.

IMG_0891

Once the cake has cooled, if you want, you can use a sieve or sifter to dust some icing sugar over top.  This cake turned out so great – it’s quite light and not too sweet.  We just had the cake on its own but apparently it would go great with some whipped cream or some vanilla ice cream as well.  Enjoy!

German apple cake

chewy two-bite brownies
baking, cooking, dessert, Food, recipe, Uncategorized

chewy two-bite brownies

I haven’t had them in a couple years but I found myself craving those addictive store-bought two-bite brownies the other day.  They don’t have them here in Saudi so I figured I’d make them! Problem is – I suck at brownies.  I think it’s one of those things that are supposed to be super easy but it can be hard to get them just right.  Anyway, I was determined to finally be able to make brownies!!

Personally, I like a chewy almost fudgy brownie – no cakey brownies for me thanks.  I read a ton of articles online about brownies, scoured lots of recipes, had one pretty epic fail, but then… I made these and they turned out fab!  They are a little crispy around the edges and then dense and chewy in the middle with a great chocolate flavour.  I used Martha Stewart’s recipe for Chewy Brownies (with just a couple of minor tweaks) and adapted it to be two-bite brownies.

Makes 30 two-bite brownies.

7 tbsp (99 grams) unsalted butter /  7 oz (200 grams) unsweetened baking chocolate / 3 tbsp canola oil / 3/4 cup and 2 tbsp all-purpose flour / 1/4 tsp baking powder / 1/2 tsp sea salt / 1 cup granulated sugar / 1 cup light brown sugar, lightly packed / 3 large eggs, room temperature / Pam non-stick baking spray (the type with flour in it)

IMG_0709

Preheat the oven to 350 F.  In a small to medium saucepan, bring some water to a boil and then lower to a simmer.  You don’t want too much water – just enough to simmer without touching the bottom of a large bowl that you set on top – like a double boiler.  Add the chocolate, butter and oil to the bowl and let it melt altogether, stirring occasionally.

IMG_0710

Take the bowl off the saucepan and mix in the granulated and brown sugars.

IMG_0711

Next, add in there eggs and mix until all combined.  The original recipe says to whisk for about 45 seconds or until smooth and glossy which will give your brownies that shiny crackly top but I don’t really care for that.  However, if you want that – go for it!

IMG_0712

In a medium bowl, whisk together the flour, baking powder and salt.  Then add these dry ingredients into the chocolate mixture and stir just until incorporated.

IMG_0713

Now, spray the crap out of your mini muffin tin with the non-stick baking spray.  This part is key! In my epic fail batch, which to be fair was also a totally different recipe, I just buttered the tin and all the brownies completely stuck to it.  So just to be sure, make sure the tin is really well coated with the baking spray.  If you don’t have the spray, I would make sure the tin is really well greased with butter and then also lightly floured.  Alternatively, you could also line the tin with mini muffin paper liners.

Measure out 1 tablespoon of batter for each brownie.  You don’t want to overfill them as you don’t want these to overflow or have a muffin top like a cupcake would.

IMG_0714IMG_0716

Bake for about 20 to 25 minutes.  You’ll know they are done when a toothpick or dry spaghetti noodle comes out of the centre with moist crumbs on it.  If it comes out with wet batter on it, they’re not done yet.  But also if it comes out clean then they’re overcooked. I know – stressful!  So just check around the 20 minute mark as you don’t want to end up with dry overdone brownies.

IMG_0717

Let the brownies cool in the tin on a cooling rack for about 20 minutes.  And then they should be easily popped out of the tin and you can let them continue cooling on the rack. Enjoy!

chewy two-bite brownies

masala chai pound cake
baking, breakfast, cooking, dessert, Food, recipe, Uncategorized

masala chai pound cake

After making my espresso coffee cake, I started thinking about making a cake using tea.  I decided to try making a chai cake and I found a recipe for a chai-spiced pound cake on the King Arthur Flour website that looked good but I wanted it to actually have tea in it as well and not just the spices.  So I spent a silly amount of time reading up on adding tea into baked goods – the easiest way would be to steep tea in milk or another liquid used in your recipe but this pound cake recipe didn’t have any liquid in it.  So I decided to infuse the butter with tea!

A couple of things – you do need to melt the butter, infuse it, and then let it cool back to room temperature which takes some time so just keep that in mind.  And also, you’ll need to start off with more butter than is needed in the recipe because after you add the tea, the tea will absorb some of the butter and you’ll lose some as you strain it.  The end result is fab though – the cake actually tastes like a warming cup of masala chai.

300 grams of unsalted butter (the cake will actually only require 16 tbsp or 227 grams of infused butter) / 4 black tea bags / 1 cup light brown sugar / 1/4 cup honey / 2 large eggs, room temperature / 1 tsp baking powder / 1/4 tsp baking soda / 1 tsp sea salt / 1 tbsp ground cinnamon / 2 tsp ground ginger / 2 tsp ground cardamom / 1 and 1/2 tsp ground allspice or ground cloves / 1 tsp black pepper powder / 2 cups all-purpose flour 1 cup full fat Greek yogurt, room temperature / 2 tsp vanilla extract

IMG_0488 2

In a small saucepan over medium heat, add the butter and melt.  Tear open the tea bags and add the tea leaves to the melted butter.  Open at least one of the tea bags carefully so that you can use it to line a small strainer. Turn the heat down to low and let the tea steep in the butter for 5 minutes.

IMG_0496

Take the saucepan off the heat and let it steep for a further 5 minutes.  Using one of the opened tea bags, line a small strainer and then pour the butter through to strain out the tea. If a bit of the tea does end up in the butter, no big deal.

IMG_0494 2

OK and now for what I found to be the toughest part – waiting for the butter to cool and solidify as the recipe requires room temperature, not melted, butter!  I’m pretty impatient so I stuck the bowl in the fridge for about 40 minutes, giving it a stir a couple times.

IMG_0497 2

Hard part is done.  Preheat the oven to 350F.  Add 227 grams or 16 tbsp of the tea-infused butter, the brown sugar and the honey to the bowl of a stand mixer.  Using a paddle attachment, beat at medium speed for two minutes.

IMG_0498 2

Add the eggs one at a time.  Beat on medium speed for two minutes in between each addition.  Then stir in the baking powder, baking soda, salt, cinnamon, ginger, cardamom, allspice or cloves and black pepper.

IMG_0499 2

Stir in half of the flour just until incorporated and then add in the yogurt and vanilla.  Again, stir just until incorporated.  Scrape down the sides of the bowl as needed. Add in the last half of the flour and stir just until incorporated.

IMG_0501 2

Lightly grease with butter and lightly flour a 9 or 10-cup bundt pan.  Spread the cake pan evenly into the pan.

IMG_0502 2

Bake for about 50 minutes or until a toothpick / dry spaghetti noodle comes out of the centre clean.  Let the cake cool in the pan for about 15 minutes before removing from the pan.

IMG_0503 2

Let the cake cool completely on a cooling rack before slicing.  Enjoy!

masala chai pound cakeIMG_0512 2