baked portuguese chicken rice, po gok gai fan
Food, macanese food, recipe

baked portuguese chicken rice (po gok gai fan)

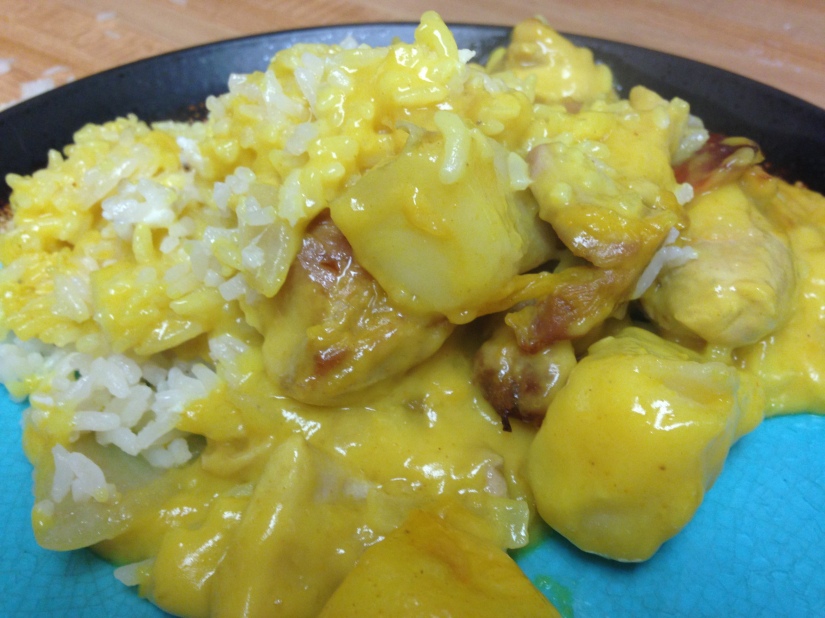
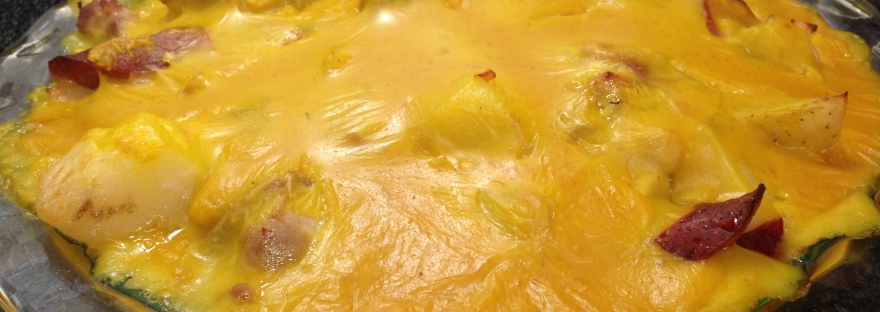
As my mom grew up in Macau, baked Portuguese chicken rice is one of my favourite things to eat.  It’s not really a Portuguese dish but originates from Macau.  If you’ve never had it before, its basically chicken and potatoes on top of fried rice, smothered in a creamy yellow sauce and then baked.  (And when my uncle took me to my grandpa’s favourite restaurant in Macau to eat this dish, it had chorizo in it too.)  You can easily find this in any Hong Kong style restaurant.  Sounds simple but I had never been able to pinpoint what the exact flavours in it are.

I’ve been craving this dish but short of a plane ride to Vancouver, I was not very close to getting it.  I’ve researched recipes online on and off for months (apparently I have way too much time on my hands!) but none of them sounded quite right to me.  There were certain ingredients which I agreed on but that was about it.  Some have curry powder in it but I’m pretty sure there’s not supposed to be any actual curry; it’s just that the sauce is yellow!  I had the same experience when I wanted to make hong kong style baked pork chop rice and couldn’t find a recipe I liked so I had to come up with my own.  And what’s super exciting (to me anyway) is if you google this dish now, my recipe is the very first link that comes up and I get multiple hits on that recipe from all over the world everyday!  Hopefully this recipe will be just as popular!

This recipe has 3 parts; the fried rice, the chicken, and the sauce:

~ 4 cups of cooked rice that has been refrigerated for at least a few hours, preferably overnight  /  2 large eggs  /  canola oil /  salt and pepper to taste

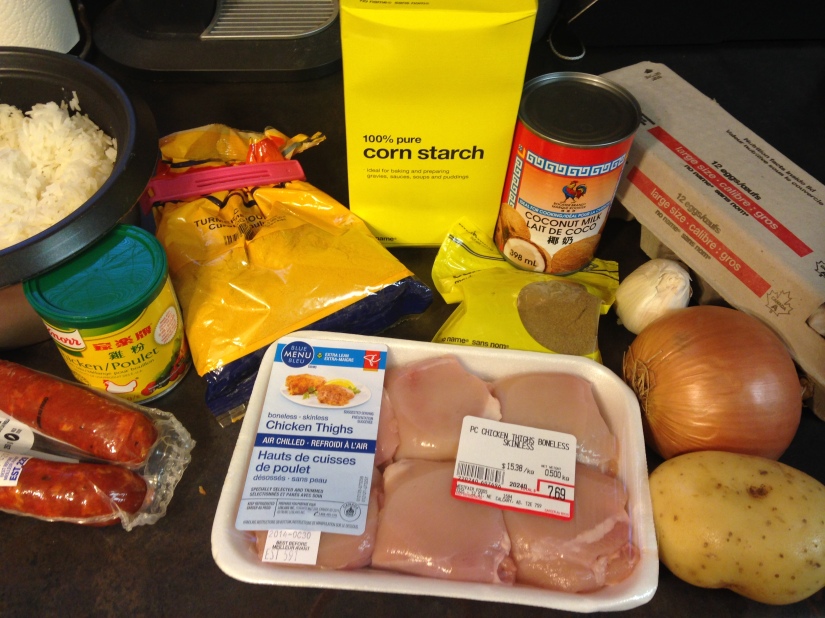
~ 6 skinless and boneless chicken thighs  /  1/2 medium yellow onion  /  2 cloves garlic  /  1 medium white potato  /  1/2 link of chorizo  /  canola oil  /  salt to taste

1 can coconut milk  /  1 cup chicken broth  /  1 pinch of ground cumin  /  2 tsp ground turmeric  /  3 tbsp cornstarch  /  salt to taste

photo 1-4

First, preheat the oven to 350F and then start on the fried rice.  The way I like to make it is just heat up some oil in a large frying pan over medium-high heat then add the cold rice in.  Stir around and let it heat up then make a little well in the middle of the rice.  In a small bowl, scramble the eggs with a bit of salt and pepper and then pour into the middle of the rice.  Let it cook for just a little bit then just stir fry it all together until it’s cooked to your liking and then set aside in a large pie plate or casserole.

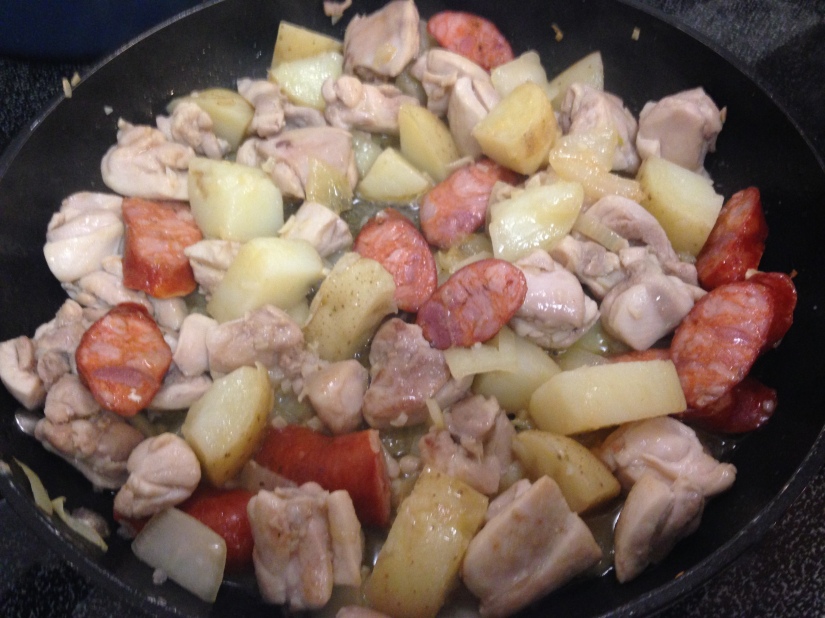
Next, cube up the potato into roughly 1 inch pieces and bring to a boil in a small saucepan of water until fork tender.  In the meantime, mince the garlic, roughly chop up the onion, slice up the chorizo and cube the chicken thighs again into roughly 1 inch pieces.  Heat up some oil in the frying pan over medium to medium-high heat and toss in the garlic and onion and let it cook a bit.  Add in the chicken and let it brown up a bit and then add the chorizo and potatoes.  Let it cook, giving it a stir every now and again for about 8 to 10 minutes.

photo 2-6

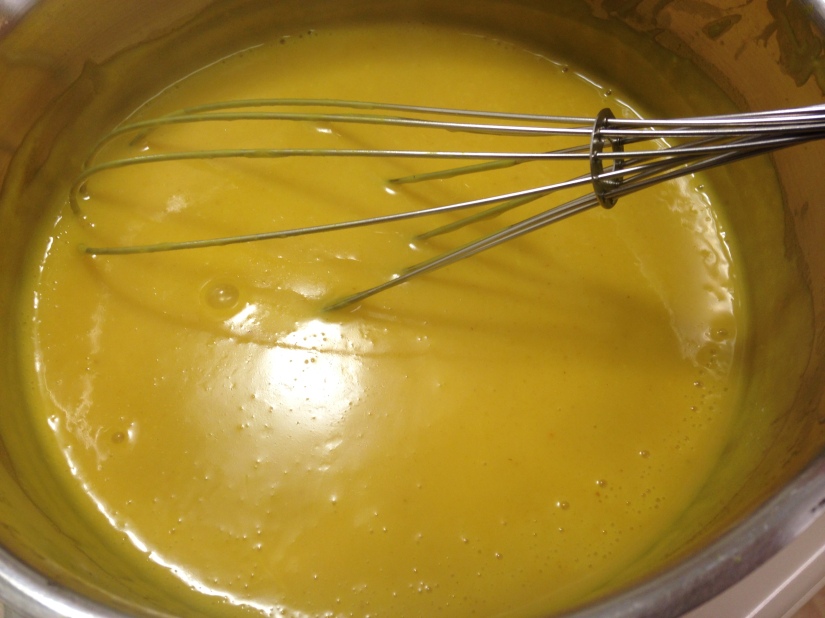
Next, throw together the sauce.  In a medium size saucepan over medium heat, mix together the coconut milk, chicken broth, turmeric and cumin.  When it’s heated up a bit, mix the cornstarch with some cold water (it should have the consistency of milk) and then pour that in and bring it to a boil while constantly whisking for at least a minute.  It should thicken up quite a bit.  Season to taste with some salt.

photo 3-7

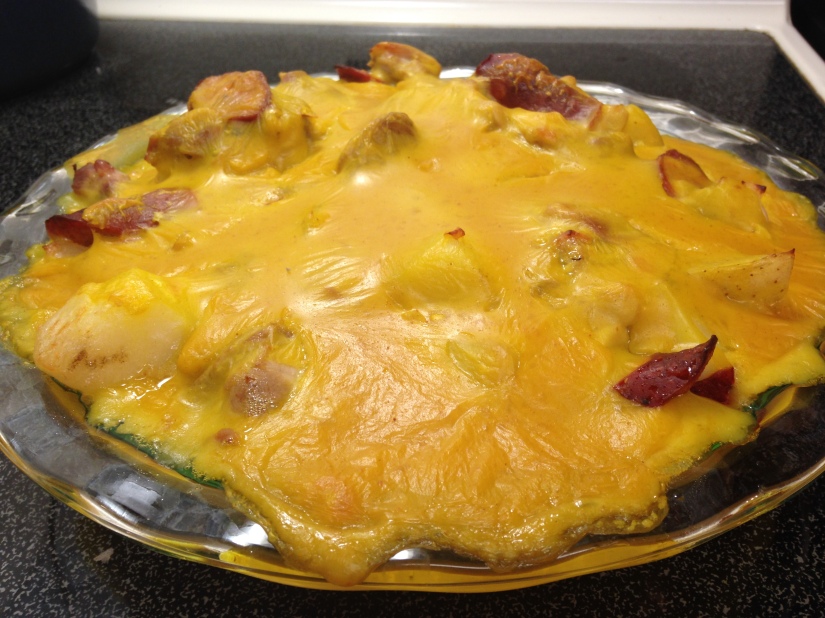
Now assemble it all together.  Layer the chicken, potatoes and chorizo mixture over the rice.  Then pour the sauce all over top.  Toss into the oven and let it bake for about 20 minutes and you’re done!

baked portuguese chicken rice

photo 5

I’m quite happy with the results!  The sauce tastes really close, I think, to what you can find in restaurants and I think that’s the key part.  If anyone has any suggestions for making this dish, I would love that but overall I’m happy with this.  Rock says it’s very good and tastes like what he’s had out in Vancouver. Yay!
baking, breakfast, Chinese food, dessert, Food, recipe

for the love of chinese buns: gai mei bao (chinese cocktail buns)

If you’ve never been to a Chinese/Hong Kong bakery, you need to try and remedy that immediately.  The best ones are in Vancouver (my favourite is Michelle Cake House in Kerrisdale) probably because there are so many people who are originally from Hong Kong there.  Unfortunately, and of course, there are none here in Moose Jaw.  My friend Katharina says there’s a place in Regina but when we tried to check it out, it was closed for renovations so I can’t comment on that just yet.  Of all the yummy Hong Kong-style buns, my favourite ever since I was a kid is gai mei bao which literally translates into cock (chicken) tail bun.  No actual chicken tails in these buns though.  If you’ve never had gai mei bao before, they’re filled with the yummiest buttery coconut filling; sooo good.  These buns are also the favourite of my family and ever since I introduced them to Rock, he has become completely obsessed.  Every time we go to Vancouver for a visit, my dad feeds Rock gai me bao throughout our stay and then also picks up like a dozen right before we leave for Rock to bring back.

Anyway, since it’s still Arctic temperatures outside today, it seemed like the opportune time to give these bad boys a try.  I don’t know anyone that’s ever made gai mei bao from scratch, but I guess our recent bagel-making has given us a boost of confidence in our baking abilities.  I’ve given separate recipes for the 3 parts that go into these buns just ‘cus it’s easier to follow: the dough, the filling, and the topping.

Makes 12.

bun dough:  water roux (150 ml water + 3 tbsp all-purpose flour)  / 2 eggs  / 1/4 cup sugar  / 2 tbsp butter  /  1 and 1/4 cups bread flour  /  ~ 1 and 1/4 cups all-purpose flour (you may need up to another 1/4 cup or so if the dough is sticky) /  2 and 1/4 tsp active dry yeast (plus 1 tsp sugar + 1/4 cup warm water to proof)

bun filling:  1 cup unsweetened fine coconut  /  1 cup all-purpose flour  /  1/3 cup custard powder  /  1 and 1/4 cups butter  /  1/2 cup sugar  /  1 cup whole milk powder  /  2 tbsp water  (this makes quite a lot of filling but there’s nothing worse than biting into a gai mei bao and it’s mostly bun with only a little bit of filling smack in the middle.  my feelings towards filling is similar to my feelings towards sauce: the more the better)

bun topping:  1/8 cup butter ( room temperature)  /  1/8 cup all-purpose flour  /  1 egg, beaten /  1/2 tsp sugar   /  ~  1 tbsp raw sesame seeds  /  sugar syrup (1 tbsp sugar mixed with 1 and 1/2 tbsp hot water)

photo-22

First things first, make the dough.  I had never heard of a water roux before but after doing some googling, it’s apparently a roux that was invented in either China or Japan to make breads softer and springier.  Sounded good to me because gai mei bao and other Chinese buns are always especially nice and soft.  To make the water roux, combine the water and flour in a saucepan over medium heat and stir constantly for a couple minutes so that it will cook and thicken up.  Remove from the heat and add in the sugar and butter and stir in until dissolved.  Let the water roux mixture cool and in the meantime proof your yeast with the warm water and the sugar.  After the roux mixture’s cooled down, add in the eggs and combine until smooth.  In a large mixing bowl/stand mixer bowl, combine the bread flour, all-purpose flour, water roux mixture and yeast.  Knead until smooth.  If the dough is wet and sticky, add a bit more flour.  Let the dough rest in the bowl covered with a tea towel for about 45 minutes or so and it should rise up to almost double in size.

While the dough is resting, move onto the filling a.k.a. the best part.  Start heating up the flour and custard powder over medium heat in a medium sauce pan.  Then add in the butter and sugar and stir until all melted in.  Remove from the heat and mix in the coconut, the milk powder, and the water.

Once the dough has doubled in size, punch it down and then roll the dough into a long log.  Cut the dough into 12 equal pieces.  Using your hands, just kinda press and gently stretch each piece of dough into an oval that’s about the size of your hand.  Place 2 heaping tablespoons of the filling into the middle of the dough and then carefully pinch the edges together to wrap around the filling, gently stretching the dough a bit if you have to.  I found it easiest to pinch together the sides starting in the middle.  Once it’s well sealed, smooth the pinched edges down a bit and gently shape the bun into kind of an oval shape.  You’ll have a little bit of filling leftover by the way, which you can just discard.  Better to have made too much filling than too little, I figure!  Once all the buns have been formed, place them with the sealed sides down on a parchment lined baking sheet and let them rest under a tea towel for about 15 minutes.

photo 1-11

While the buns are resting, preheat the oven to 350F and make the topping.  For the topping, combine 2 tbsp of the beaten egg, the butter, sugar and flour together in a small bowl and mix until it’s a smooth paste.  Spoon the paste into a makeshift piping bag by using ziplock bag that’s had one corner snipped off.  This paste will be used to put the characteristic stripes onto the gai mei bao.  When the buns are done resting, brush the tops with some of the beaten egg, pipe 1 stripe across each end of the bun, then sprinkle some sesame seeds across the middle.

photo 2-12

Bake for about 15 minutes or until the top are golden brown.  In the meantime, just stir together your simple sugar syrup.  As soon as the buns are out of the oven, gently brush the sugar syrup over the tops to give the buns a nice gloss.

photo 3-3

photo 4-1

So that was quite a bit of work but they turned out really good!  OK, so some of them looked kinda ugly because we didn’t form them all into perfect oval shapes, but not bad for a first attempt.  Also, it would be better if you could line up all the buns side by side in 2 rows, which we couldn’t do because, like I said, ours weren’t all well shaped.  Next time! But they taste just like what you would get at a Chinese bakery so I’m really happy.  The water roux apparently works miracles ‘cus the buns really were super soft and light.  And the filling tastes exactly right.  I wasn’t sure if this recipe would work out but it did so definitely give it a try.  You will love these buns;  gai mei bao are the best!  Rock was so stoked with the results, he even high-fived me.  Rock says they’re just as good as the ones in Vancouver or they may be even better because we made them ourselves.

Hong Kong style baked pork chop rice
Food, recipe

hong kong style baked pork chop rice

Of all the food I miss from home, probably what I miss the most lately is Hong Kong style food.  Baked pork chop rice was one of my mom’s favourite dishes and both my sister and dad love it too.  No surprise, there’s no Hong Kong style food here so I’ve decided to try and make this dish myself.  Generally I like to try and replicate things I’ve eaten in restaurants but I’ve always been intimidated to try Hong Kong style food because I can just never pinpoint what ingredients are in them.  But today is the day!  I can’t find any Hong Kong style recipes online that would make exactly what I would expect to get in a restaurant so here’s my version.

This dish has 3 parts:  the pork chops, the tomato sauce, and the fried rice.  Just to make things easy, I’ll break down the ingredients for each part.

Serves 3 – 4 ppl

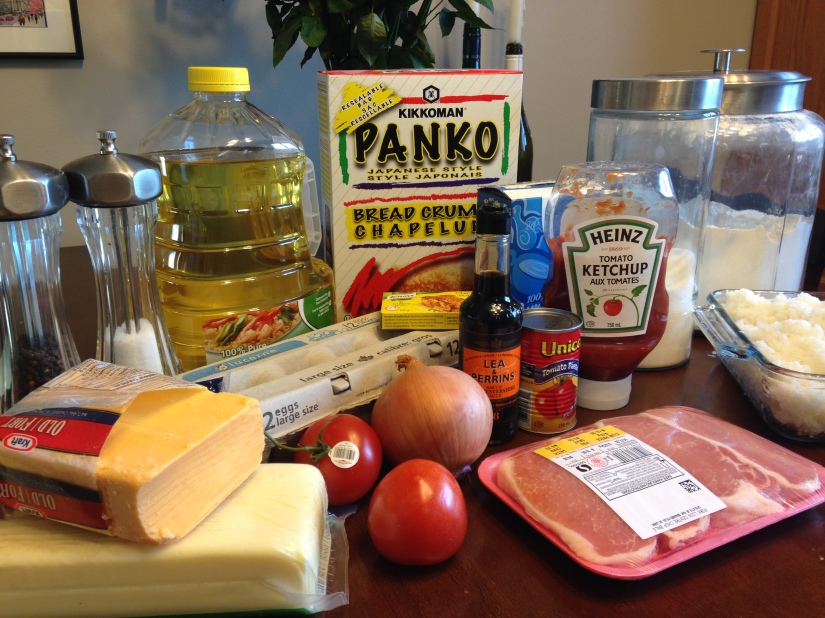
Sauce:  1 cup chicken stock  /  1 can tomato paste  /  2 tbsp worcestershire sauce  /  1/2 cup ketchup  /  2 tbsp sugar  /  1/2 yellow onion  /  1 – 2 tomatoes (or 3 roma tomatoes)  /  2 tsp of cornstarch mixed with a little bit of water  / salt and pepper to taste

Fried rice:  ~ 3 to 4 cups cooked jasmine rice that has been refrigerated at least an hour or 2 or even overnight /  2 eggs  /  salt and pepper to taste  /  canola oil for stir frying

Pork chops:  3 to 4 boneless pork chops (I used pork loin centre chops)  /  1 egg  /  flour for dredging  /  ~ 1 to 1 and 1/2 cups panko bread crumbs  /  salt and pepper to taste  /  canola oil for frying

To top:  ~ 1/4 cup shredded cheddar  /  ~ 1/4 cup shredded mozzarella

photo-17

For the sauce, chunkily chop up your onion and cook with a splash of canola oil over medium heat until starting to turn translucent.  Stir in your chicken stock, cornstarch mixed with a bit of water, worcestershire sauce, tomato paste, sugar, and salt and pepper.  Lower the heat and let it simmer with a lid on for about 10 minutes.  Cut up your tomato into roughly bite size pieces and toss them in and let it simmer for another couple minutes then remove from heat and set aside.

photo 1-7

For the rice, I know there’s lots of different ways to make fried rice but this is the way I’ve always done it.  Put a couple of good splashes of canola oil into a wok over medium-high heat.  When the oil is quite hot, throw in your cold rice and stir fry for a few minutes.  Lightly scramble 2 eggs in a small bowl and season with a bit of salt and pepper.  Create a bit of a well in the middle of the rice and pour in the eggs.  Then just casually start stirring the rice into the eggs and stir fry all together for another couple minutes.  Remove from the heat and spread into either a 9 inch pie plate or a casserole dish.

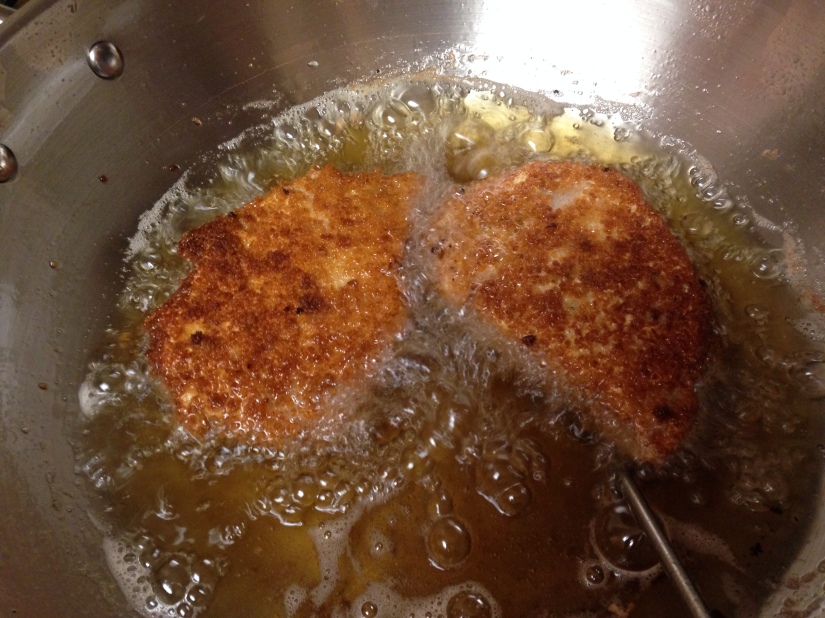
Preheat the oven to 350F.  Now it’s onto the pork chops!  Pound the pork chops until they’re about 3/4 inch think (if you have a meat tenderizer, use that.  I just used a rolling pin.)  Fill a wok or large pot with about 5 cm or so of canola oil and heat over medium to medium-high heat to ideally 325 to 350F.  Set up everything for your breading (a plate with flour, a wide dish with your egg, scrambled, and a plate with the panko bread crumbs).  Season the pork chops with salt and pepper then one by one, dredge in the flour, then dip into the egg, then press into the panko crumbs.  Once your oil is ready, fry the pork chops for about 2 minutes on each side or until cooked through.

photo 2-8

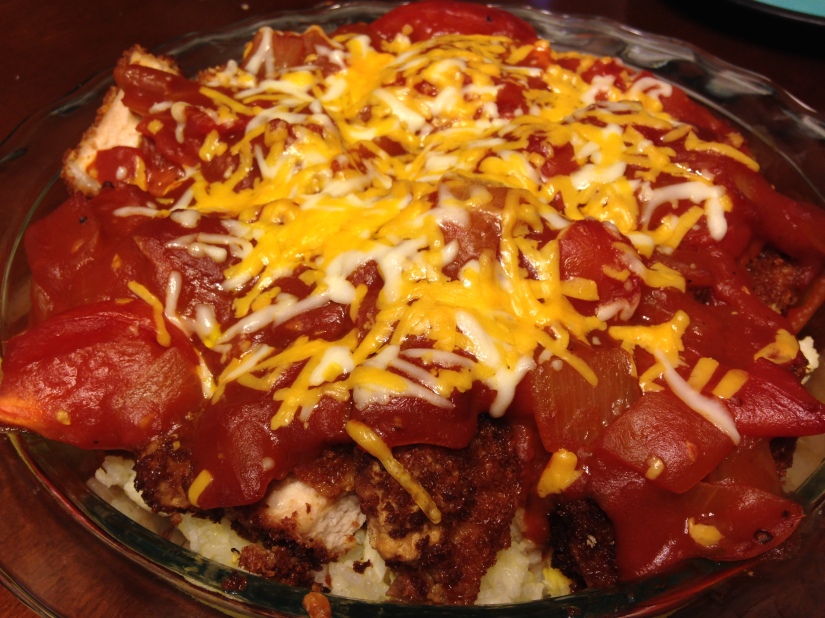
Cut each pork chop into 4 pieces and then scatter over the fried rice.  Pour the sauce over and then sprinkle the cheeses on top.  Bake in the oven for about 15 minutes and you’re all done!

Baked pork chop rice

That was quite a bit of effort but totally worth it.  I’m actually really pleased with how it all turned out and I can say it tastes pretty damn near exact to what I can get at my favourite Hong Kong style restaurant in Vancouver.  Rock says he loved the sauce and that it looked even better than what’s served in restaurants.  He’s already looking forward to having leftovers for lunch tomorrow.  Success!

UPDATE:  If you liked this recipe, you must check out my recipe for another super popular Hong Kong-style restaurant dish: baked portuguese chicken rice !!