easy Mongolian beef
Chinese food, cooking, Food, recipe, Uncategorized

easy mongolian beef

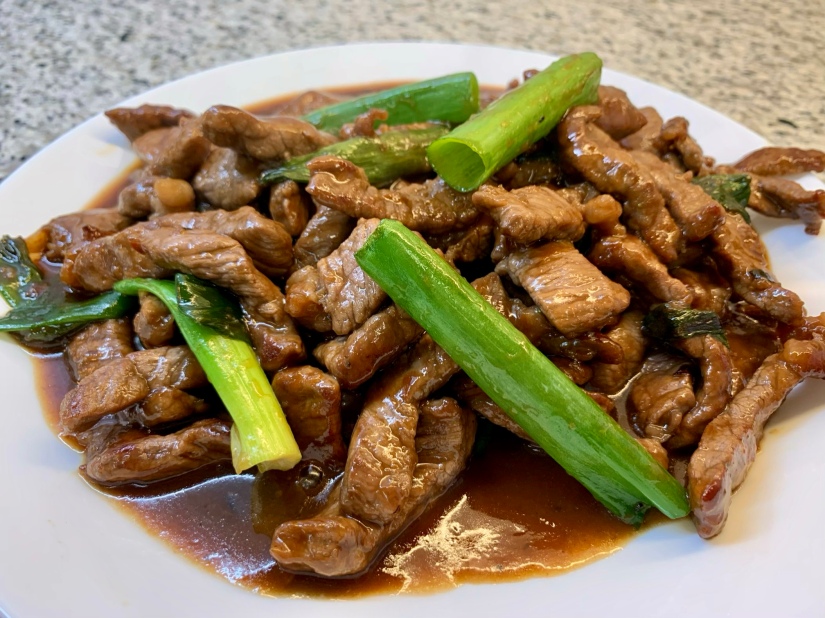
I had never heard of Mongolian Beef before until we had it at PF Chang’s here in Riyadh but it is delicious!  Obviously not an authentic Chinese dish and most definitely not Mongolian, but delicious nonetheless.  Basically it is thinly sliced flank steak and green onions in a sweet soy glaze. Yum!  This is the third time I’ve tried making it and this time not only was it the easiest with the least amount of steps and ingredients but also the best flavour.

At PF Chang’s the beef is most definitely shallow or deep fried to make it really crispy but I decided to keep it a bit on the healthier side by just stir-frying.  (If you’d like to get the beef super crisp though, you can fry in, I would say, about 1 cup of canola oil and then drain the excess oil before adding the sauce.).

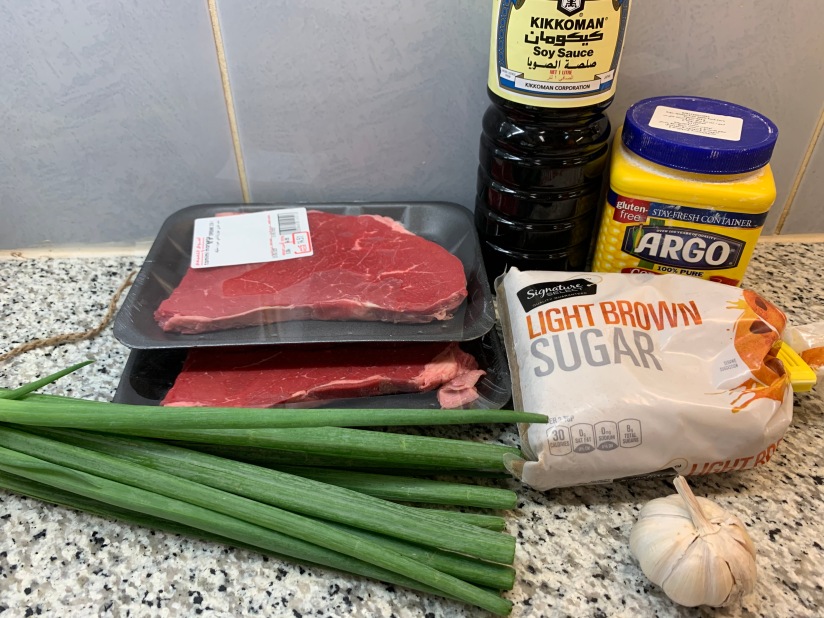
Marinated beef: 500 grams flank steak / 2 tbsp cornstarch / 1 tbsp soy sauce / 1 tbsp cold water

4 cloves of garlic, minced / 1 bunch of green onions – just the green leaves, cut into thirds lengthwise / 2 tbsp canola oil / 1/4 cup soy sauce / 1/4 cup light brown sugar

IMG_1385

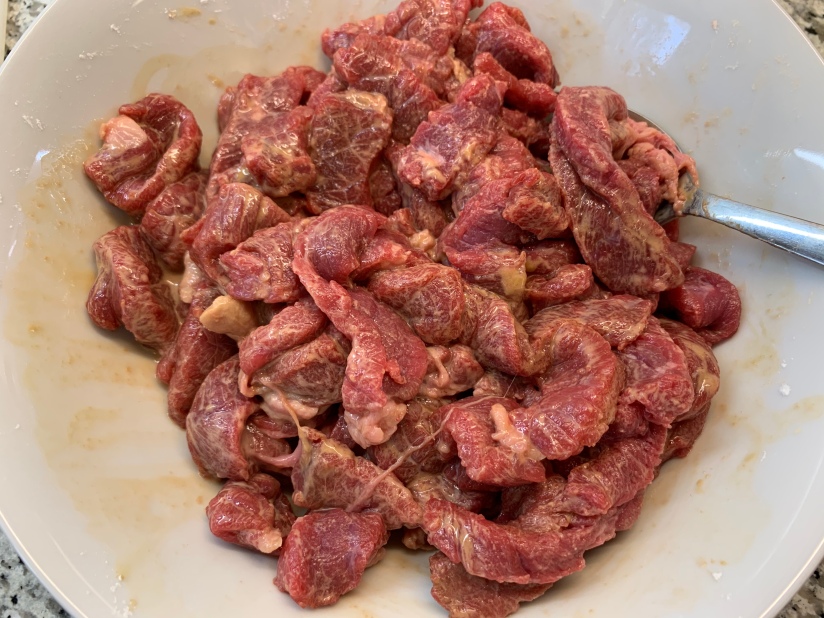
Cut the steak thinly against the grain of the beef.  In a medium bowl, combine the sliced beef, and the cornstarch, cold water and 1 tablespoon of soy sauce so that the beef is throughly coated.  Cover with clingfilm and set in the fridge for 30 minutes to 1 hour to marinate.

In the meantime, simply mix together the 1/4 cup soy sauce and brown sugar in a small bowl for the sauce and set aside.

IMG_1390

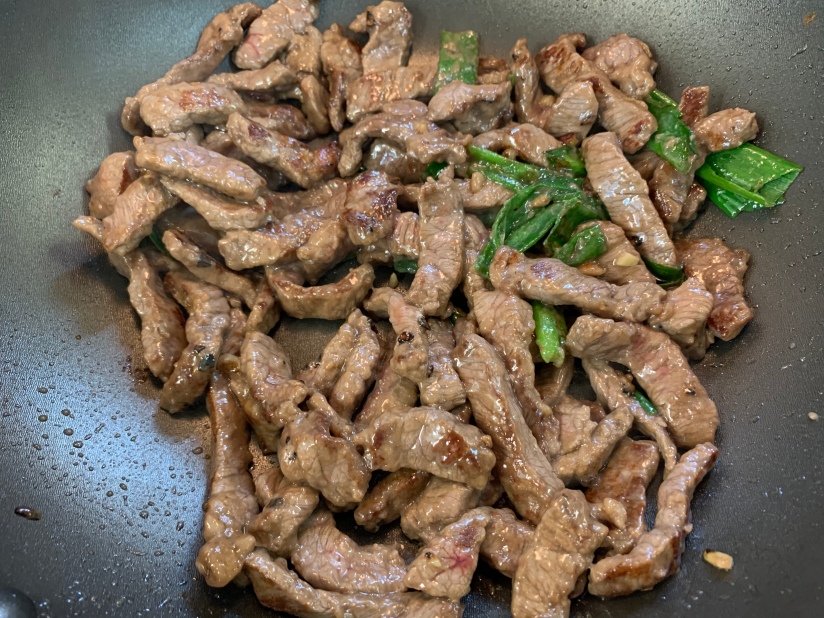
In a large wok or frying pan, heat up the oil on medium-high heat.  Add the beef and half of the green onion.  Stir-fry, letting the beef develop some crispier brown bits by not stirring constantly.  When the beef is almost cooked through, add in the minced garlic and stir-fry.

IMG_1393

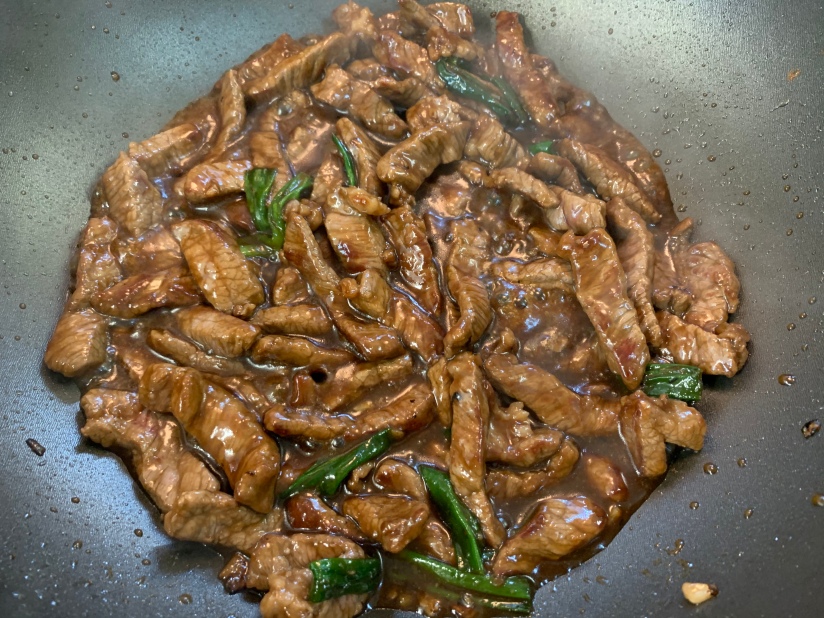
Pour in the soy and brown sugar sauce and stir until it’s thickened up and glossy.  The cornstarch from the beef marinade will cause it to thicken.

IMG_1394

Toss in the remaining green onion, remove from the heat and plate up!  I like to serve this with some jasmine rice and just some simple steamed broccoli.

easy Mongolian beef

cooking, Food, pasta, recipe, Uncategorized

hong kong style baked spaghetti bolognese

One of the things we especially miss here in Saudi is Hong Kong style food that you would find at a cha chaan teng, which is a casual Chinese cafe. There are lots of these cha chaan teng in Hong Kong but there are also quite a few in Vancouver and for me, the dishes you would find at one of these cafes is the ultimate in comfort food.

One of my favourites is the baked spaghetti bolognese at Cafe Gloucester – I feel emotional just thinking about it!  Hong Kong style bolognese is quite different in taste – a bit sweet – from a traditional bolognese and while I don’t know what is exactly in it, I’ve been experimenting and I feel this recipe comes really, really close.  Ketchup is quite common in Hong Kong style sauces so don’t get thrown off by that!  If you haven’t ever had Hong Kong baked spaghetti, you are in for a treat.

Makes 6 to 8 servings.

For the bolognese sauce: 1 small medium onion / 1 medium carrot / 3 cloves garlic / 500 grams ground beef / 1 can Campbell’s tomato soup / 1 can (400 grams) whole tomatoes or crushed tomatoes /  2 tbsp soy sauce / 1 tbsp Worcestershire sauce / 4 tbsp ketchup / 1 tsp sugar / salt and pepper to taste / olive oil

1 packet (500 grams) spaghetti / 1 and 1/2 cups shredded mozzarella cheese / 1 and 1/2 cups shredded cheddar cheese

IMG_0059

First, finely dice the carrots and the onion and finely mince the garlic.  Heat up a bit of olive oil in a dutch oven or large saucepan over medium heat.  Sautee the carrot and onion until softened and the onion has gone translucent.  Then add in the garlic and cook for another couple of minutes.

IMG_0063

Add in the ground beef and cook while stirring until beef is all browned.

IMG_0064

Next, add in the rest of the ingredients for the sauce – the tomato soup, canned tomatoes, soy sauce, Worcestershire sauce, ketchup and sugar.  Bring to a boil and then reduce the heat to a simmer.  Cover with the lid and let it simmer for at least one hour.  Season with salt and pepper to taste.

IMG_0074

Preheat your oven to 375 F. In the meantime, bring a large pot of salted water to a boil and cook your spaghetti until al dente and then thoroughly strain out all the water.

IMG_0076

Add the spaghetti to the sauce and mix together.  Dish out the spaghetti into one large ovenproof dish or a couple of smaller ones.

IMG_0080

Sprinkle the cheeses on top.

IMG_0081

Bake for 15 to 20 minutes.

Hong Kong style baked spaghetti bolognese

And voila! Enjoy!

IMG_0087


Chinese food, cooking, Food, recipe, recipes, Uncategorized

chicken chow mein (fried noodles)

I used to make chow mein however I felt that day and with no set recipe but now I’m all about this recipe that I adapted from from The Dumpling Sisters cookbook by Amy and Julie Zhang.  I brought this cookbook with me over here to Saudi but I only made the recipe for the first time a couple months ago and now it is definitely my go-to.  I’ll be making a giant batch of these noodles for Chinese New Year Eve dinner later this week.

Serves 4 – 5.

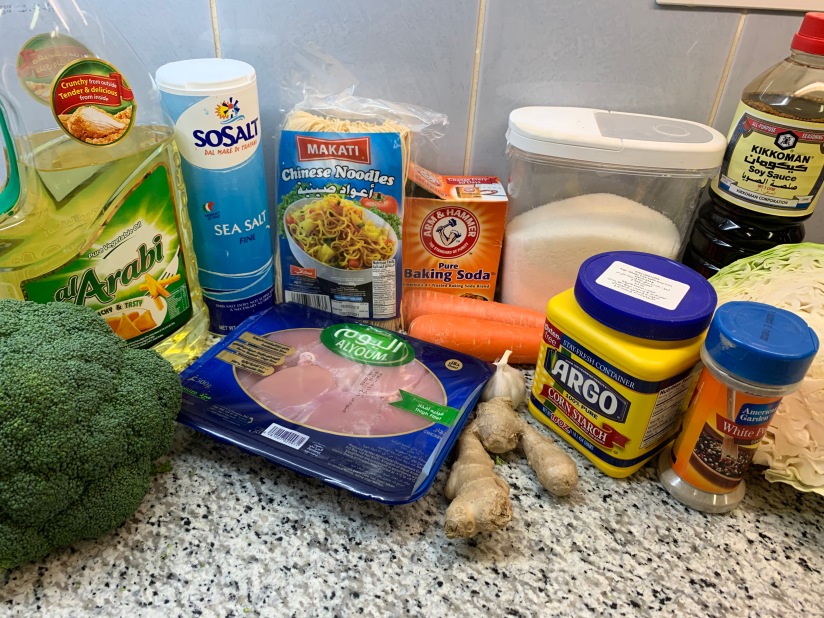
chicken marinade:  1 tsp soy sauce  /  1/4 tsp salt  /  1/2 tsp sugar  /  a couple of pinches of ground white pepper  /  2 tsp cornstarch  /  1/2 tsp baking soda  /  4 tbsp cold water

500 grams skinless, boneless chicken thighs  /  400 grams dried egg noodles  /  5-6 tbsp vegetable oil  /  1 and 1/2 tbsp minced ginger  /  3 cloves garlic, minced  /  1 carrot, thinly sliced  /  1/2 a white cabbage, shredded  /  1/2 head of broccoli, cut into florets  /  1 tsp salt  /  1 and 1/2 tsp sugar  /  1 and 1/2 tsp soy sauce

IMG_5434

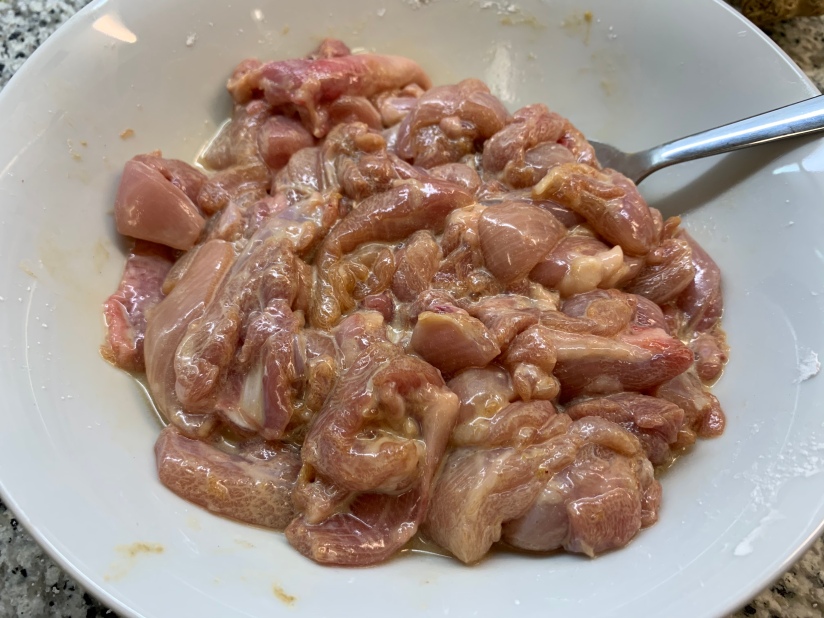
First, cut the chicken thighs into thin strips.  Mix the chicken and the marinade ingredients together in a bowl, cover and leave to marinate for about 20 minutes.

IMG_5437

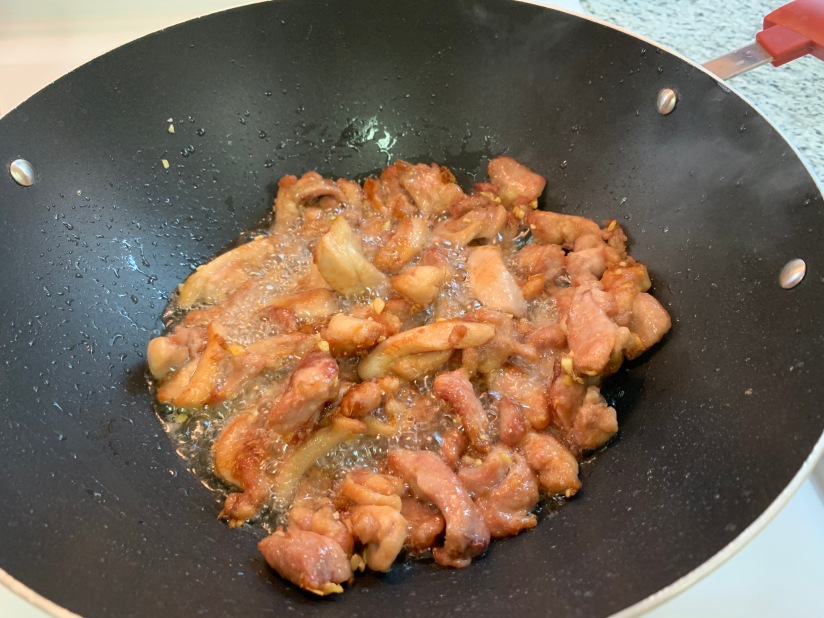
Heat about 3 tbsp of oil in a wok over high heat and stir fry half of the ginger and garlic until it’s fragrant.  Spread the marinated chicken in a single layer (as much as possible anyway) in the wok and let it brown for about a minute.  Cook the chicken for another 3 minutes, flipping the chicken every 30 seconds or so.  The chicken should have a slightly golden crust.

IMG_5439

Add in about 60 ml of water and cover with the lid.  Let the chicken cook for about a minute or so or until the chicken is completely cooked through.  Transfer the chicken, along with any gravy that’s in the wok to a bowl and set aside.

Start boiling some water in a large pot on another burner for your noodles.

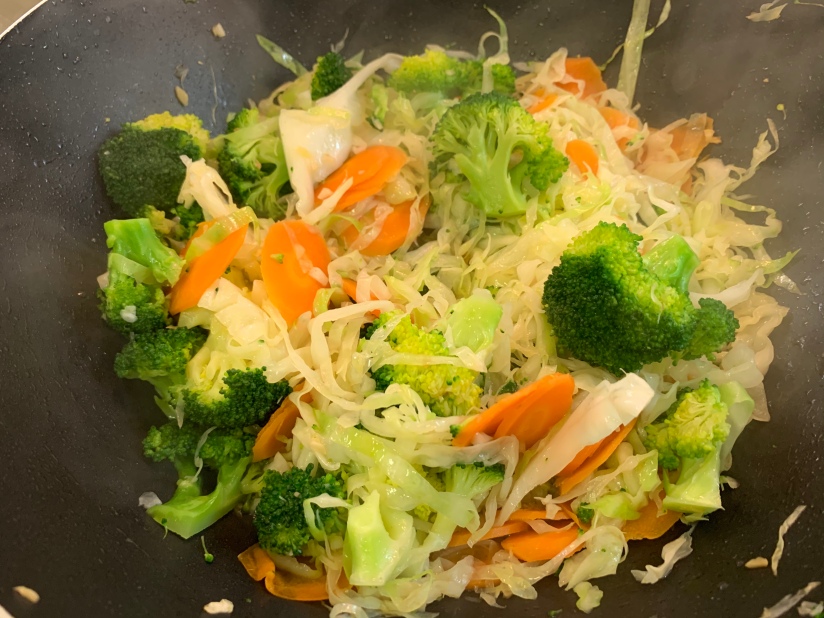
Wipe down the wok with some paper towel and heat up 2 tbsp of oil over hight heat and stir fry the rest of the ginger and garlic.  Add in the carrot, cabbage and broccoli and stir fry for roughly a minute.  Add 80 ml of water and cover with the lid and let it cook for 2 minutes.  The vegetables should be softened by then.  Take off the lid and lower the heat to medium-low.

IMG_5440

Once the water for your noodles has come to a boil, cook the noodles until they’re just done or al dente.  How long will depend on the noodles you have – slightly under the package’s cooking time instructions.  Drain the noodles and if you want, cut through the noodles with a pair of kitchen scissors to shorten them a bit.

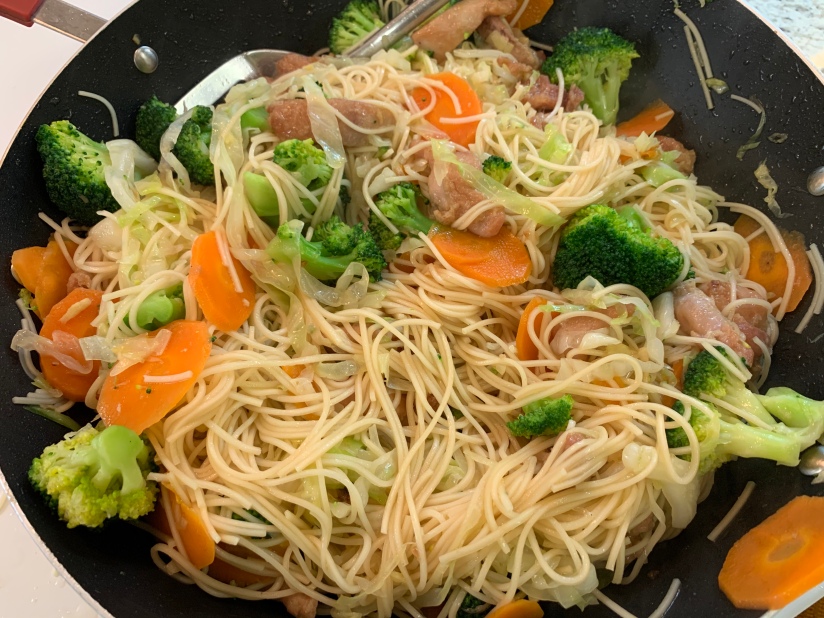
Add the chicken and the noodles back into the wok and add the salt, sugar, soy sauce, and if you find it a bit dry, can add in another tbsp of oil.  Toss everything together until everything is evenly coated with the sauce.

IMG_5442

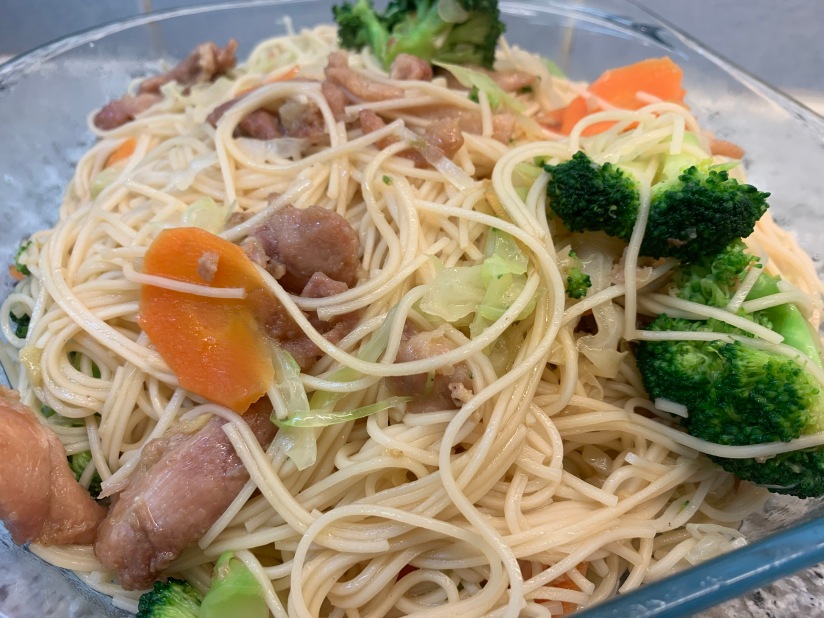
And there you have it – delicious chicken chow mein!  If you want you can serve with some spicy chili sauce but I like it just how it is.

IMG_5447


Chinese food, Food, recipe, recipes, Uncategorized

fensi (glass noodles) with Chinese cabbage

My mom used to make this comfort dish for us all the time when we were kids but unfortunately, I don’t have her recipe.  My sister has at different times over the years asked me if I knew how to make it but until today I have never attempted to make it.  Actually, I don’t think I’ve even eaten this dish in probably over 15 years.  Well turns out there’s a recipe for it in this cookbook I have called The Dumpling Sisters Cookbook by Amy and Julie Zhang.  And somehow, I managed to find all the ingredients for it, albeit not all in one supermarket, here in Riyadh, Saudi Arabia where we are currently living. I as usual didn’t follow the recipe exactly so here is my adapted version of it. (For one, I tripled the amount of fensi as their version is described more as a salad. I’m all about the fensi!)  While I know it’s not exactly the way my mom made it, it turned out great, brought back memories of when she made it, and my kids ate it up.

*If you are not familiar with fensi, it’s also known as glass noodles, cellophane noodles, vermicelli or mung bean noodles.

~ 15o grams dried fensi (glass noodles)  /  2/3 large Chinese cabbage  /  ~ 1 tbsp vegetable oil  /  5 stalks green onion  /  1 tbsp har may (dried shrimp) *optional  /  1 and 1/2 tsp salt  /  3 cups water  /  2 fat pinches of ground white pepper  /  3/4 tsp sugar  /  5 cloves garlic  /  2 tsp sesame oil

IMG_0398

If you are using the har mey (dried shrimp), soak in hot water for about 30 minutes and then drain.  For the prep, thinly slice the garlic cloves and cut the green onion stalks into roughly 5 cm long pieces.  In a large bowl or pot, cover the fensi with cold water and soak for 10 minutes and then drain.  Peel the leaves off the Chinese cabbage and thoroughly wash them.  Slice the leaves in half lengthwise and then cut into wide strips.

Heat 1/2 the oil in a wok over medium-high heat and fry the green onions until they’re just starting to wilt.  Add 1 tsp salt and the har mey, give it a light stir, and then add in 3 cups of water.  Bring to a boil and cover for a few minutes.

IMG_0402

Lower the heat and add in the sugar and white pepper.  Add the drained fensi to the wok and give it a little stir every now and again while the noodles absorb the liquid. In the meantime, heat up a large frying pan and add in the rest of the oil.

IMG_0404IMG_0406

In the frying pan, add the garlic and give it a bit of a fry until fragrant.  Add the cabbage and stir fry until the white parts of the leaves are starting to go a bit translucent.  Season with the remaining salt.

IMG_0407

Stir the sesame oil into the fensi and then add in the cabbage.  Mix everything together and that’s it!  Hope you enjoy this childhood favourite of my sister’s and mine.

IMG_0408

yook bang (steamed pork cake)
Chinese food, cooking, Food, recipe, Uncategorized

my grandma’s yook bang (chinese steamed pork cake)

This was my absolute favourite thing to eat when I was a kid and I finally made it myself for the first time! I was such a horrible picky eater growing up but I loved this Cantonese dish that my grandma would make for me.  It’s freshly minced pork mixed with a bit of dried turnip, shaped into a patty and then steamed.  It probably doesn’t sound particularly amazing and it definitely doesn’t look amazing but it is soooo good. I can very vividly remember my grandma using a big cleaver to duk or mince pork on a round wooden cutting block for this dish. She unsurprisingly doesn’t have a ‘real’ recipe for this or any precise measurements for the ingredients but I found that the following worked out well.  Tasted exactly like my childhood!

500 grams pork shoulder / 1/2 tsp salt / 1/2 tsp sugar / 1 tsp light soy sauce / 1 tbsp cornstarch / 1 tbsp diced dried turnip* / grapeseed (or any other) oil just for greasing the dish

*You can find dried turnip (which is weirdly packaged as just ‘dried vegetable’) at an Asian supermarket

IMG_5112

Using a large heavy cleaver, mince the pork. And by mince, I mean hack away at it. You want it about the consistency of ground pork that you would buy from the supermarket.

IMG_5118

IMG_5119

Using chopsticks, mix the pork with the salt, sugar, soy sauce, dried turnip, and cornstarch just until everything is combined. Lightly grease a pie dish or a large rimmed plate with the oil. Get your steamer ready and put the pork mixture into the plate and shape into a round patty.

IMG_5123

You’ll steam this for about 20 to 25 minutes or until the pork is cooked through.

IMG_5124

And there you have it! You will have some liquid in the pie dish which you absolutely should not pour out. Serve this with some veggies and steamed rice and be sure to spoon some of the liquid over the rice.

Chinese steamed fish with black bean and garlic
Chinese food, Food, Uncategorized

chinese steamed fish with black bean and garlic

One of my favourite foods growing up was Chinese steamed fish smothered in fermented black beans and garlic.  I know fermented black beans doesn’t sound like the most appetizing thing but they are sooooo delicious and even if you don’t think you’ll like them, you’ve probably had them in some Chinese dishes.  You can find these beans at any Asian grocery store.  Anyway, I just started cooking with fermented black beans for the first time a few weeks ago so I thought I’d try and make this fish dish.  I haven’t had it in many many years and I don’t even remember if it’s something that my family made or we had when we ate out at restaurants but I remember loving it.  From some lazy googling, it seems like there’s countless variations on how to make it so I decided to adapt my usual Chinese steamed fish recipe and it turned out great!

It would be ideal to use a fresh whole-head-and-tail on firm, white-fleshed fish such as cod but that’s not always possible so then you can go with some nice fillets.  Cod is my favourite but it was sold out at my nearest supermarket today so I picked up some haddock fillets instead and it still turned out good.

1 whole white-fleshed fish or roughly 500 grams of fillets, ideally cod  /  1 bunch of green onions  /  1 medium sized piece of ginger  /  4 tbsp of fermented black beans  /  4 cloves of garlic  /  3 tbsp seasoned seafood soy sauce (or regular soy sauce mixed with about t 1 tsp of sugar)  /  1 and 1/2 tbsp grapeseed oil or other flavourless cooking oil you have on hand

img_0982

Put the black beans in a small bowl and rinse with water a couple of times and drain.  Mince the garlic or if you’re lazy like me, grate it on a microplane.  Toss the black beans, the garlic and 2 tbsp of the soy sauce in a mortar and pestle and just give it a quick little mash or if you don’t have a mortar and pestle, just mash everything together a bit with the back of a wooden spoon.  You don’t wanna pulverize everything as you still want some of the beans intact.

img_0983

Fill a wok with water and place over high heat to bring the water to a boil. Cut the white parts of the green onions off and scatter in a pie plate.  Slice up the ginger and toss a few pieces in with the green onions and then lay the fish or fish fillets over top.  Tuck in a few more pieces of ginger just for kicks. Then using a spoon, spread the black bean and garlic mixture over the tops of the fish.

fullsizerender

Now you’re ready to steam the fish!  Place your steaming rack on the wok and slide the pie plate.  Cover with the lid and steam the fish until cooked through which will take, depending on the fish you use, somewhere between 10 to 15 minutes approximately. Best to test for doneness by using a fork to check that the fish is cooked through and flaking.  Just before the fish is done cooking or right after, thinly snip up the green parts of the green onions, about 2 tbsp or so.  Also, in a small saucepan, heat up the oil over medium to medium high heat until the oil is very hot. When the fish is done cooking, you can either carefully remove the cooking liquid from the pie plate or use a spatula and take the fish out and place on another plate.  Scatter the green onion over the fish and drizzle the hot oil over the green onion.  Finish off with your remaining 1 tbsp of soy sauce and serve with steamed white rice.

img_7899

Chinese food, cooking, recipe

green onion pancakes

I made these the other day to go with our Shanghainese pan fried pork buns but just hadn’t gotten around to posting about it.  I guess these are usually a breakfast food but they’re pretty quick and easy to make for any time of day.  If you’ve never had these before, they’re not at all the consistency of a regular pancake.  Rather they should be quite light and flaky, and obviously savoury rather than sweet!

~ 7 stalks of green onion (just the green parts)  /  1 and 1/4 cups all-purpose flour  /  1/2 cup boiling hot water  /  ~ 1 tsp salt  /  ~ 1/2 tsp sesame oil  /  canola oil  /  chinkiang (black rice) vinegar (for dipping)

photo 3-3

The dough could not be any easier.  Just combine the flour, water and salt and knead until smooth.  Set aside for maybe 20 minutes or so (at least this is what all the recipes I looked at said to do but I’m not really sure why since it doesn’t need to rise or anything…).  How to actually form the pancakes ranged from recipe to recipe but this is what I did.  Roll the dough out into kind of a rectangle shape, about a couple centimetres thick.  Very lightly brush the top of the dough with the sesame oil and and maybe about 1/2 tsp of the canola oil.  Snip up the green onions and scatter all over top.  Now tightly roll the dough up cigarette-style so that it forms a thin log.  Slice the log into 4 equal pieces and roll each one up into a little snail shape.  Now roll out each piece into a disk and now you just have to fry them up!

photo 2-4

Heat up a couple glugs of canola oil in a frying pan over medium to medium high heat and fry the pancakes for a couple minutes on each side or until they’ve browned up a bit.   Drain on some paper towel, cut into wedges, and serve with chinkiang vinegar for dipping. Yum!

photo 1-5

Chinese food, Food, recipe

shanghainese pan fried pork buns

I love Shanghainese pan fried pork buns and every time I’m back home I have to go out to eat them at least once.  They’re usually eaten for breakfast or lunch and I’ve been really craving them lately so I decided to try and figure out how to make them.  I knew they wouldn’t be super easy to make and I couldn’t find any one recipe that I liked so I threw together this recipe based on about 8 others I found online and hoped for the best.

They taste really great and both Rock and I were impressed with how close they taste to the ones we get in Vancouver!  The filling tastes pretty spot on.  The only thing is we burned the crap outta the bottoms of the first batch and I remembered after that my mom had told me a long time ago that they’re notoriously difficult to make authentically without burning or over-browning,  which would be to cook them sitting in a pan the entire time.  Well, she was right cus boy did they burn.  Anyway, to avoid all that and just make life easier, just take my cheater’s way which is what this recipe will tell you…!

Also we made waaay too much filling, enough for 2 dozen large buns.  So here I’ve adjusted it to make a recipe for 1 dozen buns.

for the bun:  3 cups all-purpose flour  /  2 and 1/4 tsp yeast  /  2 tbsp sugar (plus an extra 1 tsp to proof the yeast)  /  ~1 cup water  /  2 tbsp canola oil

for the filling:  ~350 grams ground pork  /  2 stalks of green onions (just the green part)  /  1 and 1/2 tbsp light soy sauce (light Chinese soy sauce, not the go-to Kikkoman!)  /  1/2 tbsp sugar  /  1 tbsp corn starch  /  1/2 tsp chicken broth powder  /  1/2 tbsp finely grated ginger  /  a few dashes of white pepper  /  1 tsp sesame oil

to pan fry: canola oil

to top/to serve:  white sesame seeds  /  green onion  /  chinkiang vinegar (black rice vinegar.  you can find this at the asian supermarket in Regina)  /  a few matchstick slices of ginger (optional)

photo-7

First make the dough.  Proof the yeast in a small bowl with the 1 tsp of sugar and about 1/4 cup warm water.  In a large mixing bowl, combine the flour, sugar, oil, water and the proofed yeast.  Knead the dough until it’s smooth and add more water or flour as needed.  Set aside and cover with a tea towel for about 15 to 20 minutes.

Next, make up the filling.  This is easy.  Just get a large bowl, throw all the filling ingredients in, and mix together!

Now to make the buns.  Roll the dough out into a log, about 1 foot long.  Cut into 12 equal size pieces.  With each piece of dough, using your hands, roll into a ball and then with a rolling pin, roll it out into a circle, about a centimetre or so thick.  Put about 1 heaped tbsp of filling in the middle and then wrap the dough around the filling by pleating and pinching the sides, making sure the bun is totally sealed.

photo 1-4

Ours definitely did not look as pretty as we had hoped for but I’m sure they’ll get better with practice!  Sprinkle some sesame seeds on the tops and now it’s time to steam them.

photo 2-3

I used a large steamer over my wok.  Brush the steaming rack with a bit of oil to avoid any sticking and space the buns apart on it as they will expand quite a bit!  Steam the buns over medium-high to high heat for about 11 minutes.  Near the end of the steaming, heat up at least a couple centimetres of canola oil in a large frying pan over medium-high heat.  When the buns are done steaming, transfer them to the frying pan and fry the bottoms for a couple minutes or so, until the bottoms of the buns have browned up a bit and are crispy.  Drain any excess oil over some paper towel and then snip some green onion over the tops.  Serve with the chinkiang vinegar with some ginger in it to dip if you want, though I think the vinegar is a vital component!  Enjoy!

photo 3-2

photo 4-2

photo 5

Food, recipe

hoi nam gai fan – hainanese chicken rice

I am in the midst of full-on hating life in Saskatchewan.  I miss my family and friends and I miss decent weather.  After 9 months of winter, it’s raining pretty much all the damn time.  Being from Vancouver, I don’t mind rain but that’s cus we’re spared the 9 month winter.  I’m also apparently in the crazy phase of being pregnant and seriously craving all the yummy things that I don’t get to here.  So I’ve decided I just have to up my game and start cooking more Chinese food that I just can’t get here.  I’m sorry but egg rolls and chicken balls are just not Chinese food. OK!  Had to get that all out of my system.

One of the things I miss is hoi nam gai fan, a longtime favourite.  My mom always used to get us takeaway hoi nam gai fan from Richmond so that’s probably why it’s such a comfort food for me.  It’s basically a cold chicken dish served with a flavoured rice and I like to eat it with a ginger-green onion sauce.  So I set out to figure out how to make it and after a first attempt at our friends’ last night, I think it was a success!  I always figured it would be very difficult to make but it was not very hard at all.

A whole chicken  /  2 pieces of ginger root, peeled  /  2 bunches of green onion  /  ~ 3 cloves garlic  /  2 cups jasmine rice  /  canola oil (except my friend Katharina’s much healthier than me and had only avocado oil instead, which turned out great so feel free to be healthier and go with avocado)  /  ~ 1 tsp sesame oil (not hoisin sauce, like I accidentally have in the photo, oops)  /  cucumber (optional)  /  coarse salt

photo 1-27

Start off by scrubbing some coarse salt all over the chicken.  Use quite a bit of salt too because you’ll be poaching the chicken and then using the stock to flavour the rice so you don’t want it to be bland.  Slice up one of the pieces of ginger and just casually chop one bunch of the green onion.  Stuff the cavity of the chicken with the ginger and green onion, toss the chicken into a pot and fill with water until the chicken is fully submerged.  Set of low-medium heat and let it slowly simmer away until the chicken is cooked all the way through (I just checked by using a meat thermometer).  Don’t let it really come to a boil though, it should be a slow process so the meat doesn’t get tough.

In the meantime, using a fine grater, grate the other piece of ginger.  In a small saucepan, warm up the ginger with a generous amount of canola or avocado oil.  Finely dice up the green parts of the other bunch of green onion and after you’ve removed the saucepan from the heat, just add that in.  Season with some salt and the sauce is done.

photo 5

I cooked 2 chickens last night! Greedy.

photo 4-4

As soon as the chicken’s cooked through, you have to cool it down.  Ideally you throw it into an ice bath but we didn’t have any ice so we just ran it under cold water in the sink until it was cold.  Make sure you don’t throw out the water that you were poaching the chicken in though, because you’ll be using that to cook the rice!

Mince up the garlic cloves and toss into a pot with a bit of oil and give it a stir over medium heat.  Then wash your rice and toss it in, giving that a bit of a stir too.  If you have a rice cooker (which I forgot to bring over to our friends’) then transfer the rice to that.  Otherwise, just cook it on the stovetop.  Strain the poaching liquid and add in 3 and 1/2 cups of the liquid to the rice.  In a rice cooker, you know what to do next.  On the stovetop, cover with a lid and turn the heat to low and cook ’til it’s done.  (Like any respectable Asian, I never cook rice on the stove so this is a new technique for me).

While the rice is cooking, using preferably a Chinese cleaver, chop up the chicken, bone, skin and all.  You can slice up some cucumber too go along with it if you’re feeling like you need a bit of green in your meal.  And when the rice is done, you’re all finished!  Rock says the sauce was amazing and now it’s one of his favourites.  Everything tasted remarkably close to exactly how I wanted it to taste so I’m very happy with it. If you’ve never had hainanese chicken rice, you have got to give this recipe a try.

photo 3-8

baking, breakfast, Chinese food, dessert, Food, recipe

for the love of chinese buns: gai mei bao (chinese cocktail buns)

If you’ve never been to a Chinese/Hong Kong bakery, you need to try and remedy that immediately.  The best ones are in Vancouver (my favourite is Michelle Cake House in Kerrisdale) probably because there are so many people who are originally from Hong Kong there.  Unfortunately, and of course, there are none here in Moose Jaw.  My friend Katharina says there’s a place in Regina but when we tried to check it out, it was closed for renovations so I can’t comment on that just yet.  Of all the yummy Hong Kong-style buns, my favourite ever since I was a kid is gai mei bao which literally translates into cock (chicken) tail bun.  No actual chicken tails in these buns though.  If you’ve never had gai mei bao before, they’re filled with the yummiest buttery coconut filling; sooo good.  These buns are also the favourite of my family and ever since I introduced them to Rock, he has become completely obsessed.  Every time we go to Vancouver for a visit, my dad feeds Rock gai me bao throughout our stay and then also picks up like a dozen right before we leave for Rock to bring back.

Anyway, since it’s still Arctic temperatures outside today, it seemed like the opportune time to give these bad boys a try.  I don’t know anyone that’s ever made gai mei bao from scratch, but I guess our recent bagel-making has given us a boost of confidence in our baking abilities.  I’ve given separate recipes for the 3 parts that go into these buns just ‘cus it’s easier to follow: the dough, the filling, and the topping.

Makes 12.

bun dough:  water roux (150 ml water + 3 tbsp all-purpose flour)  / 2 eggs  / 1/4 cup sugar  / 2 tbsp butter  /  1 and 1/4 cups bread flour  /  ~ 1 and 1/4 cups all-purpose flour (you may need up to another 1/4 cup or so if the dough is sticky) /  2 and 1/4 tsp active dry yeast (plus 1 tsp sugar + 1/4 cup warm water to proof)

bun filling:  1 cup unsweetened fine coconut  /  1 cup all-purpose flour  /  1/3 cup custard powder  /  1 and 1/4 cups butter  /  1/2 cup sugar  /  1 cup whole milk powder  /  2 tbsp water  (this makes quite a lot of filling but there’s nothing worse than biting into a gai mei bao and it’s mostly bun with only a little bit of filling smack in the middle.  my feelings towards filling is similar to my feelings towards sauce: the more the better)

bun topping:  1/8 cup butter ( room temperature)  /  1/8 cup all-purpose flour  /  1 egg, beaten /  1/2 tsp sugar   /  ~  1 tbsp raw sesame seeds  /  sugar syrup (1 tbsp sugar mixed with 1 and 1/2 tbsp hot water)

photo-22

First things first, make the dough.  I had never heard of a water roux before but after doing some googling, it’s apparently a roux that was invented in either China or Japan to make breads softer and springier.  Sounded good to me because gai mei bao and other Chinese buns are always especially nice and soft.  To make the water roux, combine the water and flour in a saucepan over medium heat and stir constantly for a couple minutes so that it will cook and thicken up.  Remove from the heat and add in the sugar and butter and stir in until dissolved.  Let the water roux mixture cool and in the meantime proof your yeast with the warm water and the sugar.  After the roux mixture’s cooled down, add in the eggs and combine until smooth.  In a large mixing bowl/stand mixer bowl, combine the bread flour, all-purpose flour, water roux mixture and yeast.  Knead until smooth.  If the dough is wet and sticky, add a bit more flour.  Let the dough rest in the bowl covered with a tea towel for about 45 minutes or so and it should rise up to almost double in size.

While the dough is resting, move onto the filling a.k.a. the best part.  Start heating up the flour and custard powder over medium heat in a medium sauce pan.  Then add in the butter and sugar and stir until all melted in.  Remove from the heat and mix in the coconut, the milk powder, and the water.

Once the dough has doubled in size, punch it down and then roll the dough into a long log.  Cut the dough into 12 equal pieces.  Using your hands, just kinda press and gently stretch each piece of dough into an oval that’s about the size of your hand.  Place 2 heaping tablespoons of the filling into the middle of the dough and then carefully pinch the edges together to wrap around the filling, gently stretching the dough a bit if you have to.  I found it easiest to pinch together the sides starting in the middle.  Once it’s well sealed, smooth the pinched edges down a bit and gently shape the bun into kind of an oval shape.  You’ll have a little bit of filling leftover by the way, which you can just discard.  Better to have made too much filling than too little, I figure!  Once all the buns have been formed, place them with the sealed sides down on a parchment lined baking sheet and let them rest under a tea towel for about 15 minutes.

photo 1-11

While the buns are resting, preheat the oven to 350F and make the topping.  For the topping, combine 2 tbsp of the beaten egg, the butter, sugar and flour together in a small bowl and mix until it’s a smooth paste.  Spoon the paste into a makeshift piping bag by using ziplock bag that’s had one corner snipped off.  This paste will be used to put the characteristic stripes onto the gai mei bao.  When the buns are done resting, brush the tops with some of the beaten egg, pipe 1 stripe across each end of the bun, then sprinkle some sesame seeds across the middle.

photo 2-12

Bake for about 15 minutes or until the top are golden brown.  In the meantime, just stir together your simple sugar syrup.  As soon as the buns are out of the oven, gently brush the sugar syrup over the tops to give the buns a nice gloss.

photo 3-3

photo 4-1

So that was quite a bit of work but they turned out really good!  OK, so some of them looked kinda ugly because we didn’t form them all into perfect oval shapes, but not bad for a first attempt.  Also, it would be better if you could line up all the buns side by side in 2 rows, which we couldn’t do because, like I said, ours weren’t all well shaped.  Next time! But they taste just like what you would get at a Chinese bakery so I’m really happy.  The water roux apparently works miracles ‘cus the buns really were super soft and light.  And the filling tastes exactly right.  I wasn’t sure if this recipe would work out but it did so definitely give it a try.  You will love these buns;  gai mei bao are the best!  Rock was so stoked with the results, he even high-fived me.  Rock says they’re just as good as the ones in Vancouver or they may be even better because we made them ourselves.