cornflake chicken strips
cooking, Food, recipe, Uncategorized

cornflake chicken strips

A friend sent me a recipe for cornflake chicken awhile back saying it was one of her kids’ favourite meals.  I think I misread the directions in the recipe, but they turned out to be chicken strips – and my kids LOVED them!  This isn’t that exact recipe but it doesn’t matter because my kids still love these and actually beg me to make them.  Definitely healthier than frozen chicken strips as they’re coated with cornflakes instead of breading and they are baked.  But still satisfyingly crunchy and yummy!

450 grams skinless, boneless chicken breasts / 2 eggs / 3/4 cup all-purpose flour / 1 tsp garlic powder / 1 and 1/2 tsp seasoned salt / 1 tsp paprika / 1/4 tsp cayenne pepper / 2 cups cornflakes

IMG_3043

First, preheat the oven to 400 F and then move onto all the prep. In a dish or a shallow bowl, lightly scramble the eggs and set aside.  On a large plate, combine the flour, garlic powder, seasoned salt, paprika and cayenne.  On another large plate, crush up the cornflakes just with your hands.  Then for the chicken breasts, cut lengthwise into strips.

IMG_3046

Now, to coat the chicken.  For each strip, first dredge the chicken the flour mixture to coat evenly.  Then, dip into the egg until also coated and then press into the crushed cornflakes on both sides.  After coating each strip, place on a parchment paper-lined baking sheet and continue with all the chicken until done.

IMG_3048

Pop into the oven for 20 minutes – the chicken should be completely cooked through by then but you should check just to be sure.

IMG_3049

And you’re done!  We had these with the classic kiddie favourite dips – ketchup and mayonnaise.

cornflake chicken strips

cooking, Food, recipe, Uncategorized

roasted miso chicken

I had never thought about cooking chicken with miso before but then I found this Nigella Lawson recipe in one of her books for a butterflied chicken with miso and sesame seeds.  This recipe is based off of that and with the flavours really dialled up.  This will give you really tasty chicken with solid miso flavour and also some sesame and garlic.  I used drumsticks this time because that’s what they had in the shop plus sometimes I’m too impatient to roast a whole chicken but you could do this with a whole chicken or chicken thighs too.

about 900 grams bone-in, skin-on chicken / 3 tbsp white miso paste / 1 tbsp soy sauce / 2 tsp sesame oil / 2 tsp fish sauce / 2 cloves garlic, minced

IMG_2810

Mix together the miso paste, soy sauce, sesame oil, fish sauce and garlic to make the marinade.  I did this in a glass baking dish but you could also use a large bowl or a large ziplock bag.

IMG_2811

Add in the chicken and make sure the chicken is all coated with the marinade.  Cover with clingfilm (or if using a ziplock, just zip it up) and put in the fridge to marinate overnight.

IMG_2813

When it’s time to cook, heat the oven to 425 F.  Place the chicken onto a roasting rack in a roasting tray.  Pro tip! Line the roasting tray with parchment first to make washing up a breeze.  I don’t always do this and then Rock nags me because I make him do the dishes.

IMG_2832

Pop into the oven for about 40 minutes, flipping the chicken over halfway through to make sure both sides of the chicken are nice and browned.  The chicken is definitely done when you check with a meat thermometer and get an internal temperature of 165 F.

IMG_2836

And then you’re done!  Plate up.  We had this with some calrose or sushi rice and a bit of sautéed shredded cabbage.

roasted miso chickenIMG_2840

John's LEGENDary fried chicken
cooking, Food, recipe, Uncategorized

john’s legendary fried chicken

I love me some fried chicken so I’m kind of surprised I’ve never actually made fried chicken myself.  I always figured it would be a lot of effort with buttermilk, eggs, double breading or whatever… but then I watched John Legend making his “LEGENDary” fried chicken on Youtube and his recipe looked too easy!

A few things – I only used chicken thighs because well, fried chicken thighs are my favourite.  But of course you could use whatever chicken pieces you’d like.  Also, I only use a fraction of the cayenne powder in the recipe because I don’t want my kids complaining that it’s spicy.  And it’s recommended to brine this chicken overnight so that’s something to keep in mind.  I haven’t done that yet because I always forget but a minimum of 4 hours has worked for me.

Anyway, I’ve made this twice in two weeks already because Aymeric asks me every single day to make it!  He calls it “oil chicken” and basically has hearts in his eyes when he says it – that’s how good it is.

5 lbs (2.2 kg) chicken pieces (of course you don’t have to make this much chicken! I’ve used 1.5 kg of thighs and I think that’s perfect for 4 people.  Just adjust the recipe to use less of the spices and flour) / canola oil for deep frying

the brine: 6 tbsp seasoned salt salt / 2 and 1/2 tbsp garlic powder / 2 tbsp cayenne powder / cold water

the breading: 2 cups all-purpose flour / 2 tbsp seasoned salt / 1 tbsp cayenne powder

IMG_9993

First, brine the chicken.  Add the chicken pieces and the seasoned salt, garlic powder and cayenne for the brine into a large bowl.  Add enough cold water to cover the chicken and then slap some cling film over top and put it in the fridge for a minimum of 4 hours but ideally overnight.

IMG_9995

When you’re ready to fry up some chicken, heat up the canola oil to about 350 to 365 F in a dutch oven or a deep fryer.  I have a deep fryer back in Canada which makes deep frying sooo easy but here we just use a dutch oven – in this case, just add enough oil for the chicken to be submerged.  If you have a candy thermometer you can check the temperature but if you don’t have one, I find putting the dutch oven over medium-heat to give a close temperature.

Now, time to bread the chicken.  Add the flour, seasoned salt and cayenne for the breading into a large ziplock bag.  Then add the chicken pieces, in small batches (I did 4 or 5 pieces at a time) into the bag, zip it up and shake shake shake until the chicken is all coated.

IMG_0001

Fry the chicken until golden-brown to brown and the chicken is cooked through.  You can check with a meat thermometer if you want to be sure (that would be 165F).  For thighs, I found 18 minutes to be perfect.

IMG_0002

After frying, drain any excess oil off the chicken on a paper towel-lined plate.

IMG_0004

And just keep going until you’ve fried up all your chicken and then enjoy!  Chicken is super juicy, flavourful and crispy. Perfect!

John's LEGENDary fried chicken


Chinese food, cooking, Food, recipe, recipes, Uncategorized

chicken chow mein (fried noodles)

I used to make chow mein however I felt that day and with no set recipe but now I’m all about this recipe that I adapted from from The Dumpling Sisters cookbook by Amy and Julie Zhang.  I brought this cookbook with me over here to Saudi but I only made the recipe for the first time a couple months ago and now it is definitely my go-to.  I’ll be making a giant batch of these noodles for Chinese New Year Eve dinner later this week.

Serves 4 – 5.

chicken marinade:  1 tsp soy sauce  /  1/4 tsp salt  /  1/2 tsp sugar  /  a couple of pinches of ground white pepper  /  2 tsp cornstarch  /  1/2 tsp baking soda  /  4 tbsp cold water

500 grams skinless, boneless chicken thighs  /  400 grams dried egg noodles  /  5-6 tbsp vegetable oil  /  1 and 1/2 tbsp minced ginger  /  3 cloves garlic, minced  /  1 carrot, thinly sliced  /  1/2 a white cabbage, shredded  /  1/2 head of broccoli, cut into florets  /  1 tsp salt  /  1 and 1/2 tsp sugar  /  1 and 1/2 tsp soy sauce

IMG_5434

First, cut the chicken thighs into thin strips.  Mix the chicken and the marinade ingredients together in a bowl, cover and leave to marinate for about 20 minutes.

IMG_5437

Heat about 3 tbsp of oil in a wok over high heat and stir fry half of the ginger and garlic until it’s fragrant.  Spread the marinated chicken in a single layer (as much as possible anyway) in the wok and let it brown for about a minute.  Cook the chicken for another 3 minutes, flipping the chicken every 30 seconds or so.  The chicken should have a slightly golden crust.

IMG_5439

Add in about 60 ml of water and cover with the lid.  Let the chicken cook for about a minute or so or until the chicken is completely cooked through.  Transfer the chicken, along with any gravy that’s in the wok to a bowl and set aside.

Start boiling some water in a large pot on another burner for your noodles.

Wipe down the wok with some paper towel and heat up 2 tbsp of oil over hight heat and stir fry the rest of the ginger and garlic.  Add in the carrot, cabbage and broccoli and stir fry for roughly a minute.  Add 80 ml of water and cover with the lid and let it cook for 2 minutes.  The vegetables should be softened by then.  Take off the lid and lower the heat to medium-low.

IMG_5440

Once the water for your noodles has come to a boil, cook the noodles until they’re just done or al dente.  How long will depend on the noodles you have – slightly under the package’s cooking time instructions.  Drain the noodles and if you want, cut through the noodles with a pair of kitchen scissors to shorten them a bit.

Add the chicken and the noodles back into the wok and add the salt, sugar, soy sauce, and if you find it a bit dry, can add in another tbsp of oil.  Toss everything together until everything is evenly coated with the sauce.

IMG_5442

And there you have it – delicious chicken chow mein!  If you want you can serve with some spicy chili sauce but I like it just how it is.

IMG_5447


sticky chicken burger
cooking, Food, recipe, recipes, Uncategorized

sticky chicken burger

I haven’t posted in a long, long time. Was busy… getting ready to move here to Saudi Arabia! So we went from Eating in Moose Jaw, to Comox, and now to Riyadh.  Today I tried making our favourite burger in the Comox Valley – the sticky chicken burger from Cornerstone Taphouse. It’s chicken breast with a balsamic reduction, roasted garlic and fried feta.  This turned out SO good.  I still have some roasted garlic and balsamic reduction leftover so am thinking of making this again tomorrow!

(This will make more roasted garlic than you need for this recipe but since you’re putting in the effort anyway, might as well have leftovers you can keep in the fridge. Roasted garlic is the best!)

To make 4 burgers: 4 chicken breasts / 4 burger buns / garlic cloves from 5 heads / 1/2 cup olive oil (plus extra for frying) / 1/2 cup vegetable oil (plus extra for frying) / 1 cup balsamic vinegar / ~250 grams feta cheese / a heaped tbsp of flour / ~4 tbsp mayonnaise / romaine lettuce for topping / salt and pepper

IMG_6757

First make the roasted garlic. I used to do this all the time in the oven but now I tend to confit it (so not really roasted, but basically same result) as it’s much quicker.  Put all the cloves, the olive oil and the vegetable oil into a small saucepan over medium heat. (Depending on the size of the pan, you need just enough oil to cover the garlic.) Once the oil has heated up and the garlic is sizzling a bit, lower the heat to medium-low.  Let the garlic cook for about 40 min or until they’re soft (I like to check by piercing with a fork) and golden brown.

IMG_6762

In the meantime, heat up the balsamic vinegar in a small saucepan over medium-high heat until it comes to a boil. Lower the heat until it’s just a simmer and let it cook down for about 10 minutes. It will have taken on more of a syrupy consistency and will thicken up more as it cools down.  Set aside.

IMG_6761

Using a sharp knife, butterfly the chicken breasts and season with salt and pepper. Heat up a large frying pan with a little bit of oil over medium to medium-high heat. Cook the breasts on both sides until completely cooked through.  Once cooked, transfer the chicken to a plate and spoon over the balsamic reduction.

IMG_6773

Cut the feta into slices a few centimetres thick.  Lightly coat both sides of the slices of feta with flour.  Heat up a thin layer of olive oil in a frying pan over medium heat and then fry the feta on both sides until golden brown. (The feta I got from the shop was a much softer texture than any other feta I’ve had before so I didn’t get the neat slices I was expecting.  Definitely not photo-worthy but oh well. Will go searching for more feta options!)

While the feta is frying, mix some of your roasted garlic with the mayo and give your burger buns a light toasting under your broiler.

IMG_6772

Now finally, put everything together! One chicken breast per burger, some feta, lettuce, the roasted garlic mayo plus a few extra garlic cloves for good measure. Enjoy!

IMG_6774

cooking, Food, recipe, Uncategorized

paprika chicken and rice bake

The local organic foods market here posted an interesting looking recipe from Buzzfeed on Facebook today and I figured I’d try it out!  I love absentmindedly browsing Buzzfeed but have never tried one of their recipes before.  Wasn’t particularly feeling confident it would work… but it turned out great!  I used mostly the same ingredients but changed all of their measurements.

The original recipe said 5 thighs feeds 5 people but pretty sure I would still be hungry after that!  I’ll say this would feed 2-4.

6-8 skin on, bone in chicken thighs  /  2 tbsp paprika (preferably a good Hungarian paprika!)  /  1 tbsp dried parsley /  1 and 1/2 tsp salt  /  1 and 1/2 tsp cracked black pepper  /  ~ 1 tbsp olive oil  /  1/2 yellow onion  /  4 cloves garlic  /  1 cup rice (right now we really like this sprouted rice & quinoa blend that you can pick up from Costco)  /  1 and 3/4 cup low-sodium / no salt added chicken broth (you’ll need to adjust the amount of broth depending on what kind of rice you are using! just use however much liquid the package says to for 1 cup)  /  optional extra pinch or two of salt for the rice

img_0950

Preheat the oven to 400 and in a large mixing bowl, toss the chicken together with the paprika, parsley, salt and pepper.

img_0952

Set a dutch oven or other oven-proof pot on the stove at medium to medium-high heat.  Add the olive oil and when that’s heated up, place the chicken thighs in skin side down and let them brown up for about 5 minutes.  In the meantime, dice up your onion and mince the garlic.  Flip the thighs over and let the other sides cook for another 5 minutes and then remove from the dutch oven.  Add the onion and garlic to the dutch oven and cook until the onions have softened up a bit.

img_0954

Stir in the rice, chicken broth and if you want, extra salt, to the onions and garlic and let it come to a boil. Then place the chicken thighs back in on top of the rice, pop the lid on and slide the whole thing into the oven.

img_0955

Now you just have to be patient and let it bake away for about 35 minutes.  Then dig in!

img_0958

Pesto chicken bagel melt
breakfast, brunch, cooking, Uncategorized

pesto chicken bagel melt

I know i’ve been terrible at blogging but Rocks’s been away for work so I’m not that motivated to cook for just me and my increasingly picky toddler. This recipe is barely a recipe really but it’s what I’ve been craving to eat lately. I had something similar to this at a local cafe months ago but it’s off the menu now so I can’t look up what’s exactly in it. Which is ok though cus this bagel is just as good. I’ve tried using cream cheese instead of mayonnaise but I prefer it with mayo. You can use whichever you like though; it’ll still turn out!

for 1:

1 everything bagel  /  ~ 1/3 cup shredded cooked chicken  /  ~1 tbsp fresh pesto  /  ~1 tbsp mayonnaise  /  2 slices of whatever cheese you’ve got on hand which for me right now is havarti

img_0896

Slice and toast your bagel.  In a small bowl, mix together the chicken, mayo and pesto. Turn your broiler on high and when your bagel is done toasting, place the halves on a baking sheet. Spread the pesto chicken mixture evenly on the bagel halves and then slap a slice of cheese over each. Broil until the cheese is all melted and voila!  I dunno if it’s my pregnancy hormones but I am obsessed.

Pesto chicken bagel melt


chicken paprikash
cooking, Food, recipe, Uncategorized

chicken paprikash

Although I’ve been to Hungary twice, for some inexplicable reason I never had chicken paprikash (paprikás csirke) until I made it myself.  I really don’t know why since I love paprika, chicken and sour cream so it’s kind of an obvious sell for me.  Anyway, I was inspired to try make it for the first time this past winter after seeing Lynn Crawford make it on her Food Network show.  I’ve made this a number of times now and we love it though, since I’ve only had my own chicken paprikash, I cannot say how authentic it is or how it tastes compared to chicken paprikash you’d get in Hungary.  Guess we need to go back to Hungary for a visit in the future to find out!

Anyway, I’ve scoured the internet for recipes (for more hours than I’d like to admit) and it seems like there’s a hundred variations on how to make this.  I guess it’s like spaghetti sauce; everyone thinks theirs is the best.  I adapted this recipe from Lynn Crawford’s and while I’m pretty sure wine and red peppers are traditional ingredients, I like how this turns out so I’m sticking with it.

Just a couple of things.  You must use Hungarian paprika, not the generic shit you can get at the regular supermarket.  I’ve tried it before with regular paprika, which in comparison is pretty flavourless, and it’s just not even worth your time.  We had really great hot paprika and sweet paprika that we brought back from Budapest but I used it all up so I had to hunt some down.  There’s none in Moose Jaw but I did find some at the Italian Star Deli in Regina and it shouldn’t be difficult to find in any specialty grocery shops that sell imported items.  I also like to add some tasty Hungarian paprika paste called Piros Arany (translates to Red Gold) that I picked up in Vancouver.  I’ve been told by some Hungarians here that it’s a super popular condiment back home.  If you can’t get a hold of any though, that’s totally fine.

This makes enough to serve 5 to 6 people so feel free to halve the recipe.  But this is actually great as a leftover meal and we think the paprikash sauce is possibly even better the next day.

~ 4 lbs chicken thighs and drumsticks with the skin on and bone in (this was 6 thighs and 8 drumsticks which is what happened to be available at the supermarket)  /  1 tbsp olive oil  /  1 tbsp butter  /  2 red peppers /  2 small onions  /  4 cloves garlic  /  4 tbsp Hungarian sweet paprika  /  3-4 tbsp Hungarian hot paprika  (use more or less depending on how much heat you want and can substitute with more sweet paprika if you’d like)  /  2 tbsp Piros Arany paste (optional)  /  4 heaped tbsp all-purpose flour  /   3 – 4 cups low-sodium chicken stock  /  1/2 cup white wine  /  2 cups full-fat sour cream  /  salt and pepper to taste

image

First for your prep; dice up the red peppers and the onions and mince the garlic.  Now in a large dutch oven or pot (minimum size 5 quarts), heat up the butter and oil over medium-high heat.  In 2 separate batches, sear the chicken on both sides until the skin is starting to turn golden brown.

image

After searing the chicken, take out the chicken and set aside on a plate.  You’ll be left with a sizzling hot combo of butter, olive oil and chicken fat in the dutch oven which is obviously awesome.  Throw in the red peppers, onions, garlic and sauté until the onions are turning translucent.  Next, mix in the hot and sweet paprika and the flour and let that cook for another couple minutes.

image

Splash in the white wine and let it simmer off a bit and then stir in your chicken stock.  You only need as much stock as to mostly submerge the chicken pieces so you can add maybe 3 cups or so first and then see how that works out before adding more.  Season with some salt and pepper to your taste.  Then add the chicken back in and reduce the heat to a simmer.  Pop the lid on and let it simmer away for about 35 to 40 minutes.  The chicken should be cooked through by then but of course you should check.

image

Take the chicken pieces out of the sauce and then for the final step, you add the sour cream.  Apparently, according to my obsessive chicken paprikash research, sour cream can curdle if you just add it straight to your hot sauce so you have to temper it first.  You can do this by gradually stirring in some of the sauce into the sour cream to bring its temperature up and then adding it to the rest of the sauce.  Stir in the sour cream and just let it cook for a couple minutes.  Add the chicken back to the sauce and you’re all done.

image

You can eat this with egg noodles, spaetzle, potatoes, rice… We had it this time with a nice sliced up baguette to sop up all the yummy paprikash sauce.

image

best butter chicken ever
cooking, Food, Indian food, recipe, Uncategorized

best butter chicken ever

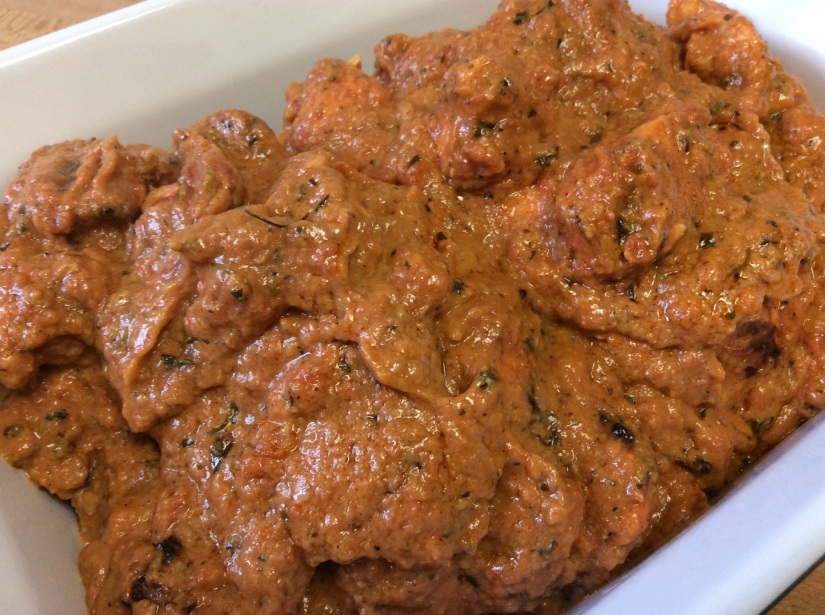
I know when butter chicken is good for the sole reason that I’ve had some pretty atrocious butter chicken over the years.  (It was really good in India and a handful of times not in India.)  Sometimes it’s bright red and tastes just like tomato sauce, sometimes it’s sickly sweet. Gross.  But a few weeks back, our friends made a really, really, really yummy butter chicken and perhaps best of all, it didn’t have any cream in it which kept my now increasingly lactose-intolerant belly nice and happy.  Instead of cream, this butter chicken is cooked with cashew butter and coconut cream. The serving dish it was in didn’t have a single drop of sauce left on it by the time we were done; that’s how good it was.  We got a copy of the recipe from them but it is honestly confusing. as. fuck.  I can’t even explain how confusing it is.  Apparently our friends make it differently practically every time anyway so I figured we could riff (quite a bit) on it.

Just a few notes, the recipe calls for Kashmiri red chilli powder which gives the dish its bright red hue.  But it’s still pretty spicy (taste it first!  I learned the hard way) so adjust the amount according to how much heat you want.  If you don’t have any on hand or can’t find any, the internet says the standard substitution would be a combination of 3 parts paprika and 1 part cayenne pepper.  If you want your butter chicken super mild though, I’d opt for substituting completely with paprika.

For garlic-ginger paste, I’ve seen both garlic paste and ginger paste in the ‘international’ aisle of the supermarket so you can buy them and mix them.  But I just got Rock to whip some up by pureeing equal amounts of fresh garlic and ginger with a splash of avocado oil.  Homemade garlic-ginger paste should keep in the fridge for a few weeks. And if you want this butter chicken to be lactose-free, use ghee instead of butter.

The recipe has 2 parts, the chicken and the sauce.  I started making the sauce just before Rock cooked the chicken so it could all come together at the same time but it’s up to you if you want to cook the chicken first.  And one last thing, the sauce I made is quite thick, though not in a bad way.  However if you prefer a thinner sauce I’d just reduce the amount of cashew butter and coconut cream.  You could also substitute coconut cream with coconut milk which would reduce the fat and make the sauce thinner.

This makes enough for 4 to 6 people.

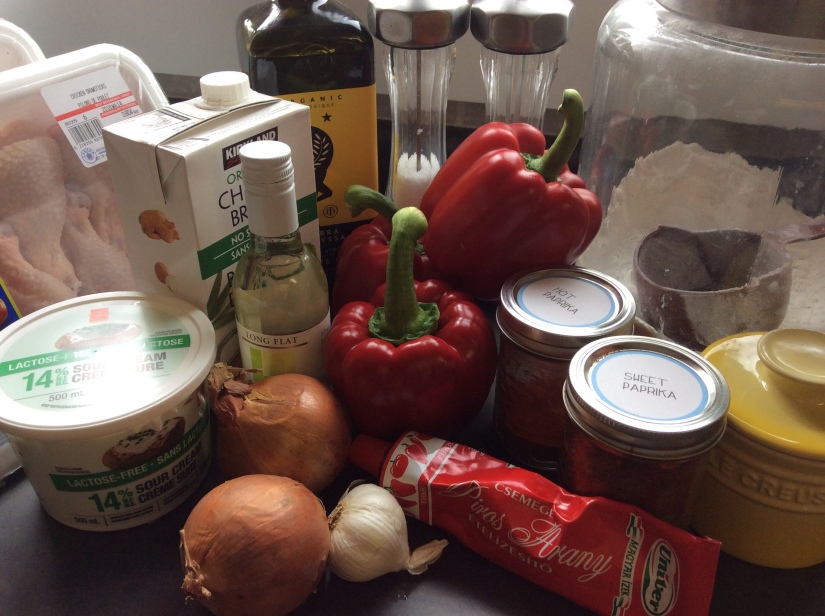
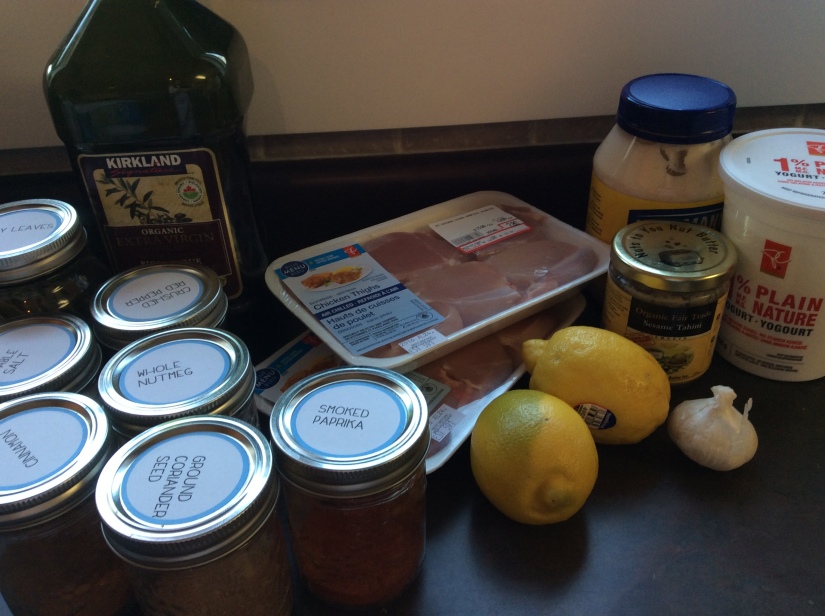
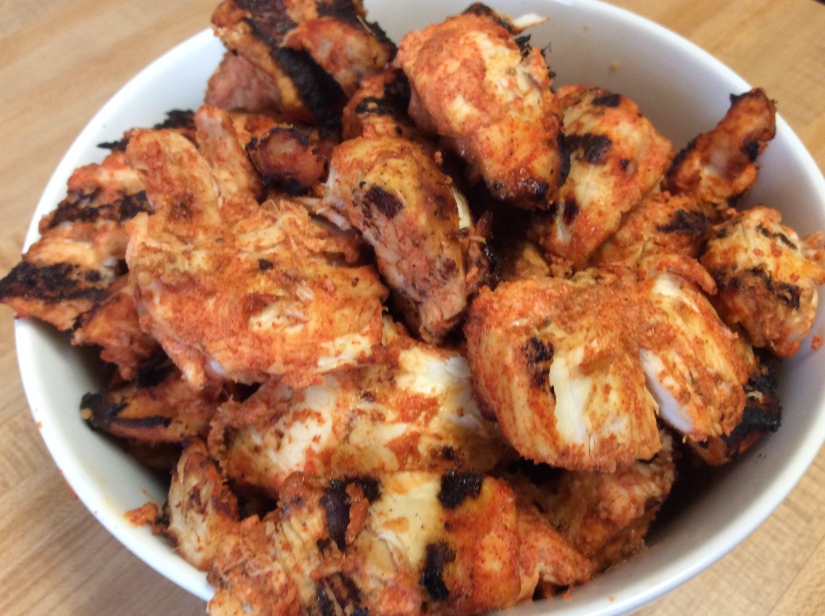
Tandoori chicken: 4 chicken breasts  /  ~1 tsp Kashmiri red chilli powder (adjust according to your taste buds)  /  2 tbsp garlic-ginger paste  /  3/4 cup plain yogurt  /  juice of 1 lemon  /  salt to taste  /  (If you’re going to barbecue the chicken, you’ll also need skewers.)

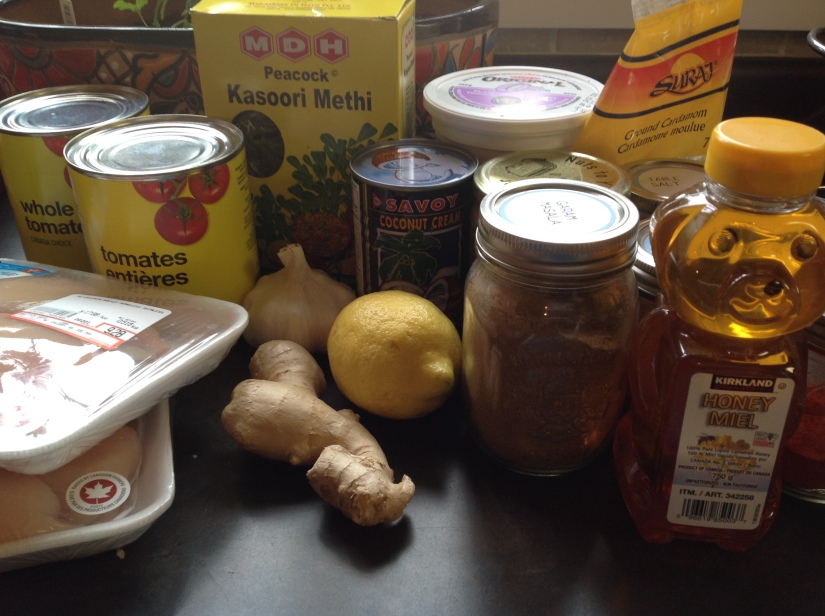
Butter chicken sauce:  2 x 796 ml tins of whole tomatoes, drained  /  4 rounded tbsp butter or ghee  /  ~ 1/2 tsp Kashmiri red chilli powder  /  1 tbsp garlic-ginger paste  /  1 tbsp garam masala  / 3 tbsp cashew butter  / 3 – 5 tbsp coconut cream  /  1 tsp ground cardamom  /  2 tbsp dried fenugreek leaves, crushed  /  1 tbsp honey  /  salt to taste

image.jpeg

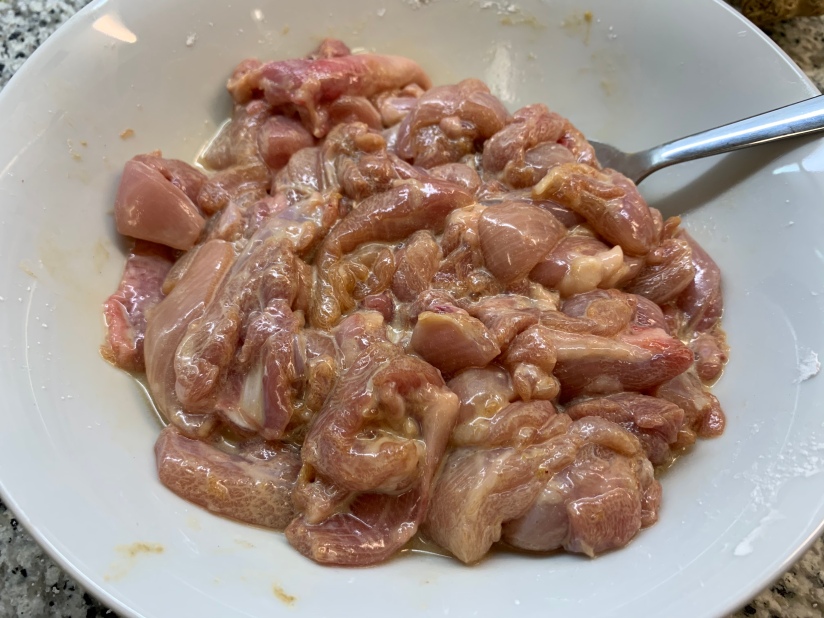
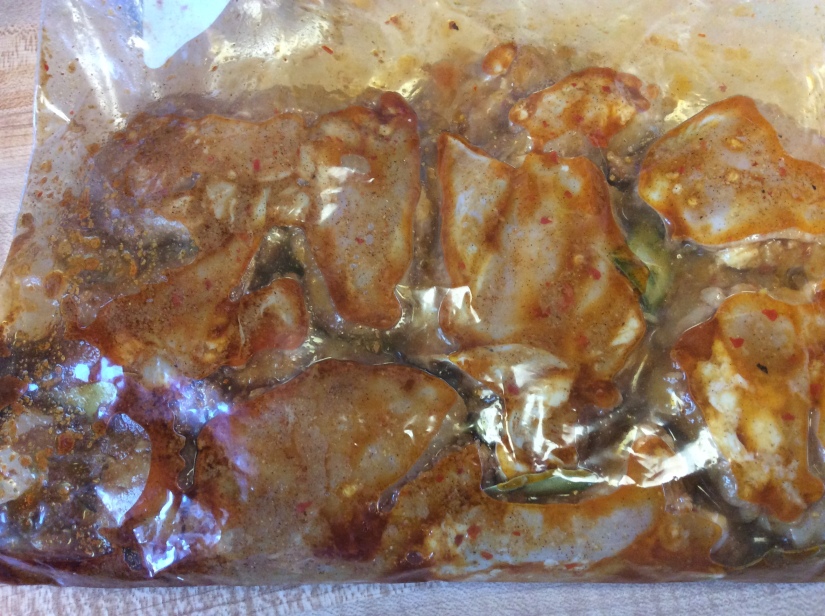
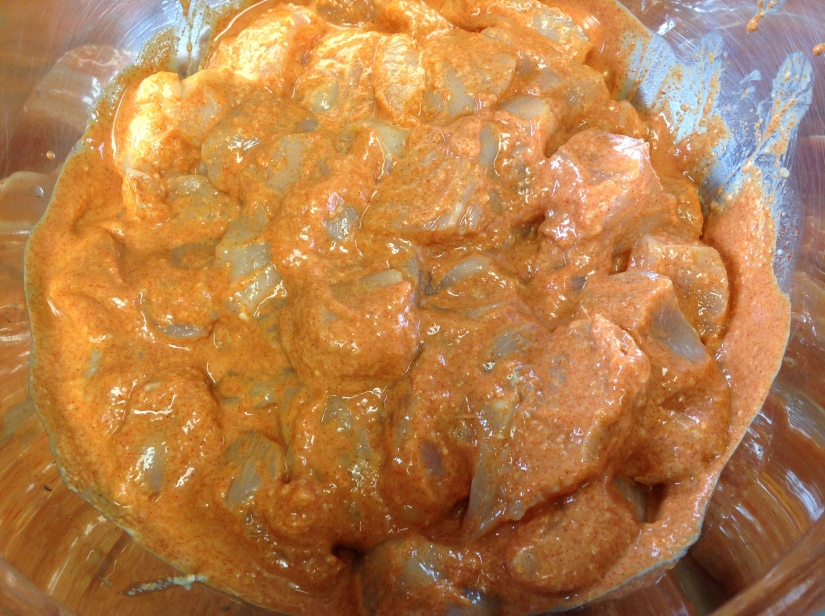
For the chicken: In a large bowl, combine the Kashmiri chilli powder, garlic ginger paste, yogurt, lemon juice and salt.  Cube your chicken into bite-size pieces and toss into the marinade, making sure the chicken is all well-coated.  Slap a piece of plastic wrap over the bowl and stick it in the fridge for at least 2 hours.

image.jpeg

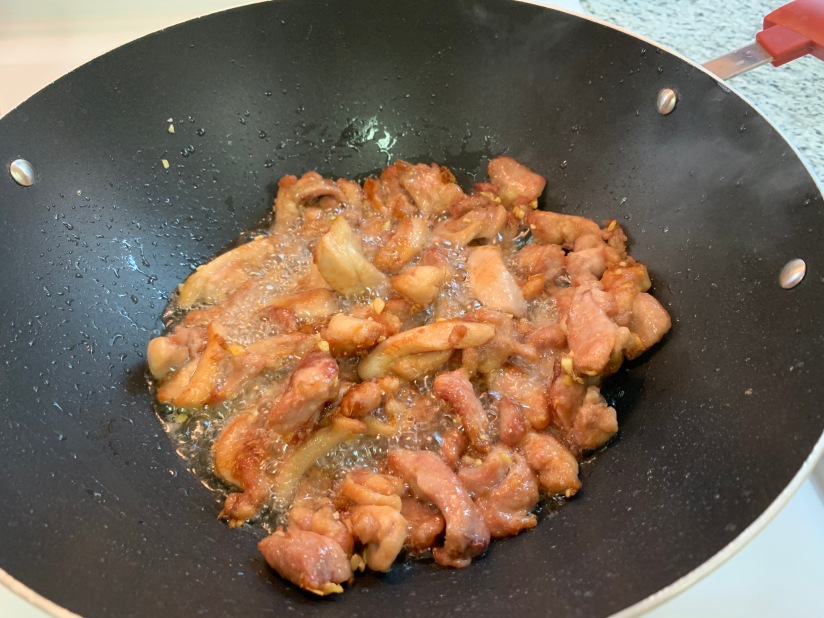
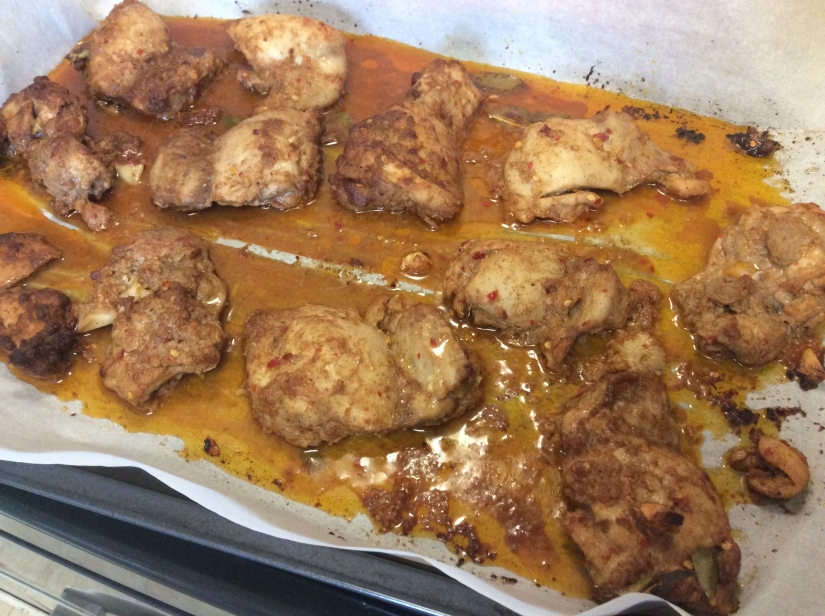
To cook the chicken, you can skewer the chicken and grill it on the barbecue (which is what we did) or simply grill or fry it on the stove. Just cook ’til the chicken is cooked through.

image

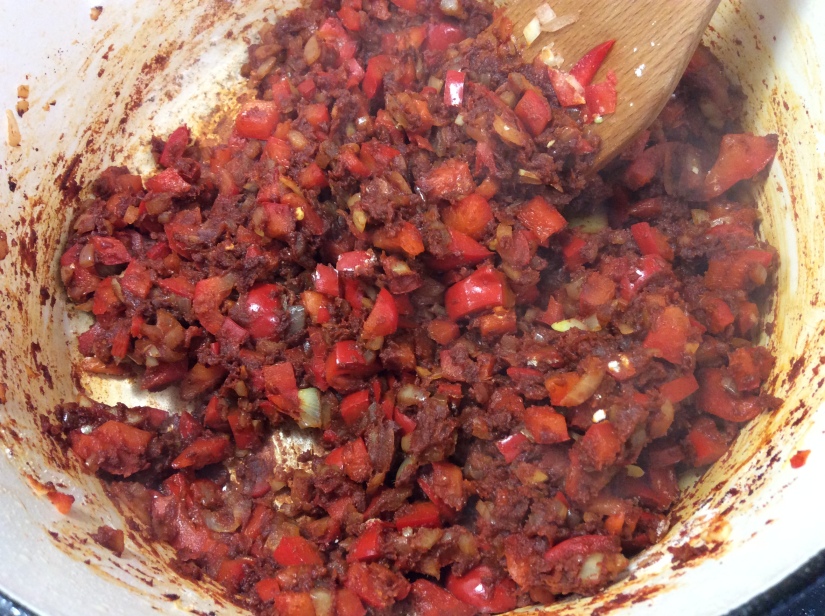
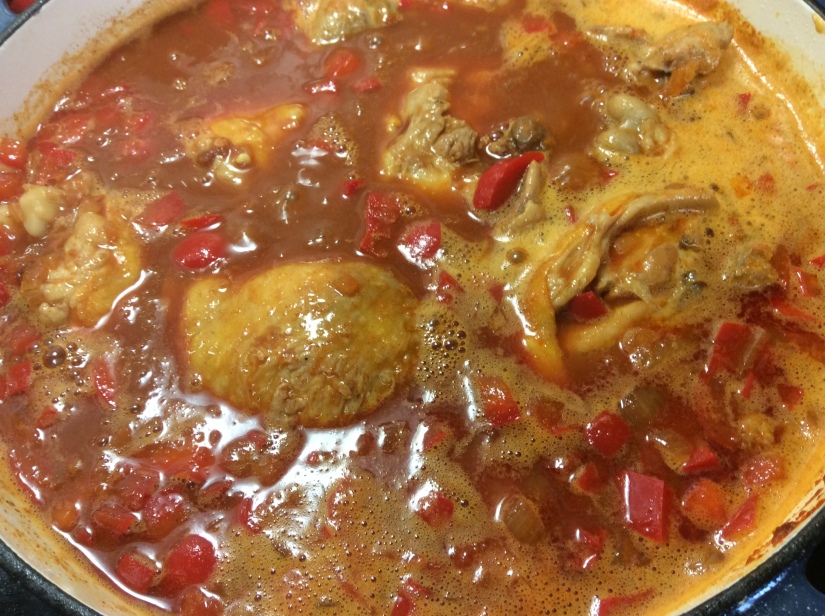
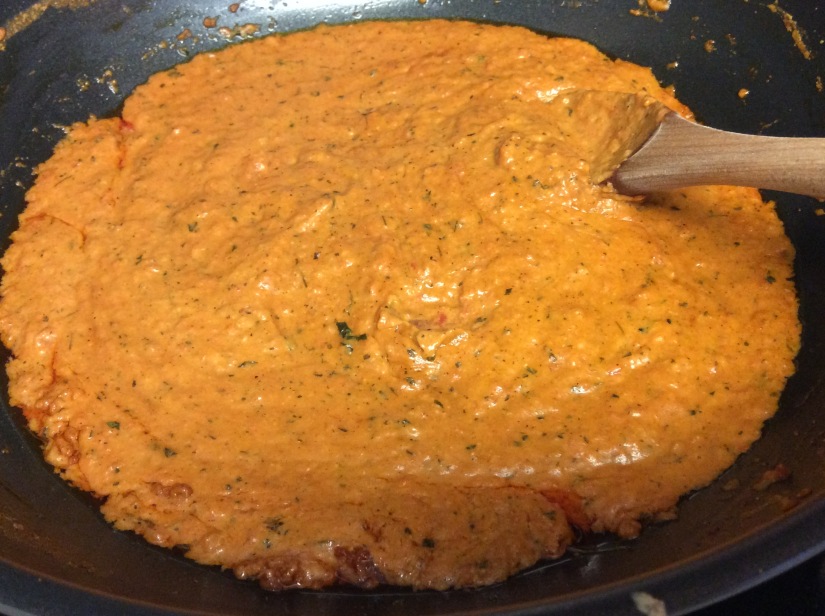
For the sauce: In a large pan or wok, cook tomatoes with 1 tbsp of butter over medium to medium-high heat until they are turning into, for lack of a better word, mush.  In a small saucepan over low heat, melt the remaining 3 tbsp of butter and stir in the chilli powder, garlic-ginger paste and garam masala.  Let this cook for about a minute; it will smell awesome.  Add this spice-butter mixture to the tomatoes, turn the heat down to medium, and toss a lid on for about 7 minutes or so. Next, add the cashew butter, coconut milk, cardamom powder and fenugreek leaves.  Put the lid back on, and let it all simmer together for about 5 to 7 minutes and then add the honey.  You don’t really have to do this but I dragged a hand blender through the sauce just ‘cus I wanted to get it super smooth. You could of course also pour it into a regular blender and puree it that way.

image

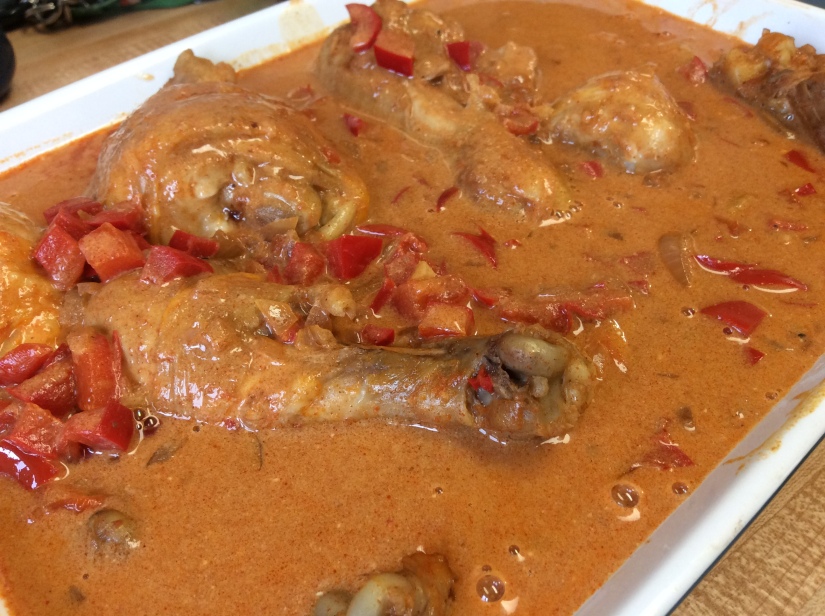
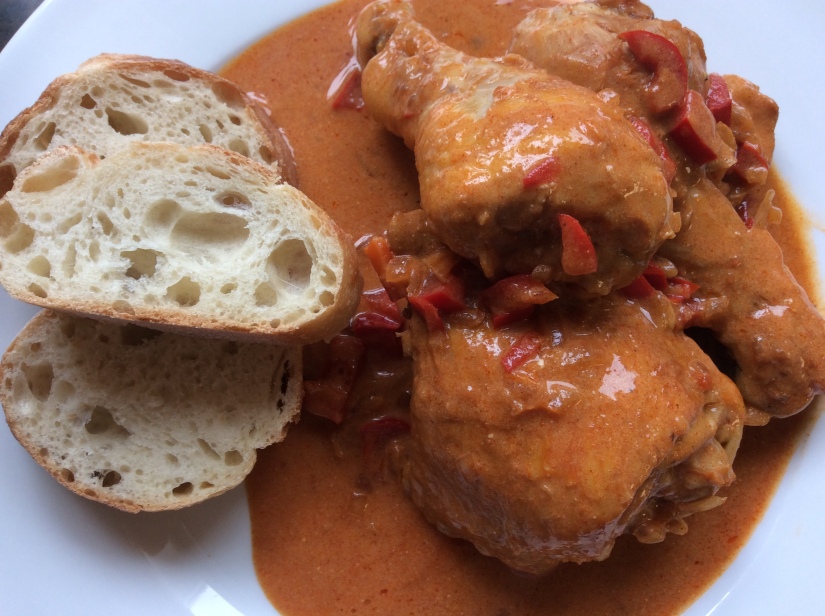
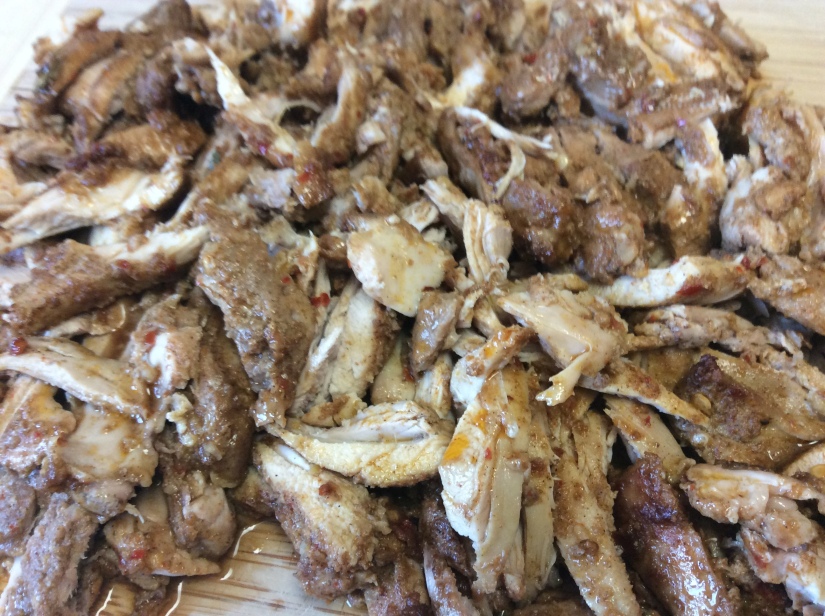
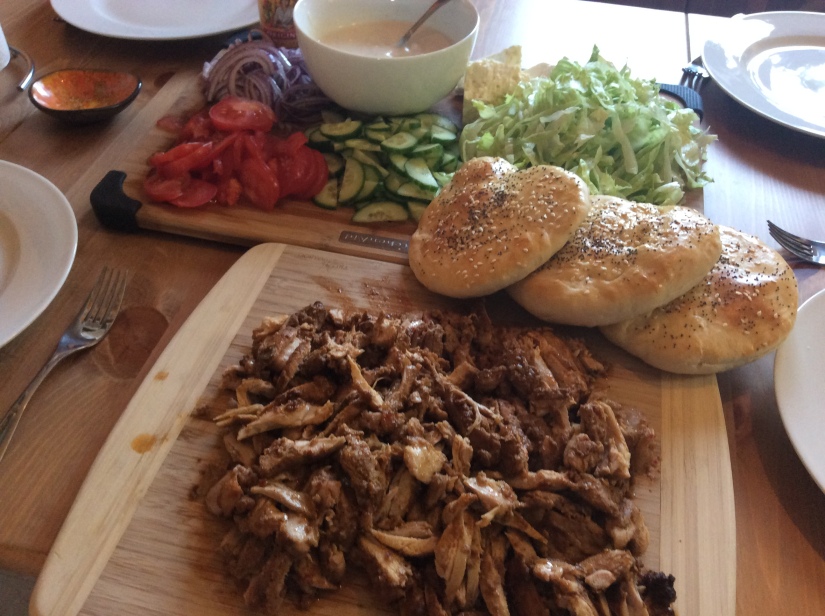
With the heat turned down to medium- low, add the chicken to the sauce and let that simmer for yet another 5 minutes or so.  Finally, serve with warm naan or some basmati rice.  SO good.  I’m telling you, the photo does not do this butter chicken justice.

best butter chicken ever


oven-roasted döner kebab
cooking, German food, recipe, recipes, Uncategorized

oven-roasted döner kebab

Rock and I are obsessed with the döner kebabs we had from this little kebab place that we had stumbled upon near our airbnb flat in the Friedrichschain district when we were in Berlin last year.  Thinly shaved chicken döner, veggies, feta (I think?) cheese, and delicious mystery sauces all sandwiched in toasted Turkish pide bread. Best. Thing. Ever.  We didn’t even know the name of the place we had those kebabs at but a google search shows it up as Döner Dach on yelp and seeing photos of those kebabs, oh man.

For literally months now, I’d google döner kebabs every so often (is that weird?), trying to find a good recipe for Berlin-style kebabs but I could never find anything that seemed like it’d live up to the ones we had.  And of course, we don’t have a giant rotating spit so it had to be a recipe that we could actually make.  Anyway, we recently discovered Nigella Lawson’s recipe for oven-roasted chicken shawarma and it is first of all delicious, but more importantly, it tastes very close to the chicken döner we had in Berlin.  It is also terribly easy!  (According to my not-so-vigorous research, döner is Turkish and shawarma is Arabic but they are very similar if not the same.  Don’t quote me on that though.)  I made this chicken for the second time last night and our friends who are from Germany gave it their ‘tastes like a German döner’ seal of approval, so yay!

For the chicken: 12 boneless and skinless chicken thighs  /  2 lemons  /  7 tbsp olive oil  /  6 cloves of garlic, peeled and minced  /  2 dried bay leaves  /  2 tsp paprika  /  2 tsp ground cumin  /  1 tsp ground coriander  /  1 tsp crushed red pepper flakes  /  1/4 tsp ground cinnamon  /  1/4 tsp freshly grated nutmeg  /  2 tsp sea salt

For an accompanying sauce (adapted from Nigella’s recipe):  2/3 cup plain yogurt  /  1/3 cup mayonnaise  /  1/4 cup tahini  /  2 cloves garlic, peeled and minced  /  sea salt to taste

image

Put the chicken thighs in a large freezer ziplock bag (or any large resealable bag).  Grate in the lemon zest and then squeeze in the lemon juice.  Add the olive oil, garlic and all of the spices for the chicken.  Zip closed the bag and mush everything together so that the chicken is all well-coated with the marinade.  Plop the bag into a large bowl or onto a plate and then stick it in the fridge for at least 6 hours or up to 1 day.

image

About at hour or so before you intend to start cooking, take the chicken out from the fridge to let it come to room temperature.  Preheat the oven to 425F.  Line a large baking sheet with parchment paper and pour out the chicken and marinade onto the sheet.  Spread out the chicken thighs so that they are all lying flat and not on top of each other.  Roast for 30 minutes (or until it’s cooked through).

image

I like to thinly slice the chicken for the sole reason that it reminds me of the thinly shaved chicken you’d find in a proper kebab.

image

To make the sauce, simply mix all the ingredients together and that’s that.  I served the chicken with the sauce, some shredded lettuce, sliced tomatoes, sliced cucumber, thinly sliced red onion, some hunks of feta cheese, some hot sauce, and Rock baked some fresh Turkish pide bread.  The first time we made this, we had it with pitas which was also really good.

image

image

You can eat the chicken with just the veggies and sauce but to make a kebab, simply slice open your bread and stuff everything into it!

image

Though this sauce is delicious, it’s not exactly the same as the mystery sauces that Berlin kebab places serve.  If anyone has recipes for those amazing white and red sauces, please share!